Introduction
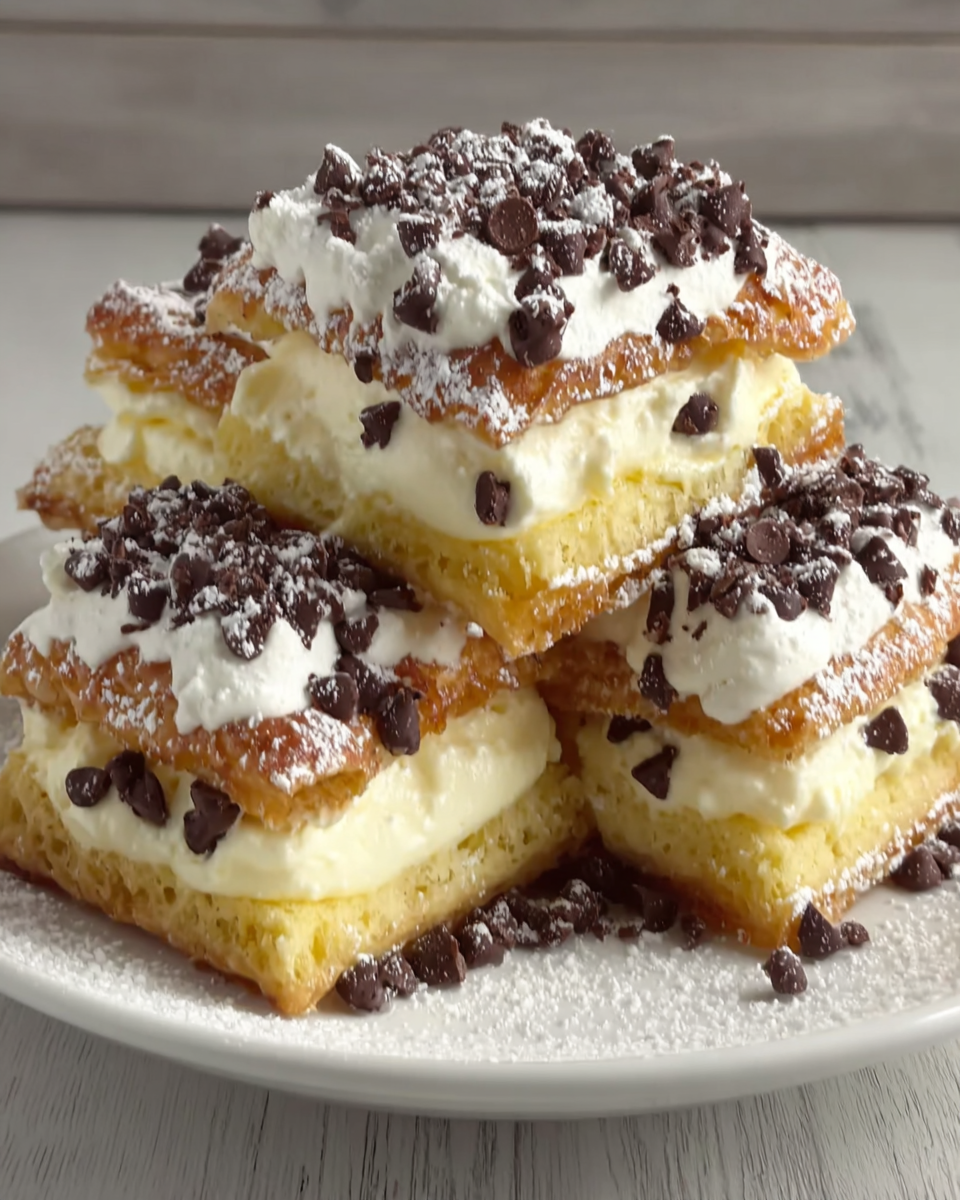
Classic Cannoli Squares are a delightful twist on the beloved Italian dessert. These squares capture the essence of traditional cannoli, featuring a creamy, sweet filling nestled between layers of tender pastry. Perfect for gatherings or as an indulgent treat, they bring the rich flavors of Italy right to your kitchen.
The balance of flavors in these squares is key, offering a combination of ricotta cheese, vanilla, and a hint of citrus zest. The texture is equally important; a flaky crust complements the luscious filling, creating a heavenly bite that will leave everyone wanting more. They’re not just for special occasions; these squares are simple enough to whip up any day of the week.
Ingredients
- 1 ½ cups all-purpose flour
The backbone of the crust, all-purpose flour provides structure and stability. Its protein content ensures the pastry gets the right flakiness when baked, creating the perfect base for your cannoli filling. - ½ cup unsalted butter, softened
Butter not only adds rich flavor to the dough but also helps in achieving a tender, flaky crust. When combined with flour, it coats the flour particles, preventing gluten formation and creating a more delicate texture. - ¼ cup granulated sugar
Sugar sweetens the pastry and helps it to brown nicely. It also contributes to the overall flavor profile, enhancing the richness of the buttery crust. - 1 large egg yolk
The egg yolk adds moisture and richness to the dough. It also acts as a binding agent, helping to hold the crust together while contributing to its color when baked. - 1 tsp vanilla extract
Vanilla extract infuses the dough with a warm, aromatic flavor that complements the sweet filling. Its subtlety allows the vanilla notes in the cannoli filling to shine through as well. - 1 cup whole milk ricotta cheese
Ricotta cheese is essential for the filling, providing a creamy and slightly grainy texture. Its mild flavor balances the other sweet ingredients, ensuring the filling is rich but not overwhelming. - ½ cup powdered sugar
Powdered sugar sweetens the filling while allowing for a smooth texture. It dissolves easily, ensuring the filling is creamy and free of graininess that granulated sugar might cause. - 1 tsp orange zest
The zest adds a bright and refreshing citrus note that enhances the overall flavor profile of the filling. It elevates the dessert, making it more reminiscent of traditional cannoli. - ¼ cup mini chocolate chips
Chocolate chips provide little bursts of flavor and texture throughout the filling. They bring a classic cannoli twist that many dessert lovers expect, adding richness without overpowering the other ingredients. - Powdered sugar for dusting
Dusting the finished squares with powdered sugar not only enhances the visual appeal but also adds a hint of sweetness without being overwhelming. It's the final touch that makes your dessert look beautifully inviting.
Directions & Preparation
Step 1: Prepare the crust
Begin by preheating the oven to 350°F (175°C). In a mixing bowl, combine the flour, sugar, and softened butter. Blend until the mixture resembles coarse crumbs. Adding the egg yolk and vanilla, mix until a dough forms. This step is crucial as it sets the foundation for the texture of the cannoli squares. The dough should be soft yet manageable; avoid overmixing to maintain tenderness.
Step 2: Chill the dough
Wrap the dough in plastic wrap and refrigerate for about 30 minutes. Chilling the dough helps relax the gluten, which prevents the crust from becoming tough during baking. It also makes it easier to roll out, giving you smoother edges for your squares. This waiting period is essential for achieving a perfect flaky crust.
Step 3: Roll out and bake the crust
Once chilled, roll out the dough on a lightly floured surface to about ¼ inch thick. Transfer it to a greased 9×9-inch baking dish, pressing it evenly across the bottom. Bake for 15-18 minutes until golden brown. This process allows the crust to develop a crispy exterior, contrasting beautifully with the creamy filling. Keep an eye on the color to avoid overbaking.
Step 4: Make the filling
In a large bowl, combine ricotta cheese, powdered sugar, orange zest, and mini chocolate chips. Mix until smooth and well-combined. This step is vital for developing the flavors that define the cannoli squares. Make sure the ricotta is well-blended for a creamy texture — lumpy filling can lead to an uneven taste and unpleasant texture.
Step 5: Fill the crust
Once the crust has cooled completely, spread the ricotta filling evenly over the top using a spatula. This allows for uniform distribution, ensuring that every bite is as delicious as the last. Smoothing the top also creates a visually appealing finish, which is important when serving these enticing squares.
Step 6: Chill and serve
Refrigerate the filled squares for at least 2 hours to allow the flavors to meld and the filling to firm up. This chilling period not only enhances the flavor but also helps the filling hold its shape when sliced. Dust with powdered sugar before serving for that classic cannoli look, providing a delightful sweetness and an elegant touch.

The Art of Flavor Balance in Cannoli Squares
Achieving the perfect balance of flavors is essential when making Classic Cannoli Squares. The contrast between the creamy ricotta filling and the buttery crust creates a harmonious taste experience. Moreover, the addition of orange zest and chocolate chips enhances the flavor profile, as these ingredients complement each other beautifully. Pay attention to the sweetness level, as it needs to be just right to avoid overpowering the delicate notes of the ricotta.
Texture Matters: Achieving the Perfect Crust
The texture of the crust is critical for Classic Cannoli Squares. A well-made crust should be flaky, tender, and able to hold the creamy filling without becoming soggy. It is important to measure the ingredients accurately and follow the mixing process closely. Chilling the dough is integral, as it relaxes gluten and prevents toughness while creating that desired flakiness. Investing time in this step will significantly improve the final product.
Serving Suggestions and Presentation
Presentation can elevate the appeal of Classic Cannoli Squares in any setting. Consider slicing the squares into bite-sized pieces for easy serving at gatherings. A light dusting of powdered sugar before serving adds a touch of elegance, and consider pairing them with fresh berries for a color contrast. Additionally, a drizzle of chocolate or a sprinkle of pistachios can enhance both the flavor and the visual presentation, making these squares irresistible.
FAQs
What can I do if my filling is too thick?
If your filling is too thick, you can gently fold in a little cream or milk to reach your desired consistency. Be careful not to overmix, as this can make the filling grainy.
Why did my crust turn out too hard?
A hard crust usually results from overmixing the dough or not using enough fat. Ensure you mix just until combined and measure butter accurately for a tender result.
Can I use whole wheat flour instead of all-purpose flour?
Yes, you can substitute whole wheat flour for all-purpose flour, but it might result in a denser crust. You may want to mix half whole wheat and half all-purpose for a lighter texture.
What if my ricotta filling tastes bland?
If your ricotta filling is bland, consider adding a touch more powdered sugar or a splash of vanilla extract. You can also enhance it with a pinch of salt to bring out the flavors.
How can I ensure my filling is smooth?
For a smooth filling, make sure to thoroughly drain the ricotta before using it. Blending the mixture until completely smooth will also help achieve the desired consistency without lumps.
What can I do if my crust is too crumbly?
If the crust is too crumbly, it might be due to insufficient moisture in the dough. You can add a small amount of cold water, one teaspoon at a time, while mixing until it binds properly.
Conclusion
Classic Cannoli Squares are a delightful way to bring a taste of Italy into your home. With their creamy filling and flaky crust, they are sure to impress family and friends alike. Whether for a special occasion or an everyday dessert, these squares offer an irresistible combination of flavors and textures.
Experimenting with the recipe can lead to discovering your unique touch, whether through different fillings or creative presentations. Enjoy making these delectable squares, and watch how they become a beloved treat in your dessert repertoire.
Recipe Card

Delicious Cheesy Spinach & Artichoke Stuffed Mushrooms
Ingredients
Method
- Preheat your oven to 375°F (190°C).
- Clean the mushrooms and remove stems. Set aside caps, and finely chop stems.
- In a skillet, heat some olive oil over medium heat and sauté the minced garlic until fragrant.
- Add chopped spinach, artichokes, and chopped mushroom stems to the skillet. Cook until spinach wilts.
- In a bowl, combine the sautéed mixture with cream cheese, Parmesan, mozzarella, red pepper flakes, salt, and pepper.
- Fill each mushroom cap generously with the cheese and spinach mixture.
- Place the stuffed mushrooms on a baking sheet and drizzle with olive oil.
- Bake in the preheated oven for 20-25 minutes until the mushrooms are tender and tops are golden.
- Remove from oven and let cool for a few minutes before serving.
Notes
Additional serving suggestions: pair with a crisp salad, garlic bread, or roasted seasonal vegetables for balance.
For make-ahead, prep components separately and assemble just before heating to preserve texture.
Taste and adjust with acid (lemon/vinegar) and salt right at the end to wake up flavors.


