Introduction
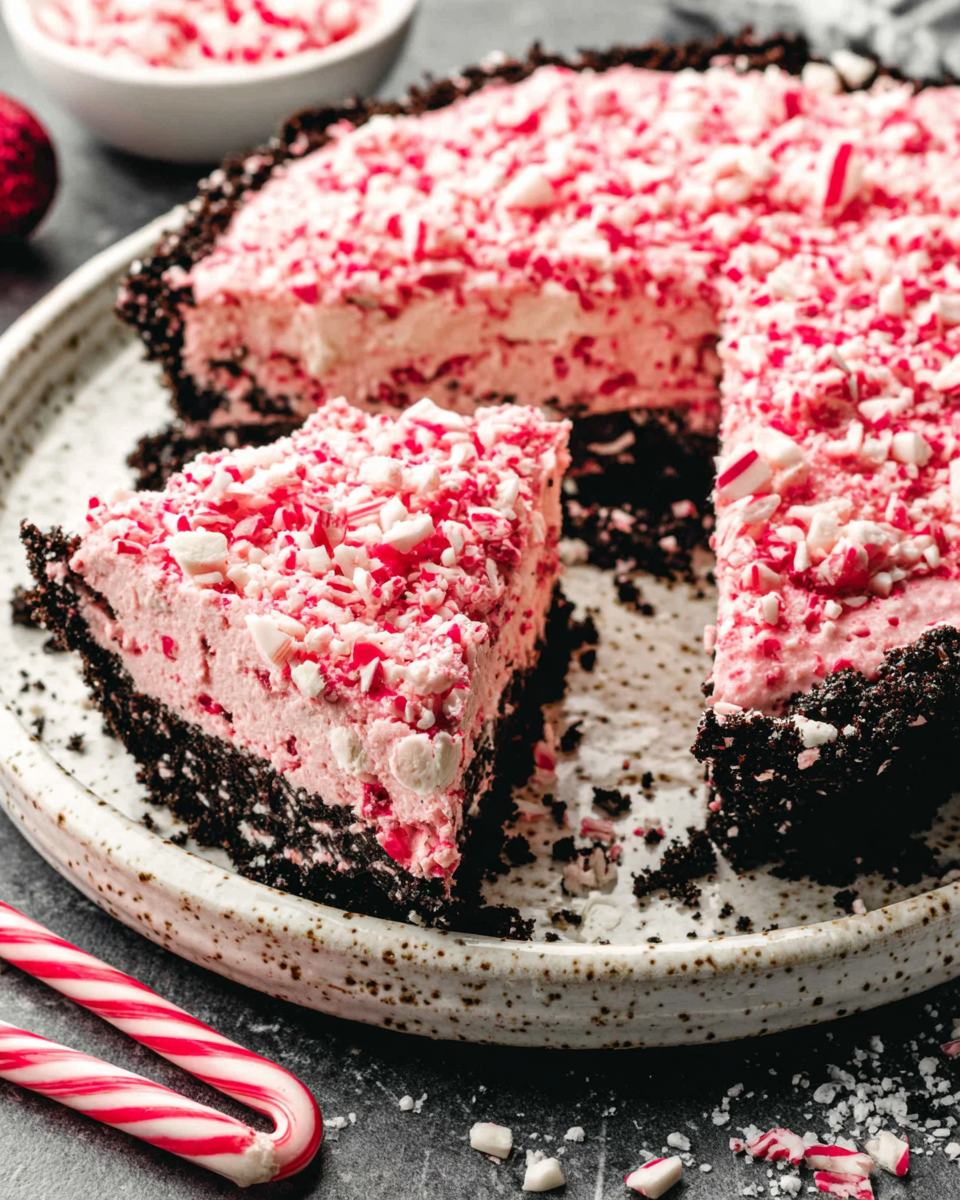
The holiday season beckons with its signature flavors, and nothing embodies this festive spirit quite like a peppermint pie. This dessert brings together a creamy, dreamy filling whipped to perfection, enveloped in a rich chocolate crust. With its vibrant minty essence, this pie is sure to become a beloved addition to your Christmas celebrations.
While Christmas gatherings are filled with joyous festivities, the kitchen often transforms into a whirlwind of culinary creativity. This straightforward recipe for Quick Christmas Peppermint Pie simplifies the holiday baking process without sacrificing flavor. Charm your guests and family by adding this delightful pie to your menu, and watch them indulge in its lusciousness!
Ingredients
- 1 ½ cups chocolate cookie crumbs
These crumbs are the foundation of the crust and infuse the pie with a rich chocolate flavor, perfectly complementing the peppermint filling. Using chocolate cookies like Oreos adds depth to the dessert while providing a delightful crunch. - 6 tablespoons unsalted butter, melted
Butter binds the chocolate cookie crumbs together, ensuring a cohesive crust that holds up well when sliced. The richness of the butter also contributes to the pie's overall flavor and enhances the mouthfeel. - 8 ounces cream cheese, softened
Cream cheese serves as the main ingredient in the filling, imparting a creamy texture and a subtle tanginess that balances the sweetness of the pie. Its high fat content creates a luscious consistency. - 1 cup powdered sugar
Powdered sugar sweetens the filling without making it grainy, allowing for a smooth and velvety texture. It dissolves easily, ensuring the pie maintains a pleasant mouthfeel. - 1 teaspoon peppermint extract
This extract provides the pie with its signature holiday flavor, creating a refreshing and festive taste. It's essential to strike a balance in the amount used, as peppermint can be quite strong. - 1 cup whipped topping
Whipped topping incorporates air into the filling, giving it a light and airy texture. It also adds a creamy element that enhances the overall richness of the pie. - Crushed peppermint candies for garnish
These candies are the finishing touch that adds both visual appeal and an extra burst of peppermint flavor. They provide a delightful crunch and enhance the holiday spirit of the pie.
Directions & Preparation
Step 1: Prepare the crust by mixing the chocolate cookie crumbs and melted butter.
In a medium bowl, combine the chocolate cookie crumbs with the melted butter. Stir until the mixture resembles wet sand, which will allow it to hold together when pressed into the pie dish. This step is crucial as it creates the base for your pie, providing structure and flavor that supports the rich filling.
Step 2: Press the mixture into the bottom and sides of a pie dish, then freeze.
Once the crust mixture is combined, transfer it to a 9-inch pie dish. Use your fingers or the bottom of a glass to tightly press the crumbs along the bottom and up the sides. Freezing the crust for about 15 minutes will help it firm up, ensuring that it maintains its shape while you add the filling.
Step 3: Beat the softened cream cheese until smooth.
In a mixing bowl, beat the softened cream cheese using an electric mixer until it's completely smooth. This step is vital as any lumps in the cream cheese will create an uneven filling. The smoother the cream cheese, the creamier your final pie will be.
Step 4: Add powdered sugar and peppermint extract, then mix until well combined.
Gradually add the powdered sugar to the cream cheese, mixing on low speed to avoid a sugary cloud. Once incorporated, pour in the peppermint extract. This mixture creates a velvety filling that’s both sweet and refreshing, embodying the essence of Christmas with every bite.
Step 5: Fold in the whipped topping until fully incorporated.
Gently fold in the whipped topping using a spatula to maintain the airiness of the mixture. This adds volume and a light texture to the filling, ensuring that every slice of your pie is fluffy and delightful. Be careful not to over-mix, as you want to preserve the whipped topping's lightness.
Step 6: Pour the filling into the prepared crust and smooth the top.
Spoon the creamy filling into the chilled crust, spreading it evenly across the top. This step is where the beautiful contrast between the dark crust and creamy filling takes place, creating a visually appealing pie. A smooth topping also helps with the overall presentation and makes for clean slices.
Step 7: Refrigerate for at least 4 hours to set.
Chill the pie in the refrigerator for a minimum of 4 hours or overnight if possible. This time allows the filling to firm up and makes for easier slicing. It’s crucial for the texture; a pie that’s not sufficiently chilled might be runny and difficult to serve.
Step 8: Garnish with crushed peppermint candies before serving.
Right before serving, sprinkle the crushed peppermint candies over the top for a festive touch. Not only does this enhance the pie's visual appeal, but it also adds a crunchy texture contrast that elevates the overall experience. Plus, those colorful bits scream holiday cheer!

Perfect Balance of Peppermint and Creaminess
The key to an exceptional peppermint pie lies in achieving the right balance of flavor. The combination of cream cheese and whipped topping provides a rich base, while the peppermint extract adds a refreshing zing. This delightful contrast is what makes each bite so irresistible and reminiscent of festive holiday traditions.
A Chocolate Cookie Crust to Remember
A rich chocolate cookie crust sets the stage for this peppermint pie, adding depth and a delightful crunch. The texture you achieve by using finely crushed chocolate cookies elevates the pie, ensuring it stands up to its creamy filling without becoming soggy. It's a treat that complements the mintiness beautifully.
Quick and Simple Preparation for Festive Gatherings
With the hustle and bustle of the holiday season, this Quick Christmas Peppermint Pie delivers convenience without compromising on taste. It requires minimal time and effort while still creating an impressive dessert. Its straightforward preparation makes it a go-to option for home cooks looking to wow their guests.
FAQs
What can I do if my pie filling is too thick?
If you find your filling is too thick, you can incorporate a bit of milk or cream, adding a tablespoon at a time until you reach your desired consistency. This will help make it fluffier without compromising the flavor.
Can I adjust the amount of peppermint extract for personalization?
Absolutely! If you prefer a milder mint flavor, start with half a teaspoon of peppermint extract and taste before adding more. It's all about finding the right flavor balance for your palate.
Can I use a store-bought crust instead of making my own?
Using a store-bought crust is a great option for saving time. A pre-made chocolate crust will still work brilliantly with the peppermint filling, making this dessert an even quicker solution.
What should I do if my pie crust crumbles while slicing?
If your pie crust crumbles when cutting, it might be due to not pressing the crumbs firmly enough into the dish. Ensure to compact the crust well and consider letting it chill longer before slicing for better results.
Can I substitute the cream cheese for a lighter option?
If you prefer a lighter filling, you can use mascarpone cheese or a lower-fat cream cheese. This can help reduce calories while still providing the creamy texture desired in the filling.
What can I do if my whipped topping deflates during mixing?
If your whipped topping starts to deflate, be gentle while folding it into the cream cheese mixture. Stir slowly to maintain airiness; whipping it too aggressively can lead to loss of that light texture.
Conclusion
This Quick Christmas Peppermint Pie is more than just a dessert; it's a celebration of flavors that captures the essence of the holiday season. Its ease of preparation makes it a delightful choice for even the busiest of home cooks.
So, gather your ingredients, give this recipe a try, and witness how it transforms your festive gatherings into memorable occasions filled with sweetness and joy. Your loved ones will undoubtedly fall in love with this seasonal dessert!
Recipe Card
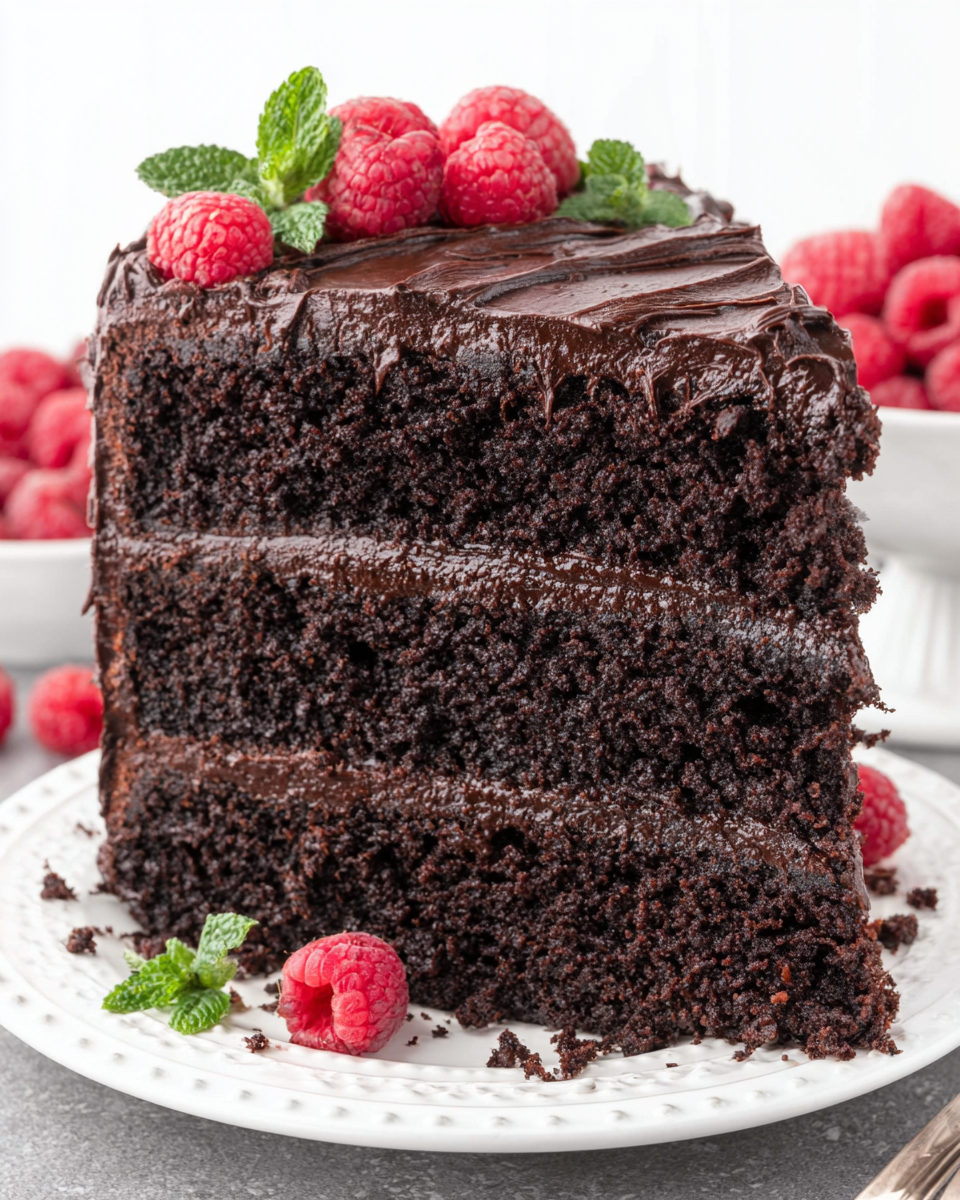
Indulgent High Protein Low Carb Chocolate Cake
Ingredients
Method
- Preheat your oven to 350°F (175°C).
- Grease a 9-inch round cake pan and line the bottom with parchment paper.
- In a large mixing bowl, whisk together almond flour, cocoa powder, protein powder, erythritol, baking soda, and salt.
- In another bowl, beat the eggs, then add applesauce and vanilla extract until well combined.
- Combine the wet and dry ingredients, mixing just until no dry streaks remain.
- Pour the batter into the prepared cake pan, smoothing the top with a spatula.
- Bake for 25-30 minutes or until a toothpick inserted into the center comes out clean.
- Allow the cake to cool in the pan for 10 minutes before transferring it to a wire rack.
- Once cooled, frost as desired or enjoy plain.
Notes
Additional serving suggestions: pair with a crisp salad, garlic bread, or roasted seasonal vegetables for balance.
For make-ahead, prep components separately and assemble just before heating to preserve texture.
Taste and adjust with acid (lemon/vinegar) and salt right at the end to wake up flavors.


