Introduction
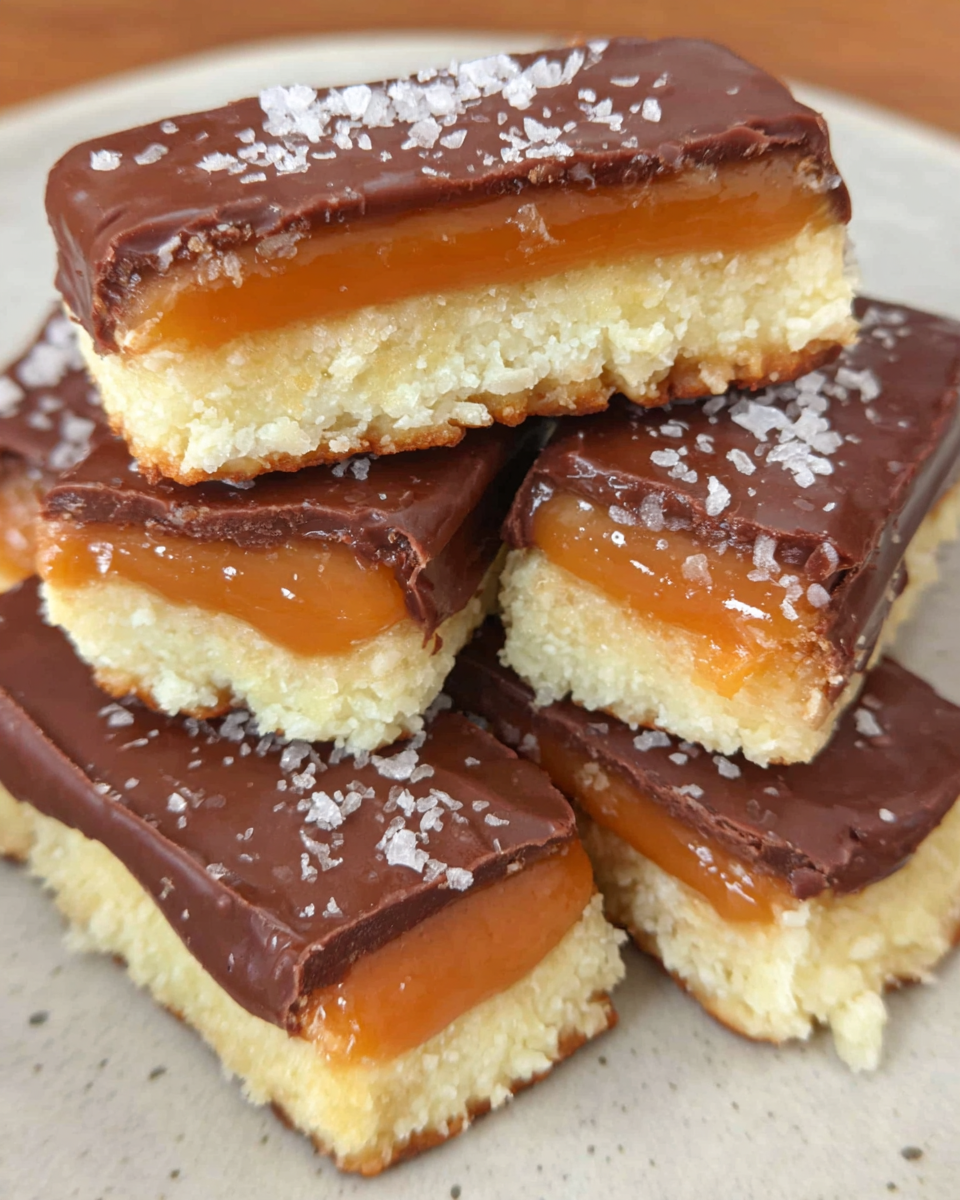
If you’re following a ketogenic diet but miss the indulgent taste of classic candy bars, this Keto Twix Bars recipe promises a delightful combination of sugar-free caramel and smooth chocolate atop a crunchy base. These bars mimic the texture and flavor of the beloved treat without derailing your low-carb lifestyle.
Each layer of this homemade candy brings together wholesome ingredients that not only satisfy a sweet tooth but also adhere to keto guidelines. With a minimal amount of carbohydrates and no added sugars, this recipe offers a guilt-free way to enjoy a treat.
Perfect for satisfying cravings or as a sweet addition to your dessert table, these Keto Twix Bars are sure to impress friends and family alike. Get ready to dive into the world of low-carb baking!
Ingredients
- 1 cup almond flour
Almond flour acts as the base for the crunchy layer, providing a nutty flavor and a great low-carb alternative to traditional wheat flour. Its high fat content fits perfectly within a ketogenic diet, contributing to satiety. - 1/4 cup unsweetened cocoa powder
Cocoa powder adds rich chocolate flavor to the base layer, ensuring you don't miss the sweetness of traditional candy. It’s also packed with antioxidants and naturally low in carbs. - 1/4 cup erythritol
Erythritol serves as a natural sweetener that doesn’t spike blood sugar levels. It’s ideal for keto baking, providing sweetness without adding extra calories or carbs. - 1/4 cup unsalted butter, melted
Butter not only enhances the flavor of the bars but also helps bind the dry ingredients together. Its fat content supports the keto diet, contributing both creaminess and indulgence. - 1 can (14 oz.) coconut cream
Coconut cream is used in the caramel layer to create a creamy texture while keeping the recipe dairy-free. It also adds healthy fats and a subtle sweetness. - 1/2 cup sugar-free chocolate chips
These chocolate chips create the iconic chocolate layer on top of the bars. They are low carb and ensure the recipe stays sugar-free, helping you enjoy chocolate without guilt. - 1 tsp vanilla extract
Vanilla extract enhances the flavors throughout the recipe, adding warmth and depth. It's a flavorful yet low-carb ingredient that can brighten up the overall taste. - Pinch of salt
A pinch of salt enhances the sweetness of the bars, balancing flavors and making the sweetness pop without being overwhelming.
Directions & Preparation
Step 1: Preheat the oven to 350°F (175°C).
Preheating the oven is crucial for even cooking. It ensures that the temperature is consistent from the moment you place the bars inside, resulting in a properly set and baked base layer.
Step 2: Combine the almond flour, cocoa powder, erythritol, melted butter, and a pinch of salt in a mixing bowl until a dough forms.
Mixing the dry and wet ingredients together creates a cohesive dough that will form the crunchy bottom layer. Ensure there are no dry spots and that the butter is evenly distributed for the best texture.
Step 3: Press the dough evenly into the bottom of a lined baking dish.
Pressing the dough into the baking dish ensures an even thickness, which is essential for uniform baking. Using parchment paper makes removing the bars easier later on.
Step 4: Bake for 15 minutes, then let cool completely.
Baking for the right amount of time is key to achieving a firm base without burning. Once out of the oven, allow it to cool fully to ensure the caramel layer won’t melt into the base.
Step 5: In a saucepan, combine the coconut cream and erythritol over medium heat, stirring until smooth and caramelized.
Cooking the coconut cream and erythritol allows for the flavors to meld and caramelize slightly. This step is important to achieve the desired texture and sweetness of the caramel layer.
Step 6: Pour the caramel over the cooled base, smoothing it into an even layer.
Smoothing out the caramel layer ensures that every bite will include that lush, sweet filling. The even distribution also helps it set properly once cooled.
Step 7: Chill the bars in the refrigerator for at least 2 hours to set the caramel.
Chilling helps firm up the caramel, making it easier to slice the bars without making a mess. This patience will pay off with beautiful, clean cuts and a delightful texture.
Step 8: Melt the sugar-free chocolate chips and pour over the set caramel layer, smoothing it out.
Melting the chocolate chips ensures that they spread evenly over the caramel layer. This top layer is essential for completing the Twix-like experience; ensuring it's smooth adds visual appeal.
Step 9: Return the bars to the refrigerator until the chocolate is set, about 30 minutes.
Setting the chocolate allows it to harden into a perfect layer over the caramel. This step is vital for the structural integrity of the bars, making them easier to slice and eat.
Step 10: Cut into bars and serve.
Cutting the bars after they have chilled ensures clean edges and reveals the beautiful layers inside. These bars can be served immediately or stored for later enjoyment.

Creating the Perfect Crunch Layer
The base layer of the Keto Twix Bars is key to achieving that iconic crunch. Using almond flour instead of traditional flour not only keeps the carb count low but also offers a rich, nutty flavor. Proper mixing and pressing into the baking dish are essential in achieving a sturdy structure for the bars that will hold up under the luscious caramel and chocolate layers.
The Art of Vegan Caramel
Coconut cream forms the backbone of the sugar-free caramel in this recipe, creating a creamy, smooth filling that mimics traditional caramel without the sugars and unhealthy additives. The key is to cook the cream until it thickens enough to hold its shape when layered but still remains pourable for ease of use. It provides a rich indulgence while perfectly adhering to the keto philosophy.
Chocolate Layer Finish
The final touch of melted, sugar-free chocolate chips transforms these bars into a true treat. The chocolate layer not only adds visual appeal but also harmonizes beautifully with the chewy caramel and crunchy base. The slight bitterness from the chocolate against the sweetness of the other layers strikes a perfect balance, making each bite irresistible.
FAQs
What should I do if the caramel becomes too thick?
If the caramel thickens too much while cooking, simply add a teaspoon of coconut cream back into the mixture and stir until smooth. This will help adjust the consistency without compromising the flavor.
Can I use another sweetener instead of erythritol?
Yes, you can substitute erythritol with other keto-friendly sweeteners like Stevia or Monk fruit. Just be mindful of their sweetness levels, as they can differ greatly.
What if my chocolate layer doesn’t set properly?
If the chocolate layer remains too soft, it may not have cooled sufficiently after melting. Make sure you let it chill in the refrigerator long enough, ensuring a firm finish.
How can I make the caramel less sweet?
To reduce the sweetness of the caramel, decrease the amount of erythritol by a tablespoon and monitor the taste as you cook. You can also add a pinch of salt to enhance the flavors without adding more sugar.
What if the bottom layer crumbles when cutting?
If you find the bottom layer is crumbling, it may not have been pressed firmly enough into the baking dish. Make sure to press down with even pressure to create a solid foundation for the bars.
Can I add other toppings to these bars?
Absolutely! Feel free to sprinkle chopped nuts, sea salt, or even a drizzle of additional sugar-free chocolate on top for extra texture and flavor.
Conclusion
These Keto Twix Bars are a wonderful way to satisfy your sweet cravings without compromising your dietary goals. With their crunchy base, rich caramel, and luscious chocolate, each bite is a delightful reminder that you don’t need sugar to enjoy something delicious.
Perfect for a treat during the week or as a party dessert, these bars are sure to please anyone, regardless of their dietary restrictions. Embrace the satisfaction of creating your own low-carb, sugar-free indulgence and share the joy with friends and family.
Recipe Card
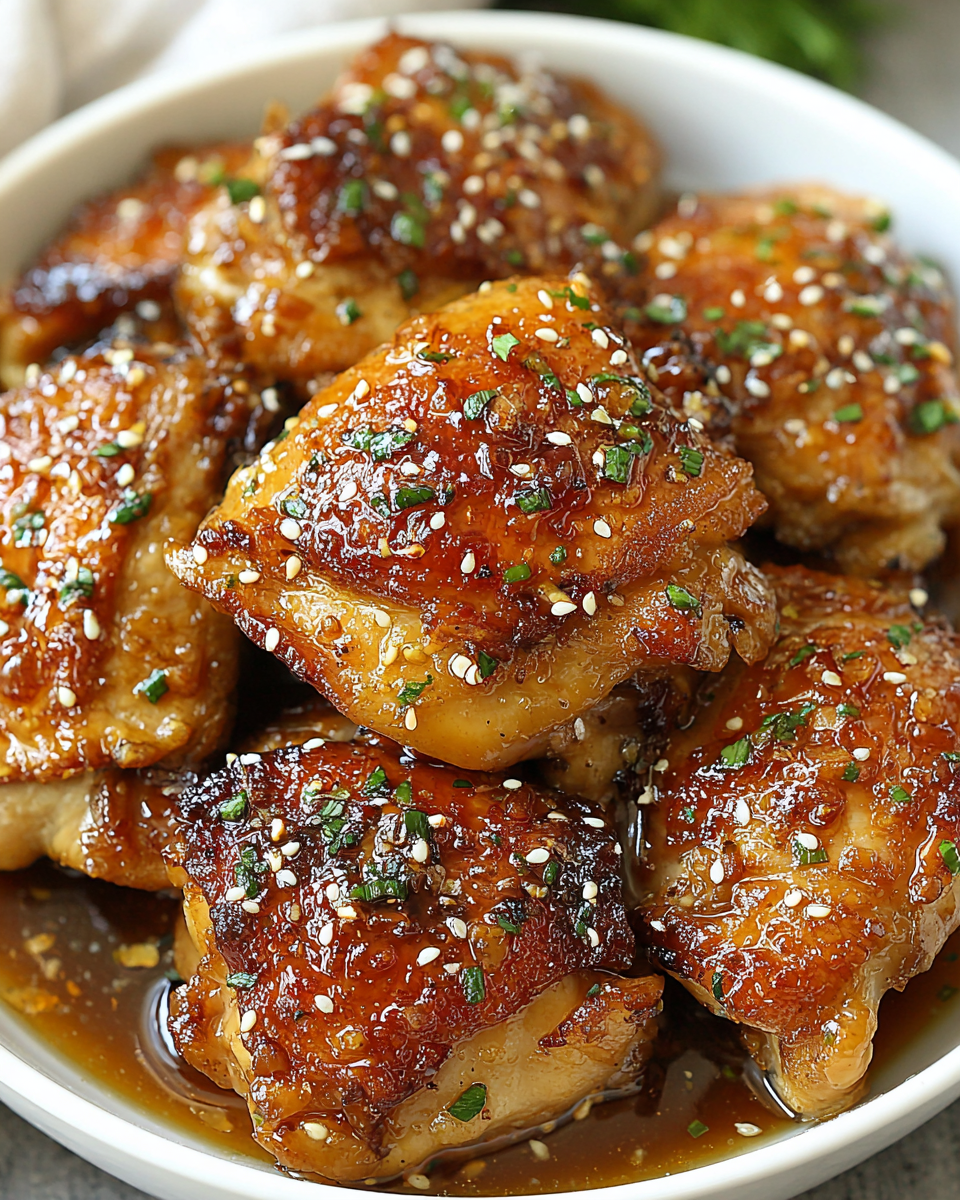
Sweet and Savory Honey Garlic Chicken Thighs Recipe
Ingredients
Method
- Prepare the chicken thighs by patting them dry and seasoning with salt and pepper.
- In a mixing bowl, whisk together honey, soy sauce, minced garlic, apple cider vinegar, black pepper, and sesame oil.
- Place chicken thighs in the slow cooker and pour the sauce over them.
- Set the slow cooker to low and cook for 4-5 hours, or until chicken is tender and fully cooked.
- Once cooked, remove chicken from the slow cooker and let it rest briefly before serving.
- Serve the chicken thighs garnished with sliced green onions and drizzled with additional sauce from the slow cooker.
Notes
Additional serving suggestions: pair with a crisp salad, garlic bread, or roasted seasonal vegetables for balance.
For make-ahead, prep components separately and assemble just before heating to preserve texture.
Taste and adjust with acid (lemon/vinegar) and salt right at the end to wake up flavors.


