Introduction
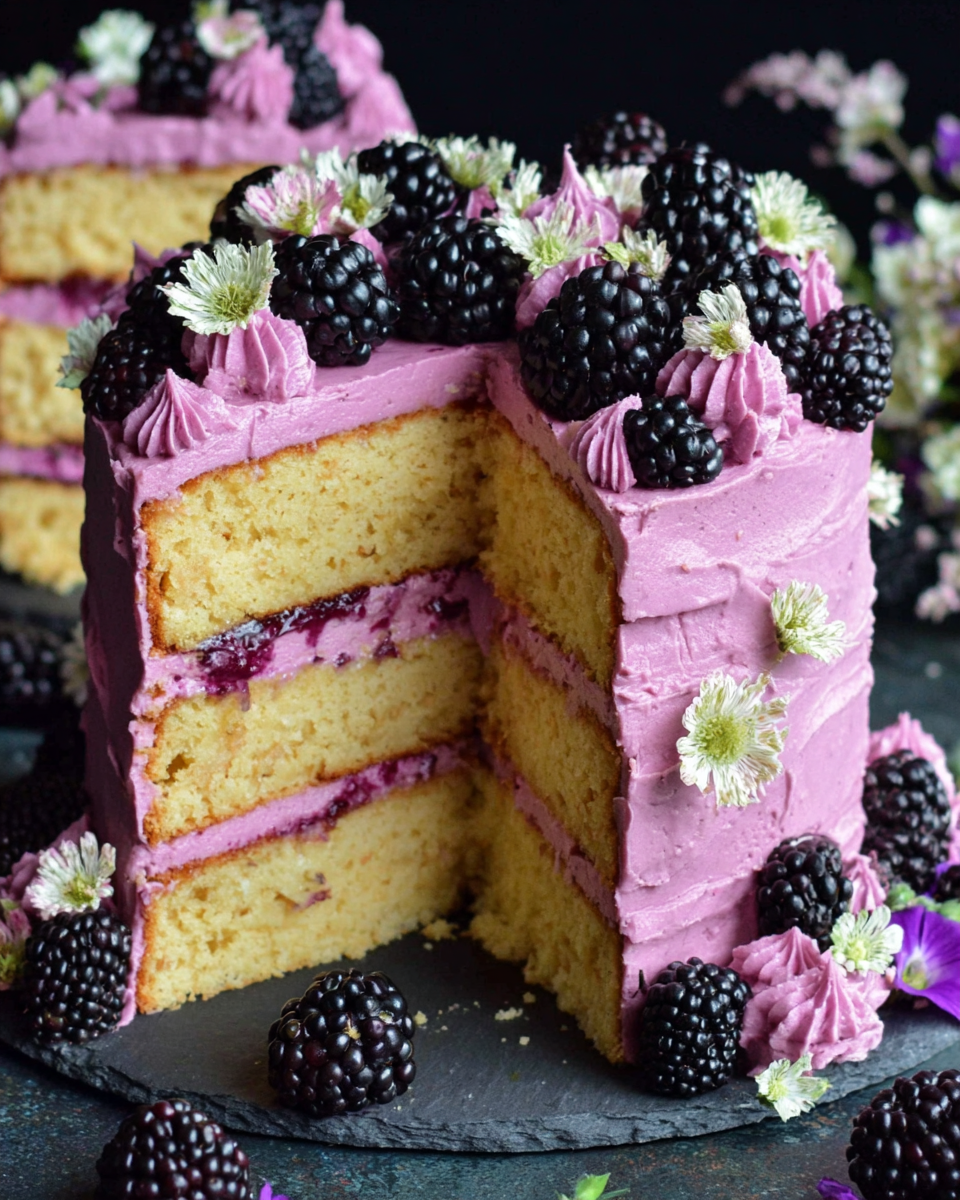
A beautiful celebration of summer's bounty, the Blackberry Layer Cake is not just a feast for the eyes but also a delightful experience for the palate. This moist cake intricately combines the tartness of blackberries with the sweetness of a luscious purple frosting, making it an ideal centerpiece for any gathering. Whether it's a birthday party or a simple family get-together, this cake is bound to impress.
The cake’s layers are filled with fresh blackberry goodness, while the frosting is not only visually appealing but bursting with flavor. Dressed in a soft purple hue, the frosting elevates the cake, making it both sophisticated and inviting. Home cooks will find this recipe rewarding, as its process allows for creativity and expression through baking.
Ingredients
- 2 cups all-purpose flour
A versatile base for the cake, all-purpose flour provides the necessary structure and texture, allowing the layers to rise beautifully. - 2 teaspoons baking powder
This leavening agent ensures the cake achieves a light and airy texture, producing that perfect rise as it bakes. - 1/2 teaspoon salt
Salt enhances flavors, balancing the sweetness of the cake, making each bite more enjoyable. - 1 cup unsalted butter, softened
Butter adds richness and moisture, crucial in producing a tender crumb that melts in your mouth. - 1 1/2 cups granulated sugar
Sugar not only sweetens the cake but also aids in browning, resulting in a lovely color and flavor. - 4 large eggs
Eggs act as a binding agent, helping to incorporate moisture and structure, while also contributing to the cake’s luscious texture. - 1 teaspoon vanilla extract
Vanilla enhances the overall flavor profile, lending warmth and depth to the cake. - 1 cup fresh blackberries, pureed
The puree infuses the cake with a vibrant blackberry flavor and a beautiful color, making it the star ingredient. - 1 cup heavy cream
Essential for the frosting, heavy cream whips up beautifully, creating a creamy texture perfect for a decadent finish. - 2 cups powdered sugar
Powdered sugar is necessary for sweetness and creating a smooth, spreadable frosting that holds its shape. - Food coloring (purple)
Adding purple food coloring not only enhances the visual appeal but helps to create a striking contrast against the cake layers.
Directions & Preparation
Step 1: Preheat your oven to 350°F (175°C).
Preheating your oven is a crucial step to ensure that the cake bakes evenly. An adequately heated oven promotes proper leavening and helps achieve a uniform texture, preventing the bottom from becoming dense while the top cooks.
Step 2: Grease and flour two 9-inch round cake pans.
Greasing and flouring the pans is vital for preventing the cake from sticking. This simple step ensures a smooth, clean release when it's time to unmold, keeping your layers intact and ready for building.
Step 3: In a bowl, mix flour, baking powder, and salt.
Combining the dry ingredients before adding them to the batter allows for even distribution of the baking powder and salt. This step is important to prevent any uneven rising and to ensure a consistent flavor throughout the cake.
Step 4: In a separate bowl, cream the butter and sugar until light and fluffy.
Creaming the butter and sugar introduces air into the mixture, which is essential for a light cake texture. The fluffy consistency not only affects the cake's body but also contributes to a delightful mouthfeel.
Step 5: Add the eggs one at a time, mixing well after each addition.
Incorporating the eggs gradually ensures that they emulsify properly with the butter-sugar mixture, resulting in a more stable and homogenous batter. This is crucial as it affects both rise and moisture in the final product.
Step 6: Stir in the vanilla extract and blackberry puree.
Adding these ingredients at this stage infuses the batter with a deep flavor. The vanilla's warmth complements the tartness of the blackberries, creating a well-rounded taste that define the cake.
Step 7: Gradually incorporate the dry ingredients into the wet mixture, alternating with the milk if needed.
Adding the dry ingredients in batches reduces the likelihood of overmixing, which can lead to a tough texture. This alternation also helps maintain moisture levels, ensuring a tender and fluffy cake.
Step 8: Divide the batter evenly between the prepared pans, smoothing the tops.
Lifting the batter with a spatula to smooth the tops ensures even baking, which is key for uniform layers. This step also prepares the batter to rise properly in the oven.
Step 9: Bake for 25-30 minutes or until a toothpick comes out clean.
Monitoring the baking time is essential to avoid overbaking, which can dry out the cake. Using a toothpick to check for doneness helps ensure each layer remains moist and flavorful.
Step 10: Let the cakes cool in the pans for 10 minutes, then transfer to wire racks.
Allowing the cakes to cool slightly in the pans helps them set, which reduces the risk of breakage when unmolding. Transferring them to wire racks promotes even cooling, preventing moisture buildup.
Step 11: While the cakes cool, prepare the frosting by whipping heavy cream to soft peaks.
Whipping the cream to soft peaks is the foundation for a light and airy frosting. It creates a whipped texture that holds up well when spread on the cake, providing a delightful creaminess.
Step 12: Gradually add powdered sugar and food coloring, then whip until stiff peaks form.
Incorporating powdered sugar slowly ensures a smooth consistency without lumps. Achieving stiff peaks is crucial for a frosting that can stand tall between layers and on top, making for a beautifully decorated cake.
Step 13: Once the cakes are cooled, level them if necessary and place one layer on a serving platter.
Leveling the cake creates a solid base for stacking, ensuring that the layers sit evenly on top of each other. This is a key element for a well-constructed cake.
Step 14: Spread a layer of frosting on top of the first cake layer, then place the second layer on top.
Spreading frosting between the layers adds flavor and moisture, creating a delightful contrast in each bite. It's important to spread evenly to encourage better stability and aesthetics.
Step 15: Frost the top and sides of the cake with the remaining frosting.
Coating the entire cake with frosting enhances its visual appeal and keeps the layers moist. This final touch is where you can unleash your creativity, creating patterns or a smooth finish.
Step 16: Serve and enjoy your delightful Blackberry Layer Cake!
Serving the cake should be done after allowing it to rest for a bit, which helps it hold its shape when sliced. Enjoying the cake fresh allows you to savor the burst of blackberry flavor and creamy frosting, making it a memorable dessert.

Choosing the Right Blackberries
Fresh blackberries are the star of this cake, so selecting ripe, plump berries is essential. Look for berries that are firm, plump, and deep in color, which ensures maximum flavor. Avoid overly soft or dull-looking berries, as they may impact the cake's taste and texture.
Creating the Perfect Frosting
When making the frosting, the key to achieving the right consistency lies in proper whipping techniques. Start with chilled cream and whip at medium speed, gradually increasing as it thickens. If it begins to separate, you may have overwhipped it, so be cautious. The goal is a fluffy, spreadable texture.
Decorating Your Cake Elegantly
The decoration of the cake can elevate it further, making it a showstopper. Consider adding fresh blackberries on top, drizzling some berry puree, or sprinkling edible flower petals. These finishing touches not only enhance aesthetics but also give hints of the delicious flavors within.
FAQs
What if my blackberry puree is too thin?
If your blackberry puree is too thin, consider straining it to remove excess juice or adding a bit of cornstarch dissolved in water to thicken it.
Can I substitute another type of berry for blackberries?
Yes, raspberries or blueberries can be great substitutes for the blackberries, giving the cake a slightly different flavor while maintaining moisture.
What should I do if my frosting turns out too thick?
If your frosting is too thick, gradually add a splash of milk or cream, mixing well until you reach your desired consistency.
How can I make this cake gluten-free?
You can substitute all-purpose flour with a gluten-free blend, ensuring that it contains xanthan gum to mimic the texture.
Is there a way to add more blackberry flavor to the frosting?
Incorporate a few tablespoons of blackberry puree into the frosting for a richer blackberry flavor that complements the cake.
What if I want to make smaller cakes?
You can divide the batter into smaller pans or use a cupcake tin. Adjust the baking time as needed based on the size of the cakes.
Conclusion
This Blackberry Layer Cake with Purple Frosting embodies the joy of baking and the celebration of fresh, seasonal fruits. Each layer tells a story of flavor, texture, and creativity, making it a perfect dessert for any occasion.
As you slice through the layers and savor every bite, you’ll understand why this cake often becomes a favorite among family and friends. Embrace the process, share it with loved ones, and enjoy the fruits of your labor.
Recipe Card
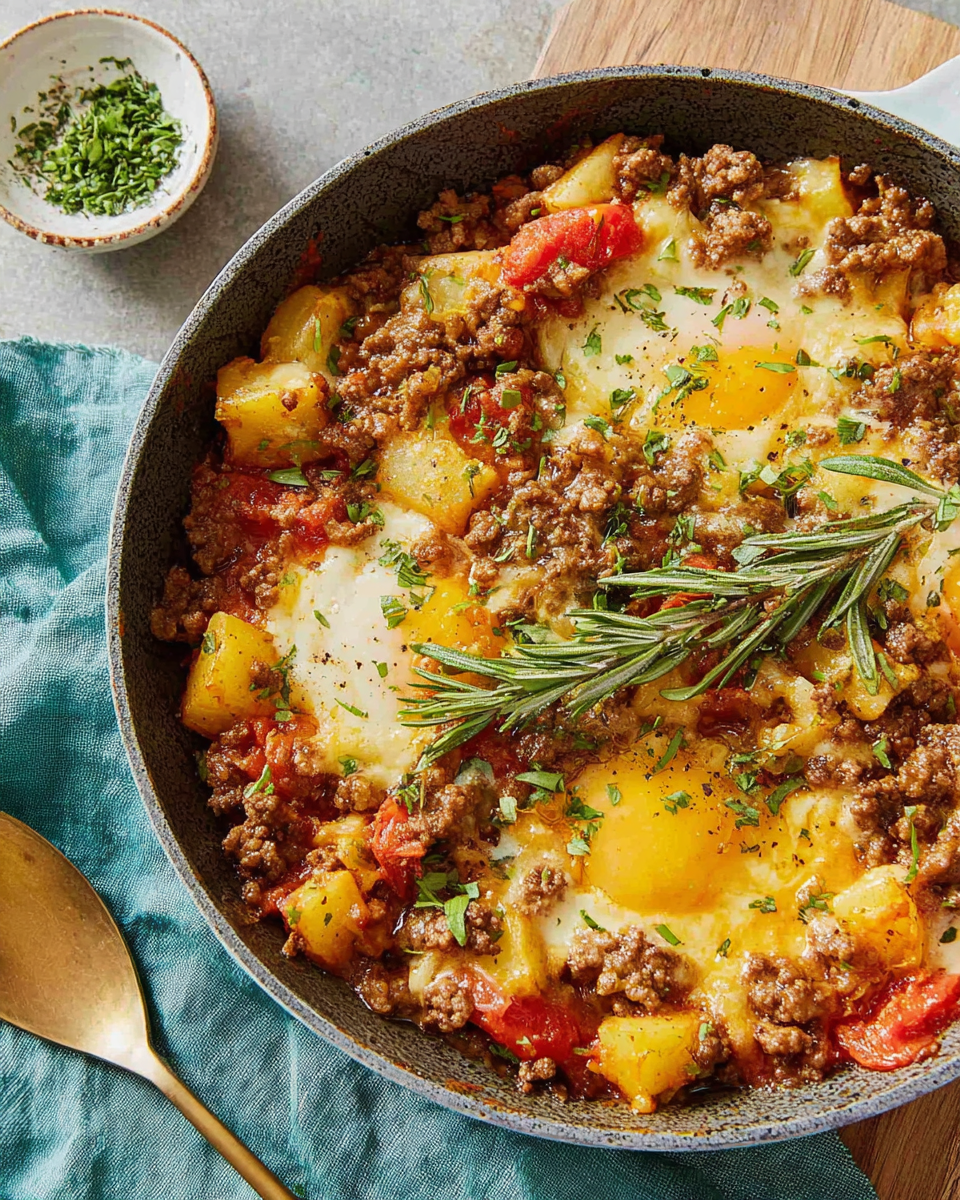
Savor the Day with Tasty Ground Beef Dishes
Ingredients
Method
- Heat the olive oil in a large skillet over medium heat.
- Add the diced onion and sauté until translucent.
- Stir in the minced garlic and sauté for another minute.
- Increase the heat to medium-high and add the ground beef.
- Season with salt, pepper, chili powder, and cumin.
- Cook until the beef is browned and fully cooked through.
- Stir in the diced tomatoes and let simmer for 10 minutes.
- Taste and adjust seasoning if necessary before serving.
Notes
Additional serving suggestions: pair with a crisp salad, garlic bread, or roasted seasonal vegetables for balance.
For make-ahead, prep components separately and assemble just before heating to preserve texture.
Taste and adjust with acid (lemon/vinegar) and salt right at the end to wake up flavors.


