Introduction
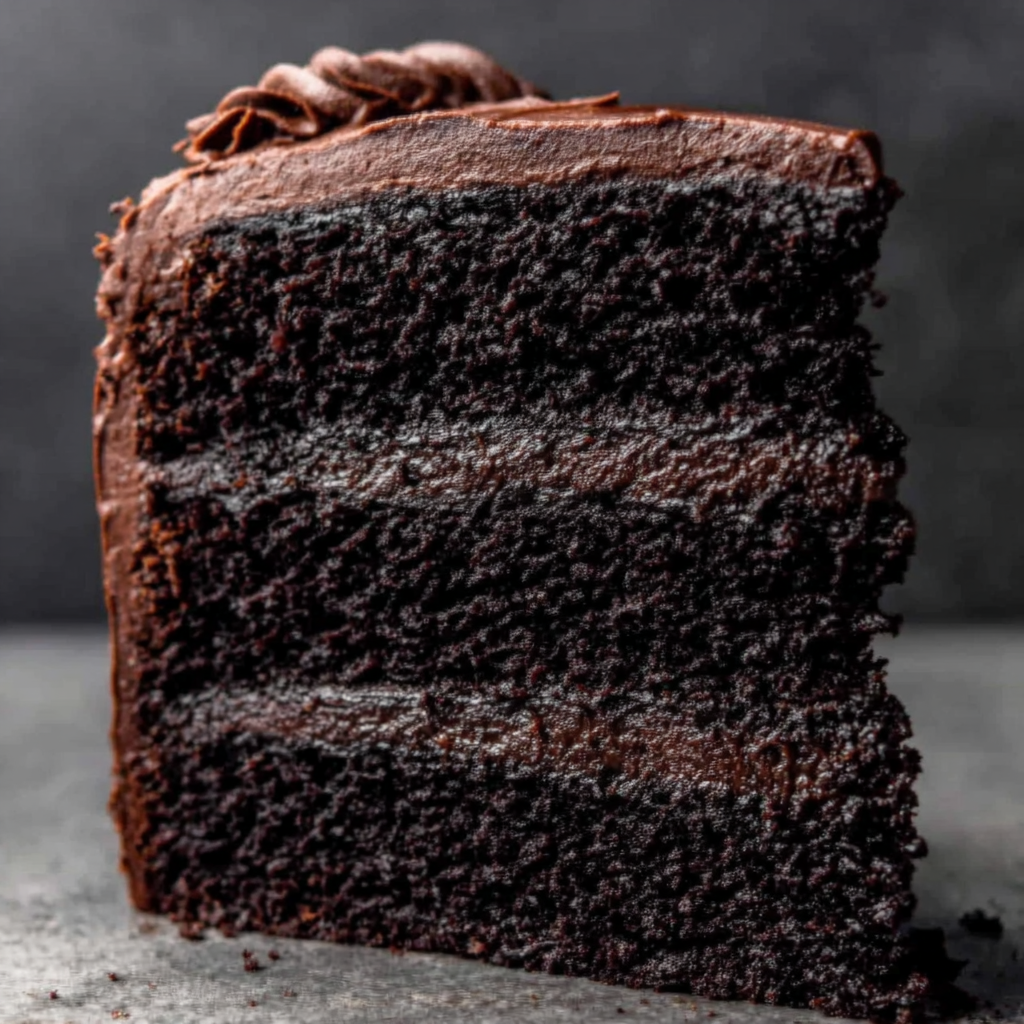
Rich, decadent, and oh-so-chocolatey, the Mount Doom Black Chocolate Cake is the ultimate indulgence for chocolate lovers. This cake comes with an intriguing name that suggests a flavor journey to the very depths of chocolate bliss. Each slice promises to be a rich experience, perfect for celebrations or simply to satisfy a sweet tooth.
Whether you're hosting a special gathering or treating yourself on a quiet evening, this cake is bound to impress. The bold flavors are deceptive in their simplicity, but the finished product speaks volumes about your culinary prowess. Let’s dive into the realm of dark chocolate and explore how to make this extraordinary cake.
Ingredients
- 2 cups all-purpose flour
All-purpose flour provides the structure for the cake, contributing to its overall texture. The gluten formed during mixing helps the cake rise and maintain its shape. - 2 cups granulated sugar
Sugar adds sweetness and moisture to the cake while also helping to enhance the chocolate flavor. It plays a crucial role in the cake's overall texture, keeping it tender. - 3/4 cup unsweetened cocoa powder
Cocoa powder is the star of the show, delivering the rich chocolate flavor that defines this cake. It also adds depth and a slightly bitter nuance that balances the sweetness. - 1 1/2 teaspoons baking powder
Baking powder acts as a leavening agent, helping the cake to rise and develop a light texture. It creates air pockets during baking, which contribute to the cake's tenderness. - 1 1/2 teaspoons baking soda
Baking soda also serves as a leavening agent but reacts with acidic components in the batter, helping the cake to achieve its desired rise and crumb structure. Combined with baking powder, it ensures a fluffy end result. - 1 teaspoon salt
Salt enhances the flavors of the ingredients, balancing sweetness and bringing out the deep chocolate taste. It helps to improve the overall flavor profile of the cake. - 2 large eggs
Eggs add moisture and richness to the cake while also acting as a binding agent. They help to create a stable structure and contribute to the overall flavor. - 1 cup whole milk
Whole milk provides moisture and fat, creating a tender crumb while also enhancing the richness of the cake. The liquid component also helps with the overall mixing of dry ingredients. - 1/2 cup vegetable oil
Vegetable oil adds moisture and richness without interfering with the chocolate flavor. It helps to keep the cake moist and extends its shelf life. - 2 teaspoons vanilla extract
Vanilla extract adds warmth and depth to the flavor of the cake. It enhances the overall sweetness, rounding out the richness of the chocolate. - 1 cup boiling water
Boiling water helps to bloom the cocoa powder, intensifying its flavor and ensuring a deeply rich chocolate taste. This step allows the cocoa to dissolve fully, contributing to the cake's moistness.
Directions & Preparation
Step 1: Preheat your oven to 350°F (175°C).
Preheating the oven is crucial as it ensures that the cake starts baking immediately when bathed in heat. Proper temperature during the initial baking phase helps achieve an even rise, creating a beautifully domed cake.
Step 2: Grease and flour two 9-inch round cake pans.
Greasing and flouring the pans prevents the cake from sticking, ensuring that it releases easily once baked. This step is essential for maintaining the cake's shape and achieving perfect presentation.
Step 3: In a large mixing bowl, combine the dry ingredients: flour, sugar, cocoa powder, baking powder, baking soda, and salt.
Mixing the dry ingredients together first ensures even distribution of the leaveners and cocoa powder throughout the batter. This step promotes uniform rising and flavor distribution, key to a successful cake.
Step 4: In another bowl, whisk the eggs, milk, oil, and vanilla extract until well combined.
Combining these wet ingredients separately allows for thorough emulsification, which is essential for achieving a uniform batter. The mixture will enhance the cake's moisture and richness.
Step 5: Gradually add the wet mixture to the dry ingredients, stirring until just combined.
This gentle mixing helps to prevent overdevelopment of gluten, ensuring a tender cake. It's vital to stop mixing once the ingredients are combined to avoid a dense texture.
Step 6: Carefully stir in the boiling water until well mixed.
This step activates the cocoa, enhancing its flavor, and adds moisture to the batter. The hot water helps to create a lighter, more delicate crumb by loosening the batter.
Step 7: Divide the batter evenly between the prepared pans.
Even distribution ensures that both cakes are of equal height and bake uniformly. This is crucial for achieving a professional look and ensuring both layers bake properly.
Step 8: Bake for 30-35 minutes, or until a toothpick inserted in the center comes out clean.
Monitoring baking time and testing with a toothpick helps prevent overbaking, which can lead to a dry cake. It's key to let it bake until just set to preserve moisture and flavor.
Step 9: Allow the cakes to cool in the pans for 10 minutes before transferring to a wire rack.
Cooling in the pans helps the cakes firm up, making them easier to transfer without breaking. Moving them to a wire rack allows them to cool completely, ensuring a good base for frosting.
Step 10: Once fully cooled, frost with your choice of icing.
Frosting is your opportunity to add flavor and moisture, enhancing the chocolate experience. Choose a rich buttercream, ganache, or cream cheese frosting for the perfect complement.

The Art of Choosing Cocoa Powder
The choice of cocoa powder significantly impacts the flavor profile of your Mount Doom Black Chocolate Cake. Opting for Dutch-processed cocoa brings a smoother, mellower taste, while natural cocoa provides a pronounced chocolate kick. Experimenting with different varieties can enhance the cake's depth and complexity, allowing for personalized flavor adjustments tailored to your taste.
Elevating Texture with Oil vs. Butter
While butter imparts a wonderful flavor, using vegetable oil in this recipe adds moisture and a lighter texture, making it incredibly tender. This cake benefits from the characteristics of oil, contributing to a deliciously moist crumb that remains delightful even after a couple of days. Consider this aspect when deciding on your fat, as it can dramatically alter the cake's eating experience.
Pairing Flavors: Frosting Choices
While this cake shines on its own, the right frosting can elevate it to new heights. Think about contrasting flavors such as a tangy cream cheese frosting or a rich chocolate ganache. Adding layers of flavor with flavored extracts, fruits, or chopped nuts in the frosting can further enhance the overall dessert experience, creating a memorable centerpiece for any occasion.
FAQs
What if my Mount Doom cake ends up too dense?
If the cake is too dense, it might be due to overmixing the batter or using too much flour. Ensure that you're measuring the flour accurately and mix just until combined.
Can I substitute granulated sugar with brown sugar?
Yes, brown sugar can be used for a deeper flavor profile and added moisture. Keep in mind that it may darken the cake slightly and may change the texture a bit.
What can I do if my cake doesn't rise properly?
If your cake fails to rise, check that your baking powder and baking soda are fresh. An inflation failure can often be traced back to expired leavening agents.
Can I use a bundt pan instead of round pans?
Yes, you can use a bundt pan. Just ensure to grease it well, and adjust the baking time as it may require a bit more time depending on the size of the pan.
What should I do if my cake is too chocolatey for my taste?
If you find the cake too rich, consider serving it with a light whipped cream or a fruit-based sauce to balance the flavor and provide a refreshing contrast.
How can I make the cake even more chocolatey?
To intensify the chocolate flavor, consider adding chocolate chips or using dark chocolate in the frosting. This will amplify the chocolate experience without overwhelming the cake.
Conclusion
The Mount Doom Black Chocolate Cake stands as a monument to chocolate lovers’ dreams, merging complexity with simplicity. Its deep flavors, sublime texture, and adaptability make it a perfect centerpiece for any occasion.
By following this recipe, you'll not only experience the pleasure of creating an extraordinary dessert but also delight in each rich bite. So gather your ingredients, embrace the process, and enjoy the magical creation of your own Mount Doom cake!
Recipe Card

Delicious Cheesy Spinach & Artichoke Stuffed Mushrooms
Ingredients
Method
- Preheat your oven to 375°F (190°C).
- Clean the mushrooms and remove stems. Set aside caps, and finely chop stems.
- In a skillet, heat some olive oil over medium heat and sauté the minced garlic until fragrant.
- Add chopped spinach, artichokes, and chopped mushroom stems to the skillet. Cook until spinach wilts.
- In a bowl, combine the sautéed mixture with cream cheese, Parmesan, mozzarella, red pepper flakes, salt, and pepper.
- Fill each mushroom cap generously with the cheese and spinach mixture.
- Place the stuffed mushrooms on a baking sheet and drizzle with olive oil.
- Bake in the preheated oven for 20-25 minutes until the mushrooms are tender and tops are golden.
- Remove from oven and let cool for a few minutes before serving.
Notes
Additional serving suggestions: pair with a crisp salad, garlic bread, or roasted seasonal vegetables for balance.
For make-ahead, prep components separately and assemble just before heating to preserve texture.
Taste and adjust with acid (lemon/vinegar) and salt right at the end to wake up flavors.


