If you’re looking for a no-bake dessert that tastes like a dream and comes together in minutes, this No-Bake Éclair Cake is about to become your new favorite treat. With just a handful of simple ingredients and zero baking required, it’s the perfect recipe to whip up when you’re short on time but still want something rich, creamy, and irresistibly chocolatey.
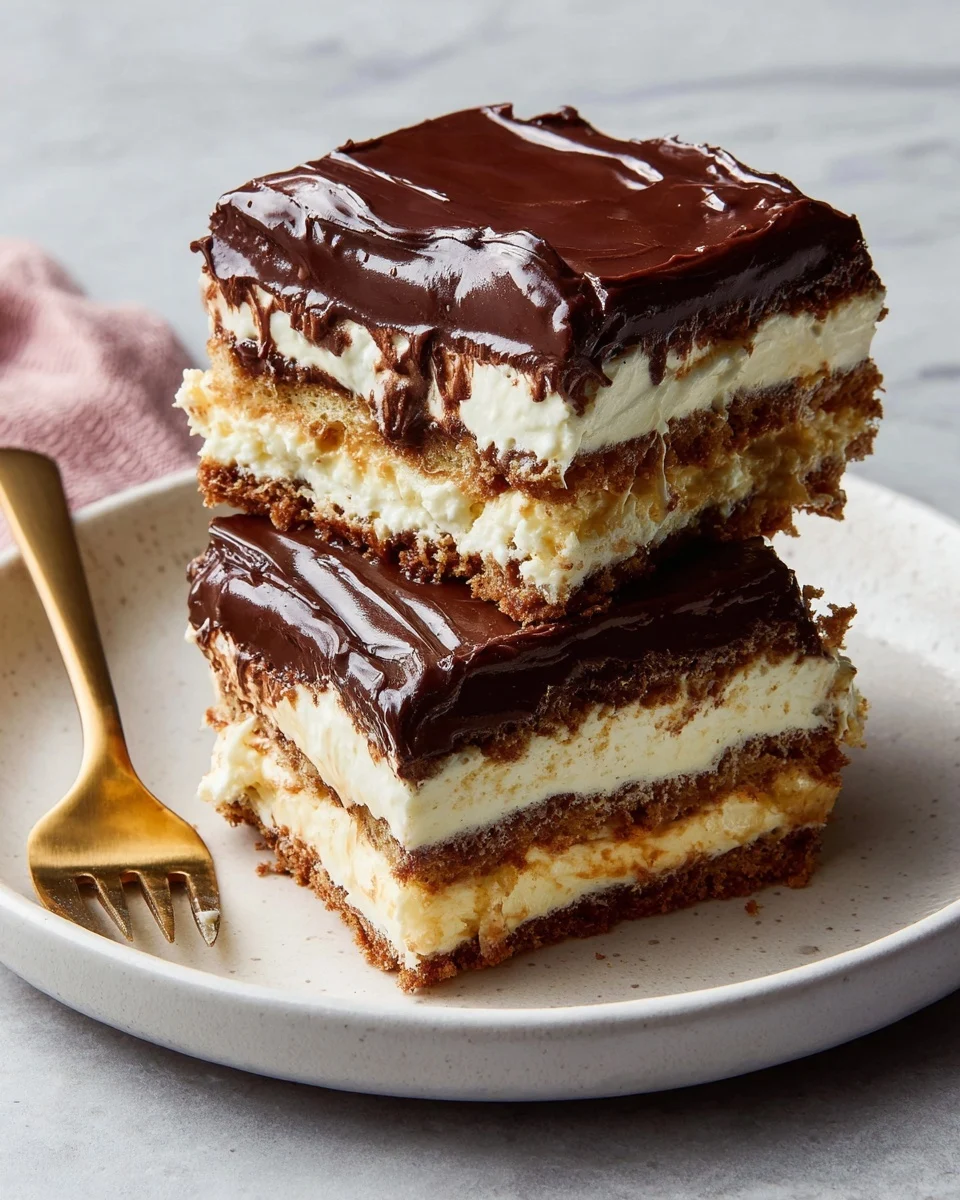
This classic no-bake éclair cake mimics the flavor of a traditional French éclair but without any of the hassle. Instead of choux pastry, this easy dessert uses graham crackers to create layers. Instead of stovetop custard, you’ll rely on instant pudding and whipped topping. And instead of tempered chocolate, a can of creamy chocolate frosting brings it all together. Once chilled, the layers soften and meld into a luscious, velvety cake that will have everyone asking for seconds.
In this article, we’re not only going to walk through how to make this no-bake éclair cake, but we’ll also cover tips, tricks, storage hacks, flavor variations, serving suggestions, and answers to the most commonly asked questions. This is the ultimate guide to making the best no-bake éclair cake—from start to finish.
Why You’ll Love This No-Bake Éclair Cake
- No oven required – perfect for hot days or when you want to keep things simple.
- Minimal ingredients – pantry staples come together to form an elegant dessert.
- Make-ahead friendly – it tastes even better the next day!
- Versatile – endless flavor twists with different pudding and topping options.
- Great for crowds – it serves 12, making it perfect for potlucks, picnics, birthdays, and family dinners.
Ingredients for No-Bake Éclair Cake
Here’s what you’ll need to make this easy no-bake éclair cake:
🧾 Serves 12
- 1 box (14.4 oz) graham crackers (about 3 sleeves)
- 2 packages (3.4 oz each) instant vanilla pudding mix
- 3 cups cold milk
- 1 tub (8 oz) whipped topping (like Cool Whip), thawed
- 1 can (16 oz) chocolate frosting (or homemade ganache if you prefer)

Step-by-Step Instructions
Let’s dive into how to make this indulgent no-bake éclair cake, step by step. Each part of the recipe is simple, but when combined, they create a dessert that’s more than the sum of its parts.
Step 1: Make the Filling
Start by preparing the creamy vanilla pudding layer.
- In a large mixing bowl, whisk together the instant pudding mix and cold milk for about 2 minutes, or until the mixture thickens.
- Once it’s thickened, gently fold in the thawed whipped topping until fully combined. This creates a light, fluffy filling that becomes the heart of the dessert.
Step 2: Layer the Cake
Now it’s time to build those signature layers.
- In a 9×13-inch baking dish, arrange graham crackers in a single layer to cover the bottom. You may need to break a few crackers to make them fit.
- Spread half of the pudding mixture evenly over the graham crackers.
- Add another layer of graham crackers on top of the pudding.
- Spread the remaining pudding mixture over the second graham cracker layer.
- Finish with a final layer of graham crackers on top. These will form the base for your chocolate topping.
Step 3: Add the Chocolate Frosting
Here’s where it gets dreamy.
- Remove the lid and foil from the can of frosting and microwave it uncovered for about 15 seconds. This makes it easier to spread.
- Stir the frosting and gently spread it over the top layer of graham crackers, covering it completely. Be sure to spread evenly so every bite is chocolate-covered.
Step 4: Chill and Set
This part is essential.
- Cover the dish with plastic wrap and refrigerate for at least 6 hours, preferably overnight.
- As the dessert chills, the graham crackers will soften and meld into the pudding layers, creating a cake-like texture that’s out of this world.
Tips for the Best No-Bake Éclair Cake
To ensure your no-bake éclair cake turns out perfect every single time, here are a few expert tips:
1. Don’t Skip the Chill Time
The magic happens in the fridge. Giving the dessert time to chill allows the graham crackers to absorb the moisture from the pudding and soften into a cakelike texture.
2. Use Full-Fat Ingredients for Best Flavor
Low-fat or sugar-free ingredients can work, but full-fat milk and whipped topping result in the creamiest, most flavorful filling.
3. Spread Evenly
Make sure each layer (especially the pudding and frosting) is spread evenly to avoid gaps or uneven textures.
4. Want a Homemade Chocolate Ganache?
If you prefer a richer topping, you can make a ganache by combining:
- 1 cup heavy cream (heated)
- 8 oz semi-sweet chocolate chips
Pour the hot cream over the chocolate chips, let it sit for a few minutes, then stir until smooth. Cool slightly before pouring over the cake.
5. Plan Ahead
Because this cake needs to chill, it’s ideal to make it the day before an event. It only gets better with time.
Variations to Try
One of the best things about this no-bake éclair cake is how customizable it is. Here are some delicious twists you can try:
Chocolate Lover’s Éclair Cake
- Swap vanilla pudding for chocolate pudding for a double chocolate version.
- Use chocolate graham crackers for extra indulgence.
Strawberries and Cream Éclair Cake
- Add a layer of sliced strawberries between the pudding layers.
- Use strawberry-flavored pudding for a fruity twist.
Peanut Butter Éclair Cake
- Mix a half cup of creamy peanut butter into the pudding mixture.
- Top with crushed peanut butter cups before chilling.
Caramel Banana Éclair Cake
- Add sliced bananas and a drizzle of caramel between layers.
- Use banana cream pudding instead of vanilla.
Lemon Éclair Cake
- Replace vanilla pudding with lemon pudding.
- Top with lemon zest and whipped cream.
The possibilities are endless, making this no-bake éclair cake perfect for any occasion or craving.
Serving Suggestions
This no-bake éclair cake is best served cold, straight from the refrigerator. Here are a few ways to elevate your presentation:
- Top with fresh berries like strawberries or raspberries for a pop of color.
- Dust with cocoa powder or drizzle with melted chocolate for a bakery-style finish.
- Serve with a scoop of vanilla ice cream on the side for a decadent dessert plate.
- Garnish with mint leaves or chocolate shavings to impress guests.
It’s already a showstopper, but a little garnish goes a long way!
Storage Instructions
Refrigeration
This cake stores beautifully in the fridge. Keep it tightly covered with plastic wrap or foil and enjoy it within 4–5 days. The longer it sits, the softer the graham cracker layers become.
Freezing
Yes, you can freeze it!
- Wrap the entire dish tightly in plastic wrap, then in foil, and freeze for up to 1 month.
- To serve, thaw in the refrigerator overnight.
Freezing may slightly affect the texture of the whipped topping, but overall, the cake holds up well.
Frequently Asked Questions (FAQs)
What kind of pudding should I use?
Instant vanilla pudding works best, but you can experiment with flavors like chocolate, banana cream, or lemon for a fun twist.
Can I make this éclair cake ahead of time?
Absolutely! This dessert is better when made in advance. Ideally, prepare it the night before so the layers have plenty of time to set.
Can I use homemade whipped cream instead of Cool Whip?
Yes, but note that homemade whipped cream may not hold up as well over time. Stabilize it with a bit of powdered sugar or gelatin if you’re prepping the cake a day or two in advance.
Is there a gluten-free version?
Yes. Simply use gluten-free graham crackers and double-check that your pudding mix is gluten-free.
Can I use sugar-free pudding or low-fat ingredients?
You can, but the texture and richness may vary slightly. Stick with full-fat for the best flavor and consistency.
Why is my éclair cake runny or soupy?
The most common reasons are:
- Not letting the pudding thicken before layering.
- Not chilling the cake long enough to set.
Always give it enough time in the fridge to firm up.
Can I make individual servings?
Yes! Use mini mason jars or small dessert cups to create individual no-bake éclair cakes—perfect for parties or potlucks.
Conclusion
The no-bake éclair cake is a timeless classic that proves simplicity and indulgence can go hand in hand. With layers of graham crackers, fluffy vanilla pudding, whipped topping, and rich chocolate frosting, this dessert delivers pure comfort in every bite. Whether you’re serving it at a holiday gathering, bringing it to a potluck, or treating yourself on a quiet evening, it never fails to satisfy.
This cake doesn’t require an oven, a fancy technique, or exotic ingredients. Yet, it always manages to impress. Its versatility means you can customize it to your heart’s content—from fruity to chocolatey, from peanut buttery to lemony—making it one of the most adaptable no-bake recipes out there.
So the next time you’re craving a dessert that’s big on flavor but low on effort, give this no-bake éclair cake a try. It’s truly a slice of heaven, and once you taste it, you’ll understand why it’s a beloved favorite around the world.
Print
No-Bake Éclair Cake – Layers of Dreamy Goodness!
Ingredients
Serves 12
-
1 box (14.4 oz) graham crackers (about 3 sleeves)
-
2 packages (3.4 oz each) instant vanilla pudding mix
-
3 cups cold milk
-
1 tub (8 oz) whipped topping (like Cool Whip), thawed
-
1 can (16 oz) chocolate frosting (or homemade ganache, see below)
Instructions
Step 1: Make the Filling
-
In a large mixing bowl, whisk together pudding mix and cold milk for 2 minutes until it thickens.
-
Gently fold in the whipped topping until smooth and fluffy.
Step 2: Layer the Cake
-
In a 9×13-inch baking dish, arrange a layer of graham crackers to cover the bottom (break as needed).
-
Spread half of the pudding mixture over the graham crackers.
-
Add another layer of graham crackers, then the remaining pudding mixture.
-
Finish with a final layer of graham crackers on top.
Step 3: Add the Chocolate Frosting
-
Microwave the frosting (uncovered) for about 15 seconds to soften slightly—just enough to make it spreadable.
-
Spread evenly over the top graham cracker layer.
Step 4: Chill
-
Cover with plastic wrap and refrigerate for at least 6 hours, or preferably overnight, to allow the layers to soften and meld.


