Introduction
Sheet pan meals have become a beloved staple for home cooks, and for good reason. They simplify dinner without sacrificing flavor or variety. One standout option is a sheet pan pierogies and kielbasa dish that combines hearty Eastern European flavors with the ease of oven cooking.
Pierogies, those delightful dumplings filled with potatoes, cheese, or other savory fillings, pair wonderfully with kielbasa, a robust smoked sausage. This dish brings both textures and tastes together while allowing them to roast to perfection. Plus, it reduces cleanup time, leaving you more time to enjoy your meal with family.
Ingredients
- 24 oz frozen pierogies
Frozen pierogies are convenient and ready to cook, providing a quick way to add substance to your meal. They usually come in various fillings, like potato and cheese, which complement the flavors of the kielbasa beautifully. - 14 oz kielbasa, sliced
Kielbasa is a flavorful smoked sausage that adds depth to this dish. Its rich, meaty profile pairs perfectly with the softer textures of the pierogies, giving a satisfying chew with every bite. - 1 cup bell peppers, sliced
Bell peppers bring not just a burst of color but also a natural sweetness and slight crunch to the dish. Their vibrant flavor enhances the overall taste profile, balancing the richness of the sausage and pierogies. - 1 medium onion, sliced
Onions are aromatic and add layers of flavor as they caramelize in the oven. Their sweetness intensifies when roasted, providing a wonderful contrast to the savory elements and rounding out the dish. - 2 tbsp olive oil
Olive oil is essential for roasting, helping to crisp the edges of the pierogies and kielbasa while keeping everything moist. It adds a subtle richness that ties the entire dish together. - 1 tsp garlic powder
Garlic powder amplifies the savory notes of the dish without the need for fresh garlic. It's a quick way to infuse the meal with flavor, giving an aromatic backdrop that enhances all the ingredients. - 1 tsp smoked paprika
Smoked paprika delivers a hint of smokiness that echoes the kielbasa's flavor. It also contributes a warm color and depth, making the dish visually appealing alongside its delicious taste. - Salt and pepper to taste
Seasoning with salt and pepper is crucial to enhancing each ingredient's natural flavors. Adjusting the salt levels helps balance the richness of the kielbasa and pierogies, allowing the other components to shine.
Directions & Preparation
Step 1: Preheat your oven to 400°F (200°C).
Preheating the oven is critical for ensuring that the pierogies and kielbasa cook evenly and achieve a desirable crispness. An adequately heated oven allows all ingredients to develop their flavors through roasting, leading to a satisfying texture and taste.
Step 2: Prepare a large sheet pan by lining it with parchment paper or lightly greasing it.
Lining the pan not only makes for easier cleanup but also helps prevent sticking, particularly for the pierogies, which can lose their shape if they adhere to the pan. A well-prepared surface ensures that each piece can roast evenly and achieve a golden-brown finish.
Step 3: In a large mixing bowl, toss together the frozen pierogies, sliced kielbasa, sliced bell peppers, sliced onion, olive oil, garlic powder, smoked paprika, salt, and pepper.
Tossing the ingredients together ensures that all the flavors are evenly distributed and that every pierogi and piece of kielbasa gets coated with the oil and seasonings. This step enhances the flavor of the dish and promotes even cooking, allowing each ingredient to shine.
Step 4: Spread the mixture evenly on the prepared sheet pan.
Spreading the ingredients in a single layer is essential for proper roasting. Crowding the pan would trap steam, causing everything to steam rather than roast. An even distribution ensures crispy edges and helps achieve that wonderfully roasted flavor.
Step 5: Roast in the oven for 25-30 minutes or until pierogies are golden brown and kielbasa is slightly crispy.
Roasting for the correct amount of time allows the pierogies to cook thoroughly while the kielbasa crisps up nicely. Keep an eye on the dish towards the end, as different ovens may have variations in cooking time, and you want to catch the perfect golden-brown finish.
Step 6: Remove from the oven and let cool for a few minutes before serving.
Allowing the dish to rest for a few minutes helps the flavors meld and makes it easier to serve. This brief cooling time ensures you avoid burning your mouth on the hot ingredients and allows the aromas to intensify further.

Combining Textures and Flavors on One Pan
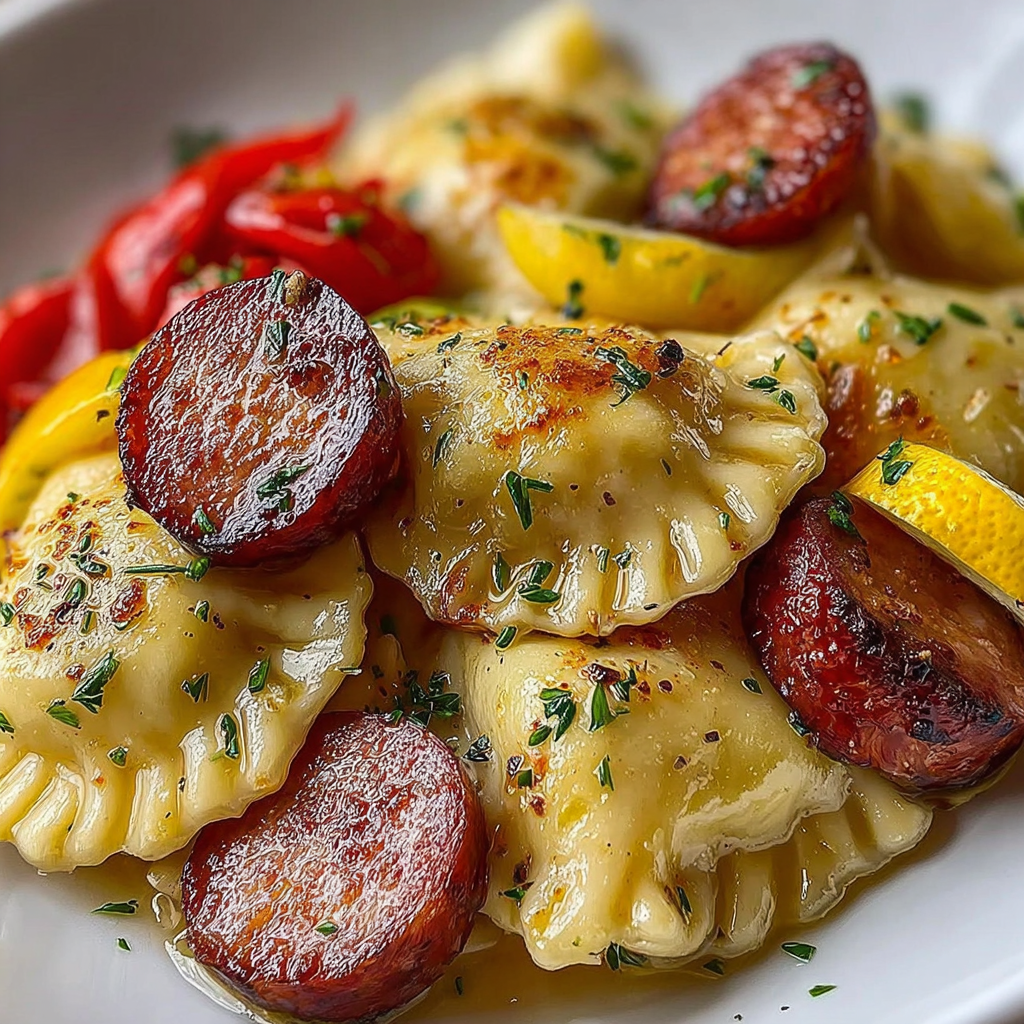
This sheet pan dish captures the heart of wholesome cooking by allowing a variety of textures and tastes to coexist harmoniously. The crispy golden pierogies contrast with the juicy kielbasa and tender roasted peppers and onions, creating a delightful medley that pleases both the palate and the senses. Each bite unveils layers of flavor that reflect the dish's Eastern European roots yet appeal to contemporary dining.
Minimal Effort, Maximum Flavor
The beauty of this recipe lies not only in its robust flavors but also in its simplicity. By utilizing frozen pierogies and pre-cooked kielbasa, you cut down prep time significantly without compromising quality or taste. It’s the type of meal that invites you to enjoy time with loved ones rather than spending hours in the kitchen, making it a practical choice for busy weeknights.
Customize Your Ingredients
One of the best parts of this dish is its versatility. Feel free to swap out the vegetables based on your preference or seasonal availability; adding broccoli or zucchini can offer delightful surprises. You may even experiment with different flavored kielbasa or add spices to suit your taste, making it easy to cater to various dietary needs or family favorites.
FAQs
What if my pierogies stick to the pan?
If you find your pierogies sticking despite greasing or lining the pan, ensure the oil is evenly distributed during preparation. Adding more olive oil to the mix can create a protective barrier.
Can I use fresh pierogies instead of frozen ones?
Absolutely, if you're using fresh pierogies, reduce the baking time as they usually need less time to cook compared to frozen pierogies. Keep an eye on them to avoid overcooking.
What if I want a spicier kick?
To add heat, consider including a pinch of red pepper flakes or some diced jalapeños in the mix. This will elevate the dish's spice level and create an exciting flavor profile.
What can I do if my vegetables cook faster than the pierogies?
To avoid uneven cooking, cut your vegetables into larger pieces or add them halfway through cooking. This way, they will roast perfectly while allowing the pierogies to catch up.
How can I make this dish more colorful?
Incorporating a variety of colored bell peppers or adding additional vegetables like carrots or yellow squash can brighten up your dish significantly, making it visually appealing and nutritious.
What if my kielbasa isn't crispy enough?
If your kielbasa isn’t crispy at the end of cooking, you can broil the tray for a couple of minutes. Keep a close eye during broiling to ensure it doesn’t overcook.
Conclusion
This sheet pan pierogies and kielbasa dish perfectly exemplifies the ease and satisfaction of home cooking. It combines comfort and flavor, making it a wonderful addition to your weeknight meals.
With minimal prep and clean-up, you can enjoy a hearty meal without the hassle. Whether it’s a cozy family dinner or a gathering with friends, this recipe guarantees to please everyone's palate.
Recipe Card

Sheet Pan Pierogies with Savory Kielbasa Bake
Ingredients
Method
- Preheat your oven to 400°F (200°C).
- Prepare a large sheet pan by lining it with parchment paper or lightly greasing it.
- In a large mixing bowl, toss together the frozen pierogies, sliced kielbasa, sliced bell peppers, sliced onion, olive oil, garlic powder, smoked paprika, salt, and pepper.
- Spread the mixture evenly on the prepared sheet pan.
- Roast in the oven for 25-30 minutes or until pierogies are golden brown and kielbasa is slightly crispy.
- Remove from the oven and let cool for a few minutes before serving.
Notes
Additional serving suggestions: pair with a crisp salad, garlic bread, or roasted seasonal vegetables for balance.
For make-ahead, prep components separately and assemble just before heating to preserve texture.
Taste and adjust with acid (lemon/vinegar) and salt right at the end to wake up flavors.


