Introduction
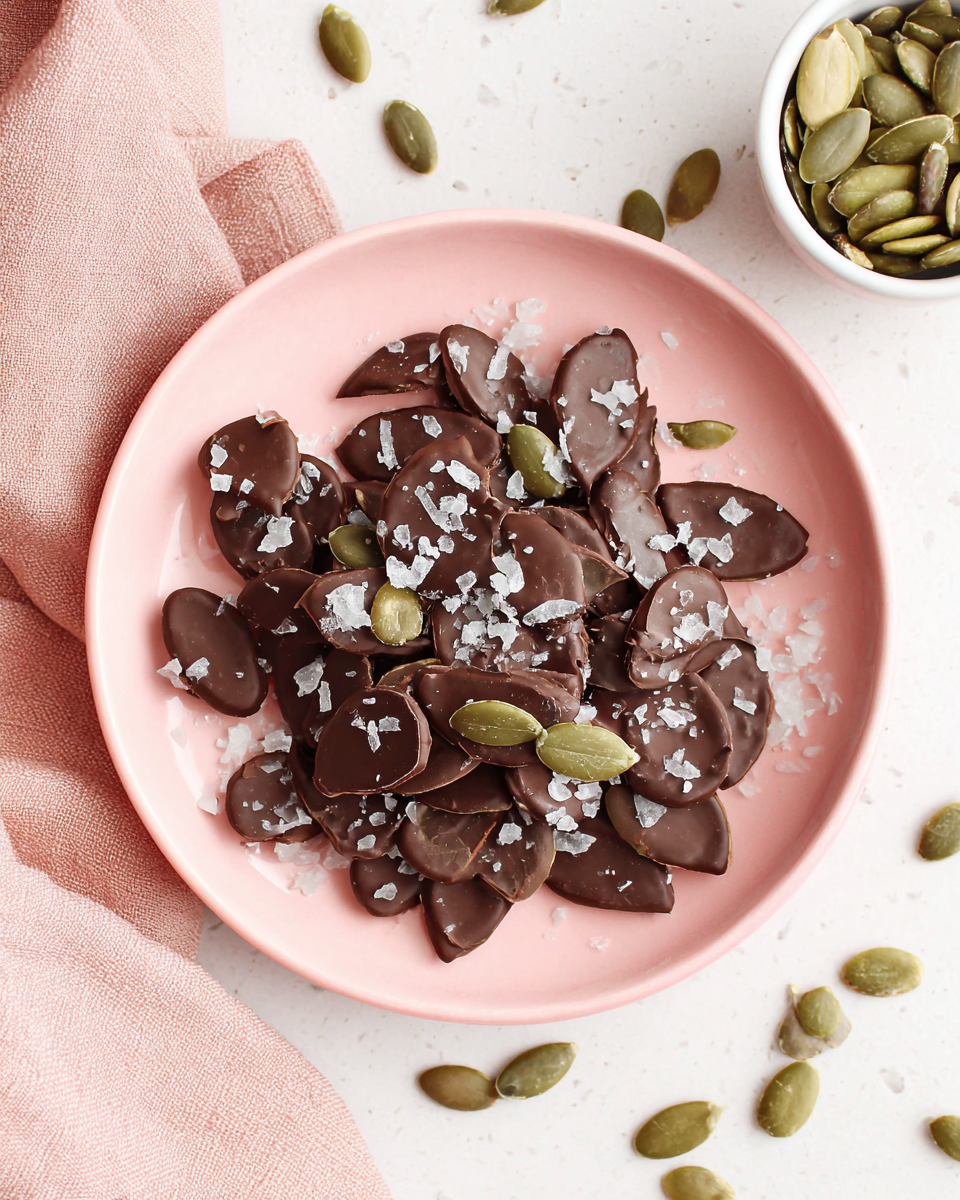
If you're looking for a snack that's both satisfying and nutritious, look no further than crunchy chocolate covered pumpkin seeds. These delightful bites combine the rich, earthy flavor of pumpkin seeds with the smooth sweetness of chocolate, creating a perfect balance that will keep you coming back for more.
Not only are they delicious, but pumpkin seeds, or pepitas, are packed with health benefits. They are a great source of protein, healthy fats, and essential minerals like magnesium and zinc, making them a wholesome choice for a mid-day treat or party snack.
In this recipe, we'll show you how to make these crunchy chocolate-covered treats at home, using simple ingredients that are easy to find. With just a few steps, you'll create a snack that delights the taste buds and provides a satisfying crunch.
Ingredients
- 2 cups raw pumpkin seeds (pepitas)
Pumpkin seeds not only provide a satisfying crunch but are also rich in nutrients, including protein and healthy fats, making them a nutritious base for this recipe. - 1 cup dark chocolate chips
Dark chocolate adds a sweet, indulgent coating and contributes antioxidants to the mix, enhancing the overall flavor and health benefits of the snack. - 1 tablespoon coconut oil
Coconut oil helps to melt the chocolate smoothly and ensures an even coating over the pumpkin seeds while adding a subtle coconut flavor. - 1 teaspoon vanilla extract
Vanilla extract enhances the flavor profile of the chocolate, providing a pleasant aromatic quality that complements the overall taste. - 1/2 teaspoon sea salt
A sprinkle of sea salt balances the sweetness of the chocolate, enhancing the flavor of the pumpkin seeds and creating a delightful contrast. - 1/2 teaspoon cinnamon (optional)
Cinnamon adds a warm spice that pairs beautifully with chocolate and pumpkin, giving the snack an extra layer of flavor for a cozy twist.
Directions & Preparation
Step 1: Preheat your oven to 350°F (175°C) and prepare a baking sheet.
Preheating the oven helps create an environment for toasting the pumpkin seeds, enhancing their nutty flavor and crunchiness. Line your baking sheet with parchment paper for easy cleanup and to prevent the seeds from sticking.
Step 2: Spread the pumpkin seeds in a single layer on the baking sheet and toast for about 10-15 minutes.
Toasting the pumpkin seeds brings out their natural flavor and gives them a delightful crunch. Be sure to stir them midway through roasting to ensure even toasting and prevent burning. Watch closely, as seeds can easily go from toasted to burnt.
Step 3: While the seeds are toasting, melt the chocolate and coconut oil together.
Melt the chocolate and coconut oil in a microwave-safe bowl in short intervals, stirring frequently to ensure a smooth consistency. The coconut oil helps thin the chocolate so it coats the seeds evenly, creating a deliciously smooth layer.
Step 4: Remove the toasted pumpkin seeds from the oven and let them cool slightly.
Allowing the seeds to cool slightly before adding them to the chocolate prevents the chocolate from seizing and maintains a good texture. It also makes them easier to handle without burning your fingers.
Step 5: Pour the melted chocolate mixture over the pumpkin seeds and stir to coat evenly.
Stirring the pumpkin seeds thoroughly ensures that every seed is covered in chocolate, leading to a satisfying bite with each piece. Use a spatula or spoon to gently fold the seeds in the chocolate.
Step 6: Add vanilla extract and sea salt, stirring to combine all ingredients well.
Incorporating vanilla extract and sea salt adds depth and complexity to the flavor. The salt enhances the sweetness of the chocolate and the flavor of the pumpkin seeds, balancing everything beautifully.
Step 7: Spoon the chocolate-covered pumpkin seeds onto the prepared baking sheet in clusters.
Creating small clusters allows for easy snacking and ensures a mix of chocolate and seeds in each bite. Spread them out well to prevent clumping and allow them to cool and harden uniformly.
Step 8: Refrigerate until the chocolate is set, about 30 minutes.
Chilling the clusters helps the chocolate firm up quickly, allowing you to enjoy your crunchy snack sooner. This step is crucial for achieving the perfect texture and making the seeds easy to separate.
Step 9: Once set, break apart any clusters and store in an airtight container.
Breaking apart the clusters ensures that you have individual bites that are ready to enjoy. Storing them in an airtight container keeps your chocolate-covered pumpkin seeds fresh for longer, retaining their crispiness.

The Nutritional Powerhouse of Pumpkin Seeds
Pumpkin seeds are often overlooked, yet they are a nutritional powerhouse loaded with protein, antioxidants, and a variety of essential minerals such as magnesium and zinc. These nutrients play a crucial role in maintaining overall health, supporting the immune system, and improving heart health. Incorporating pumpkin seeds into your diet can provide numerous health benefits while also adding a delightful crunch to your snacks.
How Chocolate Elevates This Snack
Chocolate, particularly dark chocolate, is known for its indulgent flavor and health benefits. Rich in antioxidants, it can help reduce inflammation and improve heart health when consumed in moderation. When paired with pumpkin seeds, the natural bitterness of dark chocolate complements the earthiness of the seeds, making each bite not only delicious but also enriching, elevating this snack to a new level of enjoyment.
Customizing Your Crunchy Snack
One of the joys of making chocolate-covered pumpkin seeds is the ability to customize the flavors to suit your preferences. Consider adding spices like cayenne for heat, or mixing in dried fruits and nuts for added texture and sweetness. This versatility makes it easy to experiment and create a blend that resonates with your taste buds, inviting you to craft your unique version of this delightful snack.
FAQs
What if the chocolate coating is too thick?
If your chocolate coating seems too thick, you can add a bit more melted coconut oil to the mixture. This will help to thin it out, allowing for a smoother application over the pumpkin seeds.
Can I use milk chocolate instead of dark chocolate?
Yes, you can substitute milk chocolate for dark chocolate if you prefer a sweeter flavor. Just keep in mind that the health benefits will be slightly altered with a higher sugar content.
What can I do if my pumpkin seeds burn while toasting?
If your pumpkin seeds burn, it’s crucial to keep a close eye on them as they toast. Next time, reduce the roasting time and check them frequently to avoid this issue.
How can I adjust the flavor if it’s too bland?
If you find that the flavor is too bland, consider adding a pinch of additional salt or enhancing it with spices such as cinnamon or nutmeg for an extra kick.
What if I want to make a larger batch?
You can easily double or triple the recipe by ensuring you have an adequate bowl for mixing and a larger baking sheet. Just adjust your ingredient quantities accordingly.
Can I add other toppings to the chocolate-covered seeds?
Absolutely! Feel free to sprinkle in some crushed nuts, seeds, or even shredded coconut on top of the chocolate before it sets for an added layer of flavor and texture.
Conclusion
In just a few straightforward steps, you've created a deliciously crunchy and healthy snack that’s perfect for any occasion. Whether you're enjoying them as a quick pick-me-up or impressing friends at a gathering, these chocolate-covered pumpkin seeds are sure to delight.
The beauty of this recipe lies not only in its taste but also in its versatility. With various customization options, you can personalize each batch to suit your preferences, making this a staple snack in your home. Enjoy every bite!
Recipe Card
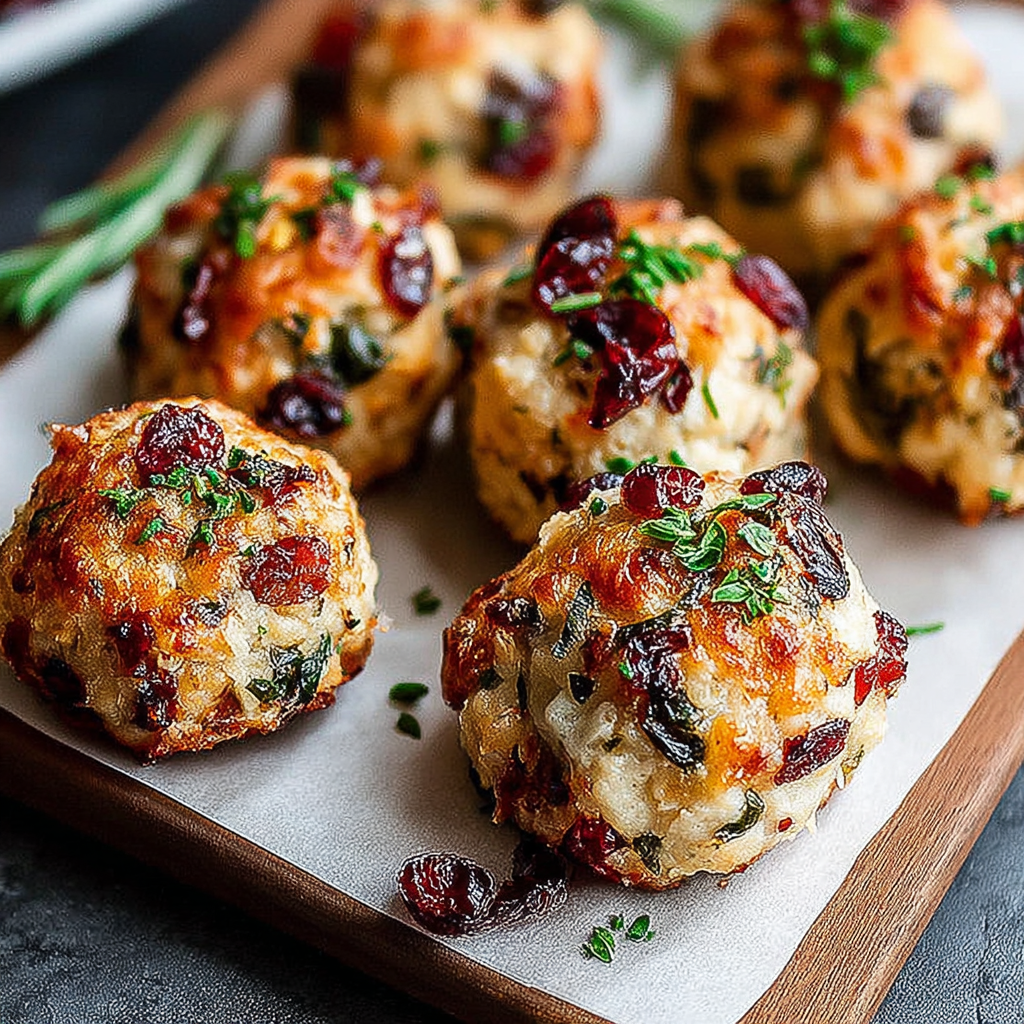
Cranberry Turkey Stuffing Balls for Home Cooks
Ingredients
Method
- Preheat your oven to 375°F (190°C).
- In a large mixing bowl, combine the ground turkey, stuffing mix, cranberries, onion, celery, garlic, thyme, sage, salt, and black pepper.
- In a separate bowl, whisk the egg and chicken broth together until well combined.
- Pour the egg mixture into the turkey mixture and stir until just combined.
- Using your hands, form the mixture into golf ball-sized balls and place them on a greased baking sheet.
- Bake in the preheated oven for 25-30 minutes or until the internal temperature reaches 165°F (74°C).
- Allow the stuffing balls to cool slightly before serving.
Notes
Additional serving suggestions: pair with a crisp salad, garlic bread, or roasted seasonal vegetables for balance.
For make-ahead, prep components separately and assemble just before heating to preserve texture.
Taste and adjust with acid (lemon/vinegar) and salt right at the end to wake up flavors.


