Introduction
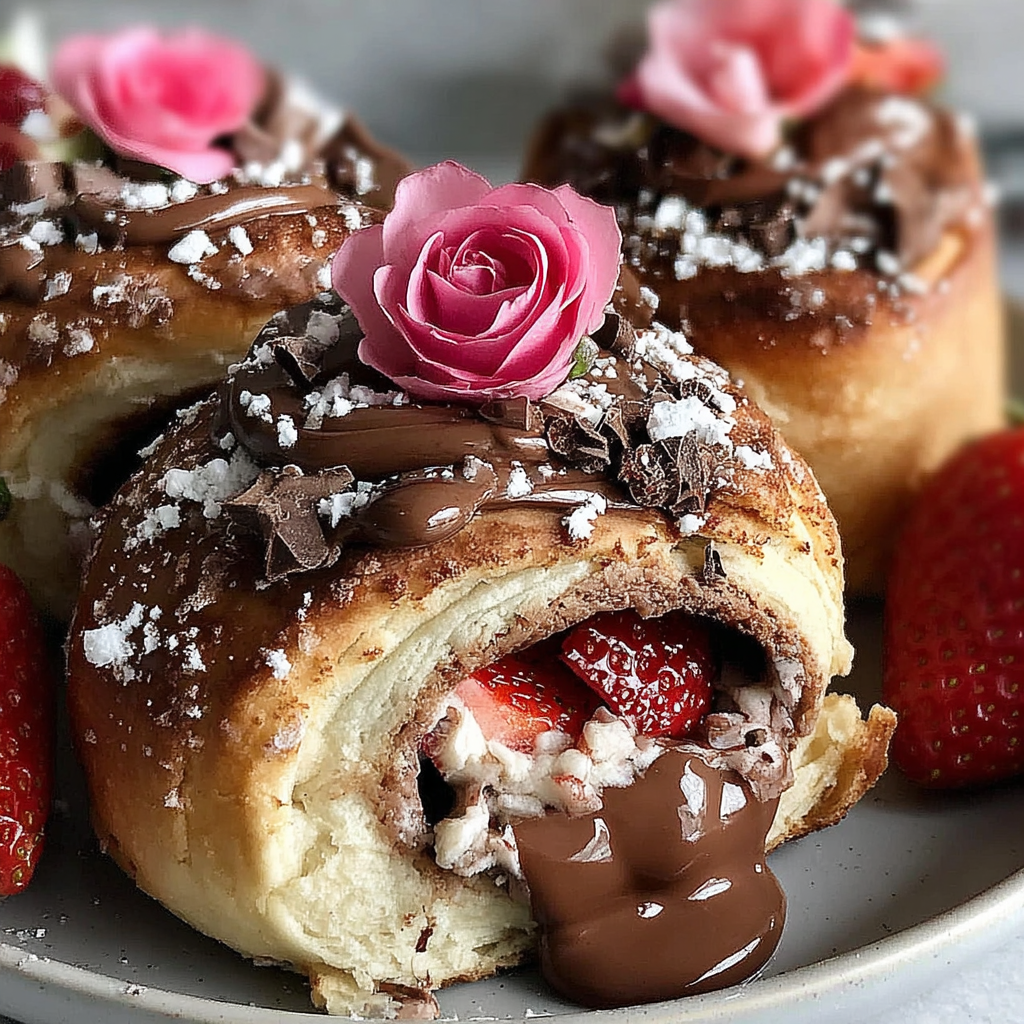
Valentine's Day is the perfect occasion to whip up something special, and what better way to express your love than with homemade chocolate rolls? These sweet, soft pastries are filled with rich chocolate and topped with a glossy glaze, making them irresistible.
Creating chocolate rolls may seem daunting, but the process is straightforward and rewarding. With a few simple ingredients, you can craft a delightful treat that will impress your partner and enhance the romantic atmosphere of the day.
Ingredients
- 3 cups all-purpose flour
Flour is the foundation of the rolls, providing structure and stability. All-purpose flour offers the right balance of protein content, resulting in a soft yet sturdy dough that holds its shape during baking. - 1 cup warm milk
Warm milk helps activate the yeast, ensuring a good rise. It also adds moisture and a subtle sweetness to the dough, contributing to the overall texture and flavor of the rolls. - 1/4 cup granulated sugar
Sugar not only sweetens the rolls but also feeds the yeast, helping it to bloom. This results in a beautifully risen dough with a light and airy texture. The sugar is also essential for the glaze. - 1/4 cup unsalted butter, melted
Butter enriches the dough, adding flavor and tenderness. The fat coats the flour proteins, resulting in a softer roll. Melted butter also helps bind ingredients together smoothly. - 1 packet (2 1/4 tsp) active dry yeast
Yeast is the key leavening agent that causes the dough to rise. Active dry yeast needs to be activated in warm liquid, making it vital for achieving the desired fluffy texture in your rolls. - 1/2 teaspoon salt
Salt is crucial for enhancing flavor and controlling yeast activity. It ensures that the rolls are well-seasoned and helps create a balanced dough that doesn't rise too quickly. - 1 cup chocolate chips
Chocolate chips provide rich chocolatey flavor and gooey texture in the filling. They melt during baking, creating delightful pockets of sweetness that are irresistible. - 1 cup powdered sugar
Powdered sugar is used for the glaze, creating a smooth, sweet finish. It blends easily with cream or milk to create a glossy coating that enhances the overall appearance of the rolls. - 2 tablespoons cream or milk (for glazing)
Cream or milk is combined with powdered sugar to make a smooth glaze, adding richness and a lovely sheen. It helps the glaze adhere to the rolls, providing a beautiful finish.
Directions & Preparation
Step 1: Activate the yeast.
Begin by combining the warm milk, sugar, and yeast in a bowl. Allow the mixture to sit for about 5-10 minutes until frothy. This step is essential as it ensures that the yeast is alive and ready to create carbon dioxide, which helps the dough rise. The frothy mixture indicates that the yeast has been activated successfully.
Step 2: Mix the dry ingredients.
In a large mixing bowl, whisk together the flour and salt. Mixing the dry ingredients separately ensures that the salt is evenly distributed throughout the flour, preventing any uneven saltiness. This step prepares the foundation for a balanced dough.
Step 3: Combine the mixtures.
Next, pour the activated yeast mixture and melted butter into the dry ingredients. Mix until a dough forms. This step is crucial as it brings all components together, allowing gluten to develop. Knead the mixture gently until a smooth, elastic dough forms.
Step 4: Let the dough rise.
Cover the bowl with a damp cloth and let the dough rise in a warm place for about 1-2 hours, or until doubled in size. This step is vital for developing flavor and texture, allowing the yeast to work its magic. Be patient; the longer the rise, the better the flavor!
Step 5: Prepare the filling.
While the dough is rising, melt the chocolate chips in a microwave or over a double boiler. Stir until smooth. This filling adds a rich, decadent center to your rolls. Ensuring the chocolate is not too hot when spreading is essential to prevent it from melting the dough.
Step 6: Roll out the dough.
Once the dough has risen, punch it down and roll it out on a floured surface into a rectangle, about 1/2 inch thick. This step allows you to create an even surface for spreading the chocolate. When rolling, use gentle pressure to maintain the dough's airy texture.
Step 7: Spread the chocolate.
Spread the melted chocolate evenly over the rolled-out dough, leaving a small border at the edges. This is where the chocolate's gooeyness will enrich the rolls once baked. Be careful not to overfill, or the chocolate may ooze out while baking.
Step 8: Shape the rolls.
Starting from the long edge, tightly roll the dough into a log. Slice the log into even pieces about 1-2 inches thick. Properly shaping the rolls ensures they bake evenly and maintain their spiral form, creating those beautiful chocolate swirls.
Step 9: Second rise.
Place the sliced rolls in a greased baking dish or on a parchment-lined sheet, making sure they’re close but not touching. Cover and let them rise for another 30-45 minutes. This second rise is crucial for achieving that fluffy texture and helps the rolls hold their shape during baking.
Step 10: Bake the rolls.
Preheat your oven to 350°F (175°C). Bake the rolls for 20-25 minutes or until golden brown. Keep an eye on them towards the end to prevent over-browning. Proper baking develops flavor and texture, giving you that sought-after golden crust.
Step 11: Prepare the glaze.
While the rolls are baking, whisk together the powdered sugar and cream or milk until smooth. This glaze adds a sweet finish that complements the richness of the chocolate. Adjust the consistency by adding more cream for a thinner glaze if desired.
Step 12: Glaze the rolls.
Once the rolls are out of the oven and slightly cooled, drizzle the glaze over them generously. The warmth of the rolls will slightly melt the glaze, allowing it to soak in and create a delightful, sweet crust. This finishing touch brings everything together beautifully.

Creating a Romantic Atmosphere
Making chocolate rolls is not just about the recipe; it's also about the experience. Create a romantic atmosphere by setting the table with soft lighting and your favorite music in the background. As you bake, enjoy the process together and savor the excitement of knowing how delightful the end result will be.
Perfect Pairings for Chocolate Rolls
These delicious chocolate rolls can be beautifully complemented by a side of fresh berries or a scoop of vanilla ice cream. Consider serving them with a generous dollop of whipped cream for an extra indulgent treat. Pair with a warm cup of coffee or a glass of sparkling wine to enhance the celebratory feel.
Customizing Your Chocolate Rolls
Feel free to get creative with the recipe by adding different fillings, such as peanut butter, hazelnut spread, or even a touch of espresso powder to the chocolate for a mocha twist. The dough can also be flavored with orange zest or cinnamon for an added aroma and taste, making each tray uniquely yours.
FAQs
What can I do if my rolls are too dense?
If your rolls turn out dense, it may be due to insufficient rising time or too much flour in the dough. Ensure to give the dough enough time to rise fully during both rises for a fluffier texture.
Is it possible to use whole wheat flour?
Yes, you can substitute half or all of the all-purpose flour with whole wheat flour. However, you may need to adjust the liquid slightly, as whole wheat flour absorbs more moisture.
Why did my chocolate filling leak out during baking?
Leaking may occur if the chocolate was too warm or if excessive filling was used. To prevent this, allow the chocolate to cool slightly before spreading it, and adhere to the recommended chocolate amount.
Can I add nuts to the filling?
Absolutely! Chopped nuts such as walnuts or pecans pair wonderfully with chocolate. Just sprinkle them on top of the chocolate before rolling the dough.
What if my dough doesn’t rise?
If your dough doesn’t rise, the yeast might be inactive due to old yeast or incorrect liquid temperature. Always proof your yeast before adding, and keep the dough in a warm, draft-free place.
How can I make the rolls more chocolatey?
To enhance the chocolate flavor, try adding cocoa powder to the dough itself or doubling the amount of chocolate chips in the filling for a richer taste.
Can I omit the glaze?
While the glaze adds a lovely finish, you can certainly enjoy the rolls without it. For a lighter option, dust them with powdered sugar instead.
Conclusion
These chocolate rolls are not just a treat but a delightful way to create memories on Valentine's Day. The process of baking together can be just as sweet as sharing the finished product.
With a little practice, you'll have these rolls perfect for any occasion, whether it's a romantic evening or a cozy family brunch. Enjoy the love and joy that comes from homemade treats!
Recipe Card

Decadent Chocolate Rolls for a Romantic Celebration
Ingredients
Method
- Activate the yeast.
- Mix the dry ingredients.
- Combine the mixtures.
- Let the dough rise.
- Prepare the filling.
- Roll out the dough.
- Spread the chocolate.
- Shape the rolls.
- Second rise.
- Bake the rolls.
- Prepare the glaze.
- Glaze the rolls.
Notes
Additional serving suggestions: pair with a crisp salad, garlic bread, or roasted seasonal vegetables for balance.
For make-ahead, prep components separately and assemble just before heating to preserve texture.
Taste and adjust with acid (lemon/vinegar) and salt right at the end to wake up flavors.


