Introduction
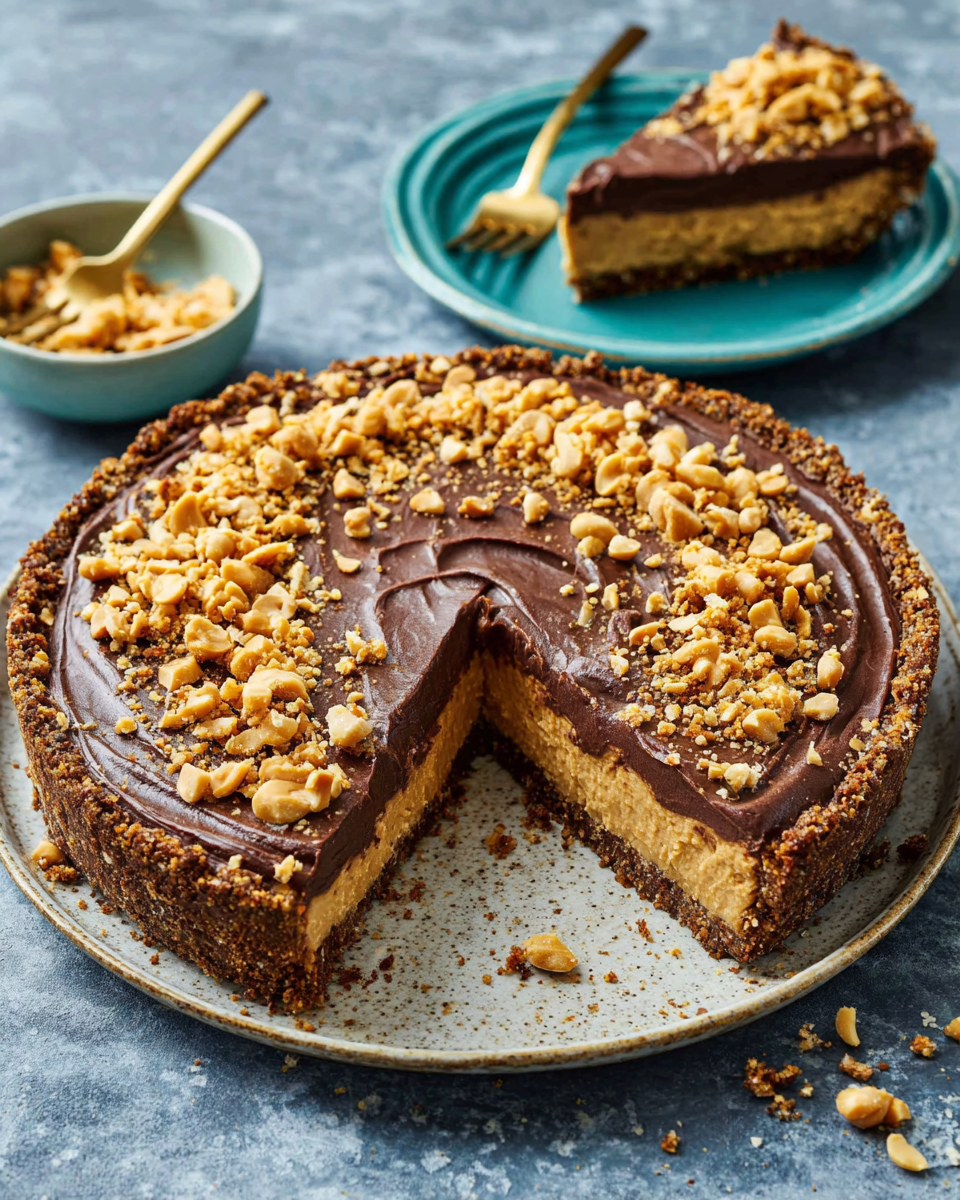
Peanut butter pie is a dessert that feels like a comforting hug in slice form. The creamy blend of peanut butter and cream cheese, paired with a light, airy whipped topping, creates a luscious filling that is simply irresistible. And the best part? You don’t need to turn on the oven to whip up this delightful treat.
Whether you're hosting a gathering or just treating yourself, this no-bake peanut butter pie strikes the perfect balance of sweetness and richness. With a buttery graham cracker crust and smooth filling, it's a pie that everyone can appreciate and enjoy without the fuss of baking.
Ingredients
- 1 ½ cups graham cracker crumbs
Graham cracker crumbs serve as the base for the pie crust. Their slightly sweet flavor and crispy texture provide a great contrast to the rich filling. You can crush the crackers yourself or buy pre-made crumbs for convenience. - ½ cup unsalted butter, melted
Melted butter helps bind the graham cracker crumbs together, ensuring the crust holds its shape once set. Unsalted butter is preferred to control the saltiness of the overall dessert. - 1 cup creamy peanut butter
Creamy peanut butter is a star ingredient, providing both flavor and texture. It adds a rich, nutty taste that characterizes the pie, making it deeply satisfying. - 8 ounces cream cheese, softened
Softened cream cheese adds richness and a creamy texture to the filling. It helps create a smooth consistency that complements the peanut butter perfectly. - 1 cup powdered sugar
Powdered sugar provides sweetness and aids in achieving the silky texture of the filling without the grittiness that granulated sugar might impart. - 1 teaspoon vanilla extract
Vanilla extract enhances the overall flavor of the pie, adding warmth and complexity. It balances out the sweetness of the other ingredients. - 1 cup heavy whipping cream
Heavy whipping cream is whipped to create a light, airy texture that lightens the dense filling. This creates a delightful contrast and makes each bite feel indulgent yet not overly heavy. - Chopped peanuts (optional, for topping)
Chopped peanuts can be sprinkled on top for added texture and a nutty crunch. They also elevate the dish's presentation, making it look even more inviting.
Directions & Preparation
Step 1: Prepare the graham cracker crust.
In a medium bowl, combine the graham cracker crumbs and melted butter until fully mixed. This step is crucial as it forms the sturdy foundation of the pie. Once they are well combined, press the mixture evenly into the bottom and up the sides of a 9-inch pie pan. Refrigerate while preparing the filling.
Step 2: Beat the cream cheese.
In a large bowl, use an electric mixer to beat the softened cream cheese until smooth and fluffy. This step ensures there are no lumps in your filling, contributing to a creamy texture. Take your time to mix thoroughly as this forms the base for your luscious peanut butter filling.
Step 3: Add peanut butter and powdered sugar.
Blend the creamy peanut butter and powdered sugar into the whipped cream cheese until fully incorporated. This step is vital for flavor, as it allows the peanut butter to envelop the cream cheese, creating a harmonious mixture. The sweetness from the powdered sugar balances the richness of the peanut butter.
Step 4: Incorporate vanilla extract.
Stir in the vanilla extract, mixing just until combined. This enhances the pie's flavor profile and adds a subtle warmth. Don't overmix at this stage; you want to maintain the creamy texture without deflating the mixture.
Step 5: Whip the heavy cream.
In a separate chilled bowl, beat the heavy whipping cream until stiff peaks form. Whipping the cream adds air into the filling, creating a light and fluffy texture that contrasts nicely with the dense peanut butter mixture. This is where the pie gains its delightful creaminess.
Step 6: Fold in the whipped cream.
Gently fold the whipped cream into the peanut butter filling using a spatula. This step is essential for maintaining the airiness you've created with the whipped cream. Incorporating it gently will keep your filling light and fluffy.
Step 7: Fill the chilled crust.
Spoon the peanut butter filling into the prepared graham cracker crust, smoothing the top with a spatula. This step assembles your dessert and allows the filling to fully settle into the crust. Make sure it's evenly spread for a beautiful finish.
Step 8: Chill the pie.
Cover the pie with plastic wrap and refrigerate for at least 4 hours, preferably overnight. Chilling helps the pie set and allows the flavors to meld beautifully. Patience is a virtue here, as the longer it chills, the more delicious it becomes.
Step 9: Serve with toppings.
Once the pie is thoroughly chilled, remove it from the refrigerator. You can top it with additional whipped cream or sprinkle chopped peanuts for added flavor and crunch. This last step is about presentation and takes your no-bake peanut butter pie to the next level.

Variations To Enhance Your No-Bake Pie
To elevate your no-bake peanut butter pie, consider mixing in crushed chocolate cookies into the crust for a richer flavor profile. Alternatively, you could swirl in melted chocolate or caramel into the filling before it sets, introducing an exciting surprise with each slice. If you're adventurous, try flavoring the cream cheese with a hint of coffee or spices like cinnamon to create a unique twist.
Perfect Pairings for Your Pie
This delicious peanut butter pie pairs beautifully with a glass of cold milk or a hot cup of coffee. The creaminess of the pie complements the richness of coffee, creating a delightful balance. You can also serve it alongside fresh fruit like strawberries or banana slices, adding a refreshing contrast that cuts through the richness.
Storage Tips for Optimal Freshness
To keep your no-bake peanut butter pie fresh, store it in an airtight container in the refrigerator. It’s best consumed within 5 days, but the flavors improve as it sits. If you are in a warmer climate, you may want to keep it in the coldest part of your fridge to maintain its structure and creamy texture.
FAQs
How can I adjust the sweetness if it's too sweet?
If the pie is too sweet for your liking, consider adding a pinch of salt to balance the flavors or serving it with slightly unsweetened whipped cream on top.
What can I do if my filling turns out too thick?
If the filling is too thick, you can gently fold in a little more whipped cream or milk to loosen it, making it easier to spread and enhancing its creaminess.
Can I use crunchy peanut butter instead of creamy?
Yes, using crunchy peanut butter will add texture and nice little bursts of peanut flavor throughout the pie, though it will slightly change the consistency.
Is it possible to add chocolate to the recipe?
Absolutely! You can fold in melted chocolate or mini chocolate chips into the filling for a deliciously decadent chocolate-peanut butter combination.
What if my whipped cream doesn’t stiffen sufficiently?
If your whipped cream doesn’t achieve stiff peaks, re-chill it and try whipping again. Make sure your bowl and beaters are cold, as this helps achieve the right consistency.
How can I make this pie more chocolatey?
To enhance the chocolate flavor, consider making a chocolate graham cracker crust or drizzling melted chocolate over the top before chilling. You can also incorporate cocoa powder into the filling.
Conclusion
In making this no-bake peanut butter pie, you've created a dessert that's not only delicious but also simple enough for any home cook to master. The combination of flavors and textures will surely impress anyone lucky enough to enjoy a slice.
This pie is perfect for summer gatherings, family dinners, or just a sweet indulgence after a long day. With such a straightforward recipe, you can have a delightful dessert ready to share in no time.
Recipe Card
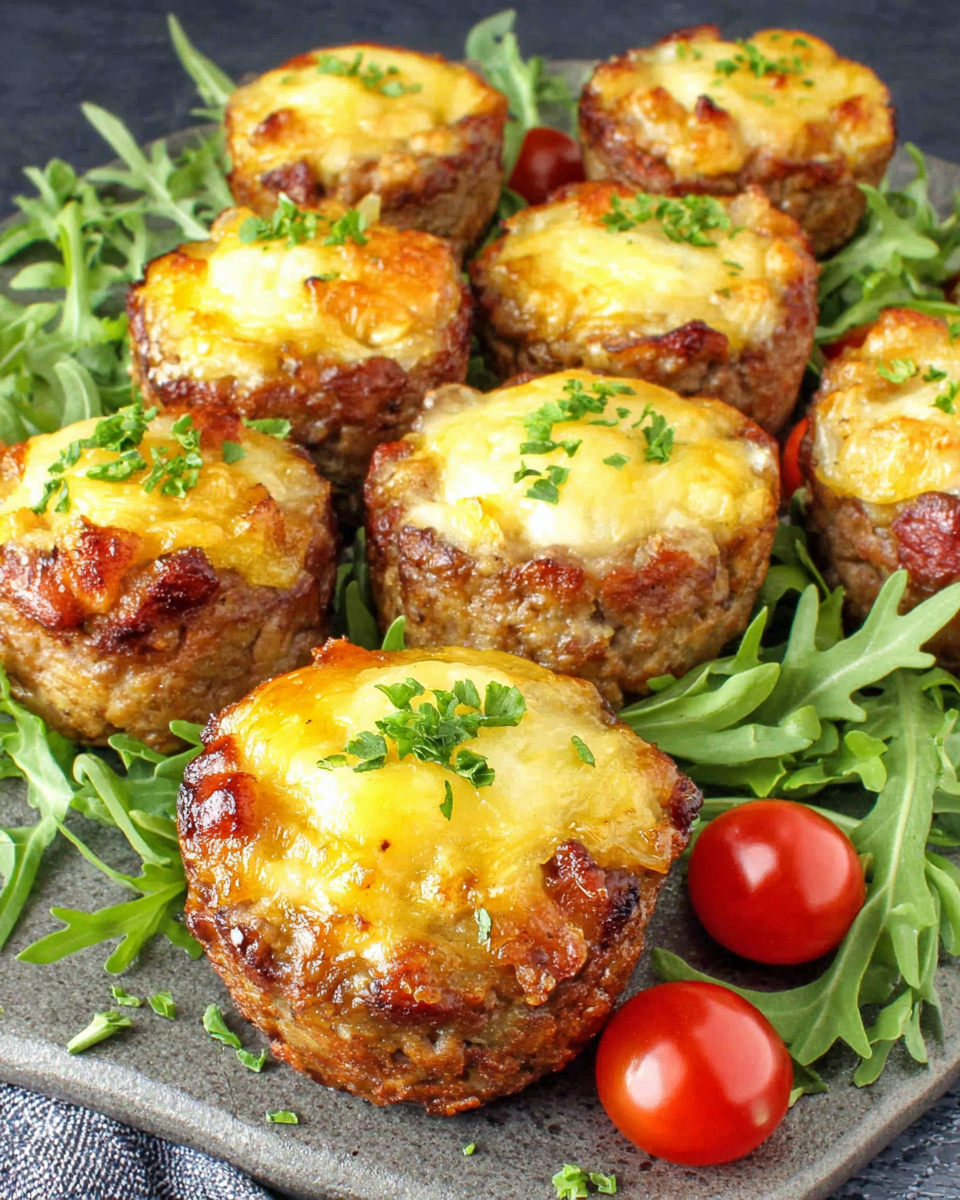
Simple and Flavorful Meatloaf Cups for Dinner
Ingredients
Method
- Preheat the oven to 375°F (190°C).
- In a large bowl, combine all the ingredients.
- Grease a muffin tin lightly with non-stick spray or oil.
- Scoop the meat mixture into each muffin cup, filling them about 3/4 full.
- Top each cup with a teaspoon of ketchup.
- Bake in the preheated oven for 20-25 minutes.
- Let the cups cool slightly before removing them from the tin.
Notes
Additional serving suggestions: pair with a crisp salad, garlic bread, or roasted seasonal vegetables for balance.
For make-ahead, prep components separately and assemble just before heating to preserve texture.
Taste and adjust with acid (lemon/vinegar) and salt right at the end to wake up flavors.


