Introduction
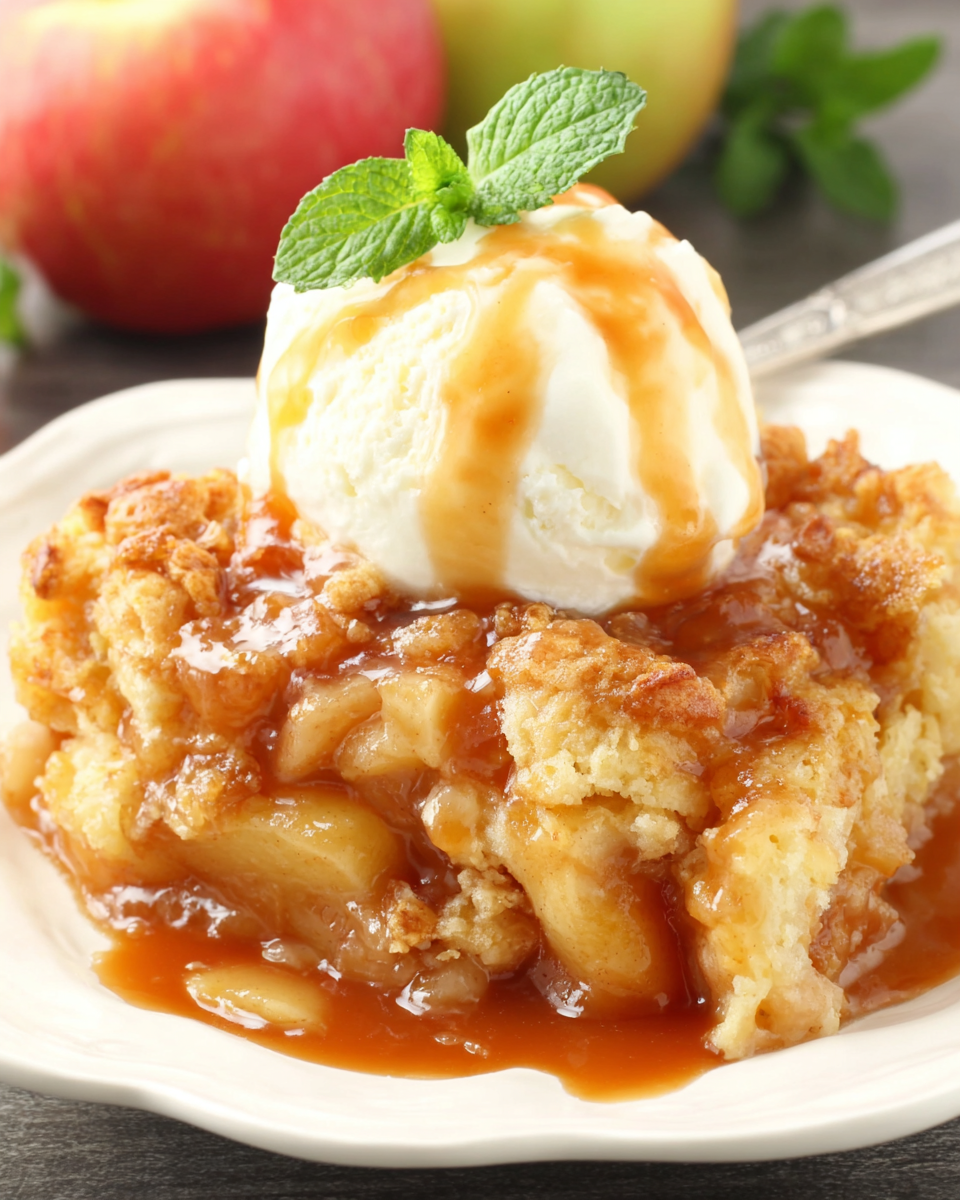
When the craving for something sweet arises, few desserts are as comforting as a homemade apple cobbler. With its tender fruit filling and crumbly topping, it's an easy crowd-pleaser that can be prepared in minutes. This delightful dessert brings together the unassuming beauty of apples with a buttery, sweet crust, making it perfect for any occasion.
What sets this easy apple cobbler apart is its simplicity. You don’t need to be a baking expert to create a stunning dish. Using fresh, ripe apples and a handful of pantry staples, you can whip this up quickly, whether for a cozy family dinner or a last-minute gathering. The inviting aroma of cinnamon and baked apples combined with the warm, crispy topping will make it a favorite in your home.
Ingredients
- 6 medium apples, peeled and sliced
Fresh apples serve as the star of this dessert, providing natural sweetness and a satisfying texture. They break down slightly while baking, creating a delicious filling. Varieties like Granny Smith or Honeycrisp are excellent due to their balance of tartness and sweetness. - 1 cup granulated sugar
Sugar sweetens the apple filling and enhances the overall flavor of the cobbler. It also helps create a beautiful caramelization during baking, adding depth to the dish. - 1 tablespoon lemon juice
Lemon juice brightens the flavor of the filling and prevents the apples from browning too quickly. It adds a hint of tang that balances the sweetness. - 1 teaspoon ground cinnamon
Cinnamon is essential for adding warmth and spice to the dessert. It complements the apples perfectly and enhances the cozy, fall-like essence of the cobbler. - 1 cup all-purpose flour
Flour forms the base of the cobbler topping. It provides structure and helps achieve a crumbly, yet tender texture that contrasts beautifully with the soft fruit beneath. - 1 teaspoon baking powder
Baking powder is a leavening agent that helps the cobbler topping rise slightly, providing a light texture. With this ingredient, you’ll avoid a dense topping. - 1/2 cup unsalted butter, melted
Butter adds richness to the topping and contributes to the lovely, golden color as it bakes. The moisture from the melted butter also ensures a tender texture. - 1/2 cup milk
Milk provides additional moisture for the cobbler topping, helping to connect the dry ingredients. It also contributes to a soft, fluffy yet appealing texture. - 1/4 teaspoon salt
Salt enhances the flavors of the other ingredients, balancing the sweetness of the sugar and bringing out the various tastes of the apples and spices.
Directions & Preparation
Step 1: Preheat the oven to 350°F (175°C).
Preheating the oven ensures that your cobbler will bake evenly. This temperature is ideal for creating a golden brown topping without burning it, while also allowing the apples to soften just right.
Step 2: Prepare the apple filling by combining sliced apples, sugar, lemon juice, and cinnamon in a large bowl. Toss until apples are well coated.
Coating the apples with sugar and cinnamon enhances their flavor and helps draw out moisture, creating a luscious filling. The lemon juice prevents browning and balances the sweetness, making the apples more vibrant.
Step 3: Pour the apple mixture into a greased 9×13 inch baking dish.
Using a greased dish prevents the cobbler from sticking during baking, making it easier to serve. The spacious size allows for even baking, ensuring every bit of apple is perfectly cooked.
Step 4: In a separate bowl, whisk together the flour, baking powder, and salt.
Combining the dry ingredients before adding the wet ensures even distribution. This step prevents clumping and helps achieve a more uniform texture in the cobbler topping.
Step 5: Stir in the melted butter and milk into the dry ingredients, mixing until just combined.
Overmixing can lead to a dense topping; just mix until the ingredients are incorporated. The moisture from the butter and milk will keep the topping light and tender.
Step 6: Drop spoonfuls of the batter over the apples. Spread gently but it’s okay if some apple is exposed.
This creates pockets of topping that will bake into a lovely golden crust. Allowing some apples to show means their natural sweetness will come through even more.
Step 7: Bake in the preheated oven for 40-45 minutes, or until the topping is golden brown and a toothpick inserted comes out clean.
Monitoring the baking time ensures you avoid overcooking, which could lead to a dry topping. The golden color is a good indicator that the cobbler is ready to be enjoyed.
Step 8: Allow cooling for a few minutes before serving warm with ice cream or whipped cream if desired.
Letting the cobbler cool slightly allows the juices to settle, making it easier to serve. The warm cobbler paired with cold ice cream creates a delightful temperature contrast.

Choosing the Right Apples
Selecting the right apples is crucial for a successful apple cobbler. Look for a mix of sweet and tart varieties, such as Fuji, Honeycrisp, or Granny Smith, to create a balance of flavors. The sweetness balances the tartness, resulting in an irresistible filling. Always choose firm apples, as they hold their shape while baking and add a pleasing texture.
Crafting the Perfect Crust
The topping of the cobbler can make or break the dish. Use cold, melted butter and combine it with the dry ingredients just until mixed. This method ensures a tender, crumbly texture that contrasts beautifully with the warm apple filling below. Don’t be alarmed by a lumpy batter; a little texture is what you want to achieve that rustic, homemade look.
Serving Suggestions
For an enhanced dessert experience, serve your apple cobbler with a scoop of vanilla ice cream or dollop of whipped cream. The richness of the ice cream complements the warm apples and spices, creating a delightful harmony in each bite. Sprinkle some additional cinnamon on top for a touch of extra flavor, or even drizzle with caramel for indulgence.
FAQs
What can I do if my cobbler topping turns out too thick?
If your topping feels too thick, it could be due to overmixing or too much flour. Adding a splash more milk can help loosen the batter, making it easier to spread over the apples.
How can I adjust the spices if I prefer a stronger flavor?
Feel free to increase the amount of cinnamon or add nutmeg to amplify the spice profile. Just be cautious with strong spices, as you want the apple flavor to shine through.
What if my cobbler is too dry after baking?
If your cobbler is dry, it may have baked too long or had too much flour. Be watchful of the baking time, as every oven is different. You can serve it with ice cream or cream to add moisture.
Can I use a different type of milk?
Yes, you can use any type of milk, including almond or oat milk, as a substitute. This flexibility allows for dietary preferences while maintaining the lovely texture of the topping.
What fruits can I mix in with the apples?
You can mix in other fruits like pears or berries, which pair beautifully with apples. This adds extra flavor and variety in texture to your cobbler.
How can I make the cobbler less sweet?
To reduce sweetness, decrease the sugar by a quarter or a third. You can compensate slightly with additional lemon juice to keep the brightness in the flavor.
Can I double the recipe for a larger crowd?
Certainly! Just ensure you use a larger baking dish and adjust the baking time as needed. Keep an eye on it as it bakes.
Conclusion
Making an easy apple cobbler is not only quick but also an enjoyable experience for home cooks of all levels. The simplicity of the ingredients paired with the comfort of the warm, baked apples makes it an unbeatable dessert. Whether enjoyed alone or paired with a scoop of ice cream, this cobbler is sure to please all who share it.
So, next time you have a handful of apples, consider whipping up this delightful dessert. It’s a wonderful way to celebrate the season and impress your family and friends with minimal effort required!
Recipe Card
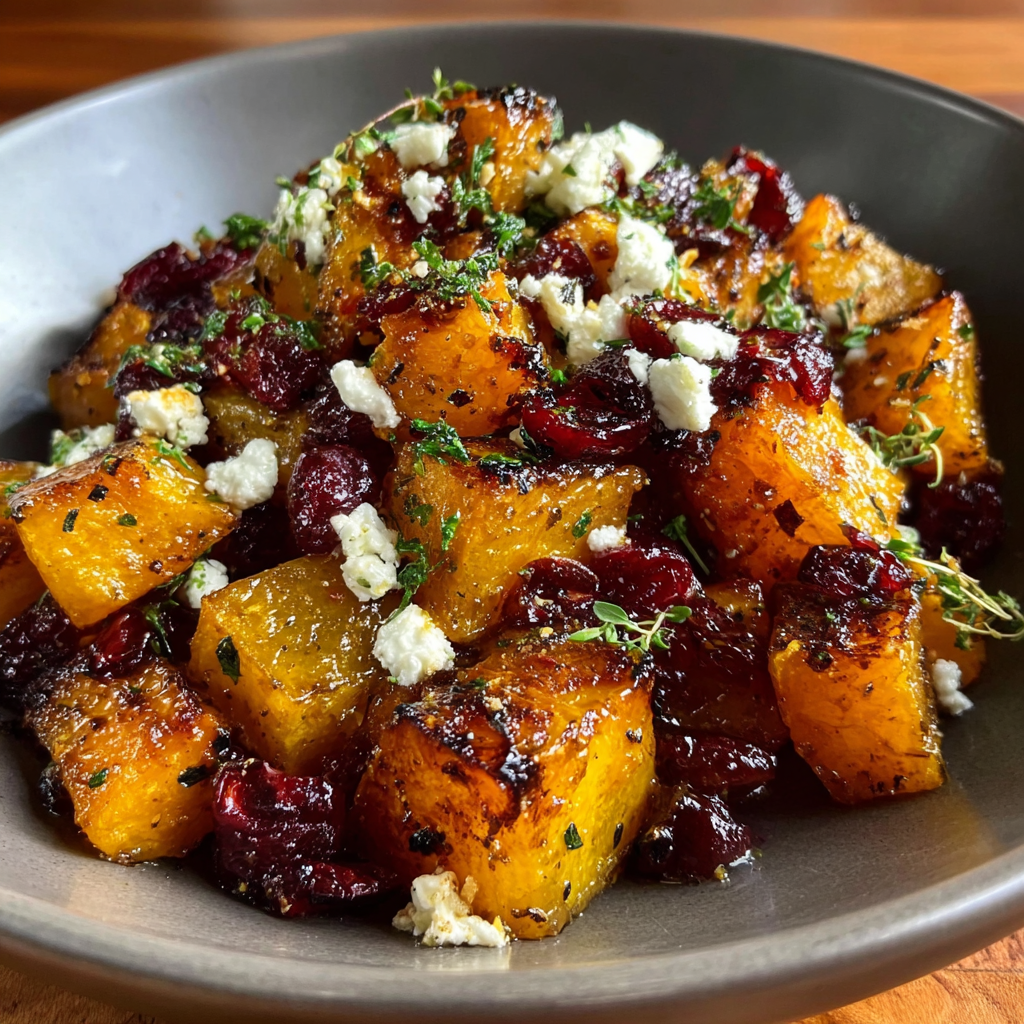
Roasted Butternut Squash with Cranberries and Feta Bliss
Ingredients
Method
- Preheat the oven to 400°F (200°C).
- Prepare the butternut squash.
- Toss the squash with olive oil, salt, and pepper.
- Spread the squash onto a baking sheet in a single layer.
- Roast the squash for about 25 minutes.
- Add the cranberries, honey, and toss lightly.
- Return the baking sheet to the oven and roast for an additional 10–12 minutes.
- Remove from the oven and sprinkle with feta cheese.
- Serve warm, garnished with fresh herbs if desired.
Notes
Additional serving suggestions: pair with a crisp salad, garlic bread, or roasted seasonal vegetables for balance.
For make-ahead, prep components separately and assemble just before heating to preserve texture.
Taste and adjust with acid (lemon/vinegar) and salt right at the end to wake up flavors.


