Introduction
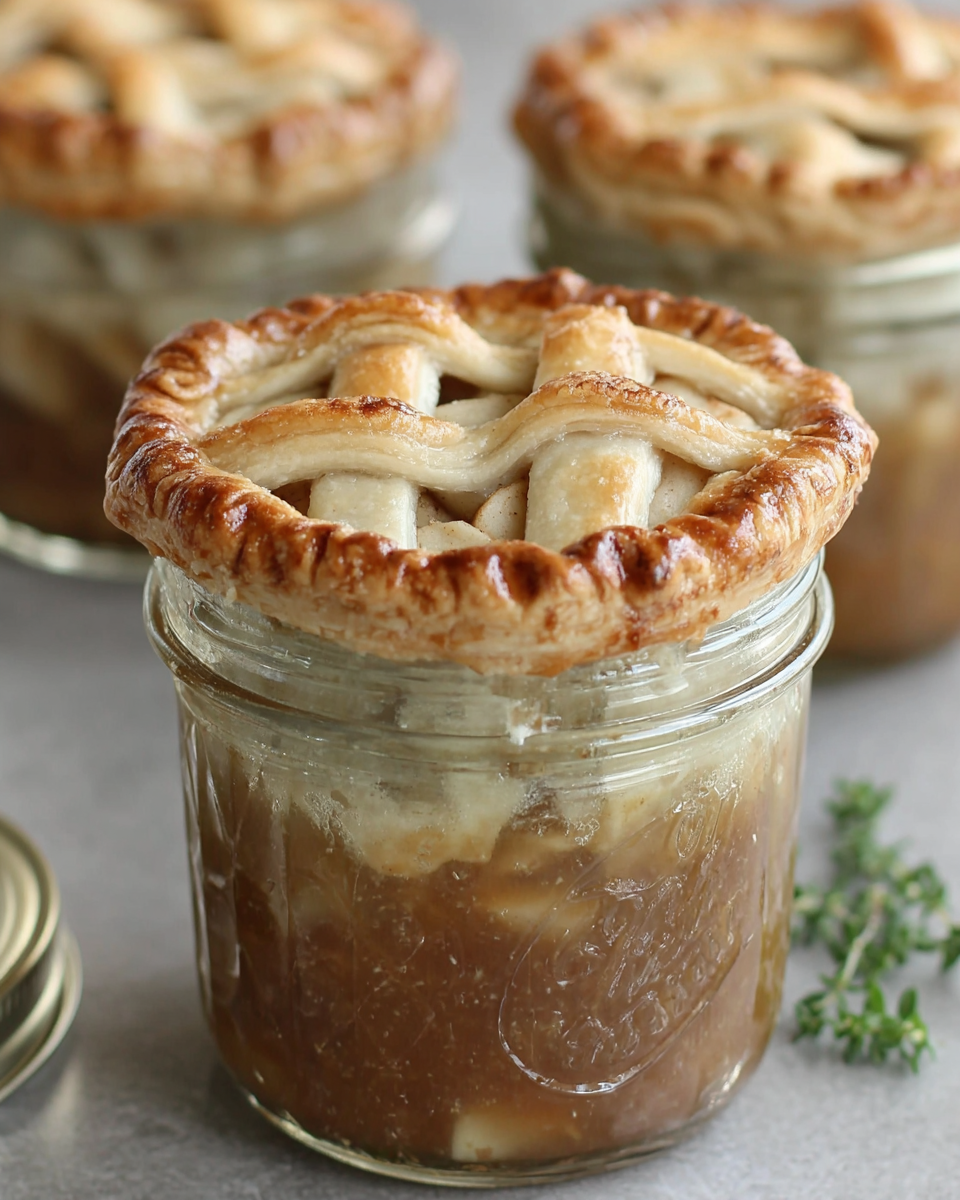
The charm of Mason jar apple pie lies not only in its delightful presentation but also in the convenience it offers. This recipe allows you to enjoy the classic flavors of apple pie in a single-serving format, making it perfect for gatherings or quiet evenings at home. As the autumn season draws near, the warm spices and soothing textures of this dessert will undoubtedly brighten your days.
Crafting a Mason jar apple pie is a delightful experience that serves both as a culinary project and a fun way to share treats with friends and family. The combination of buttery crust, sweetened apples, and a hint of cinnamon layered in a glass jar is not just visually appealing but also creates a decadent slice of comfort food. Let's dive into creating this charming dessert!
Ingredients
- 2 large apples, peeled and sliced
Apples form the heart of the pie, delivering natural sweetness and a juicy texture. Varieties like Granny Smith for tartness or Gala for sweetness can be used, allowing you to customize the flavor. - 1 tablespoon lemon juice
Lemon juice not only prevents the apples from browning but also enhances their flavor by adding a subtle tang that balances the sweetness. - 1/4 cup granulated sugar
Sugar sweetens the apples and contributes to the overall flavor profile of the pie. Adjusting the quantity allows you to control the dessert's sweetness depending on the apple's natural sugars. - 1 teaspoon ground cinnamon
Cinnamon adds warmth and depth to the apple filling, invoking the classic apple pie flavors. It’s essential for creating that familiar and comforting taste. - 1 tablespoon cornstarch
Cornstarch acts as a thickening agent, helping to bind the juices released from the apples and creating a more cohesive filling that won’t run. - 1 cup all-purpose flour
The flour is the base for the crust, providing structure and texture. It’s crucial for a flaky and tender crust that envelops the apple filling. - 1/4 teaspoon salt
Salt enhances the flavor of the crust, balancing the sweetness and ensuring a well-rounded taste. - 1/2 cup unsalted butter, chilled and cubed
Butter is key to achieving a rich, flaky crust. The cold temperature helps to keep the pie crust tender by limiting gluten formation. - 1/4 cup ice water
Ice water helps bring the dough together while minimizing gluten development, which keeps the crust tender. - Mason jars (4-6, depending on size)
The jars are the vessels for your pie, allowing for individual servings that are both convenient and adorable, showcasing the layers of deliciousness.
Directions & Preparation
Step 1: Preheat your oven to 375°F (190°C).
Preheating the oven is essential to ensure that the pie crust bakes evenly and gets that desired golden-brown color. By starting with a hot oven, you create a great environment for the butter in the crust to steam, which results in flakiness.
Step 2: Prepare the apple filling by tossing sliced apples with lemon juice, sugar, cinnamon, and cornstarch in a bowl.
This step melds the flavors and prepares the apples to release their juices while baking. The cornstarch will help thicken the filling, preventing it from becoming too watery. Allowing the mixture to sit for a few minutes also helps the apple flavors to develop.
Step 3: In a separate bowl, combine flour and salt. Cut in the chilled butter until the mixture resembles coarse crumbs.
Cutting in the butter is a key action to achieve a flaky texture. The pea-sized butter pieces create pockets that expand during baking, allowing the crust to lift and flake beautifully. Be careful not to overwork the dough, as it could make the crust tough.
Step 4: Gradually add ice water, mixing until the dough forms a ball. Wrap it in plastic wrap and refrigerate for 30 minutes.
Chilling the dough helps to relax the gluten formed during mixing, making it easier to roll out later. It also keeps the butter cold for flakier layers. The 30-minute rest is crucial for achieving the right dough consistency.
Step 5: Roll out the dough on a floured surface and cut it into circles that fit your Mason jar openings.
Rolling out the dough to the appropriate thickness, generally 1/8 inch, is important for both structure and flakiness. The dough should be pliable yet firm enough to hold its shape when baked.
Step 6: Layer the apple filling into the Mason jars, filling them up to about three-quarters full.
Filling the jars to the right level ensures that the apples have room to cook down while allowing the juices to bubble without overflowing. Visualizing how it fits can help you get the correct portion.
Step 7: Top with the rolled-out crust circles, sealing the edges. Cut slits in the crust to allow steam to escape.
Sealing the crust properly prevents the filling from leaking. The slits are crucial for steam to escape, which prevents the top from bubbling over while ensuring an evenly baked crust.
Step 8: Place the jars on a baking sheet and bake for about 25-30 minutes or until the crust is golden brown.
Using a baking sheet catches any drips from the jars and makes moving them in and out of the oven easier. The baking time may vary based on your oven and jar size, so keep a close eye on them.
Step 9: Remove from the oven and let cool for a few minutes before enjoying.
Allowing the jars to cool slightly helps the filling set, making it easier to dig in without losing the structure. Enjoy them warm or let them cool completely for later!

Customizing Your Apple Filling
While this recipe gives a delightful base, feel free to experiment with your apple filling. You can add other fruits like berries or pears for a unique twist, or incorporate flavors like nutmeg or ginger. The use of different types of apples can also change the taste significantly; combining varieties allows for a more complex flavor profile.
Creative Crust Variations
Consider using different types of crusts to give your Mason jar apple pie a personal touch. You can try adding spices such as cardamom or using whole wheat flour for a nutty flavor. If you prefer a crumbly topping, consider making a streusel by mixing oats, brown sugar, and butter, which can provide a delightful contrast to the tender apple filling.
Perfect Pairings with Mason Jar Apple Pie
Mason jar apple pie not only looks stunning but also pairs well with a variety of accompaniments. A scoop of vanilla ice cream or a dollop of whipped cream adds an irresistible creaminess that contrasts beautifully with the warm spiced apples. For a festive twist, consider drizzling with caramel sauce or serving with spiced cider for a cozy autumn experience.
FAQs
What should I do if the filling is too watery?
If you find your filling is too watery, ensure you're using the right amount of cornstarch to thicken it. You can also try letting the filling sit longer before baking to allow the juices to thicken.
Can I scale this recipe to make a larger batch?
Yes, you can easily double or triple the recipe. Just ensure you have enough Mason jars and adjust the baking time if you're using larger jars.
What if my crust isn't flaky?
If your crust isn't flaky, it may have been mixed too much or overworked. Ensure your butter is very cold and that you handle the dough gently.
Can I use different types of apples for the filling?
Absolutely! Mixing tart and sweet apples can provide a more nuanced flavor. Consider combining varieties like Granny Smith and Honeycrisp.
What can I do to enhance the spices in my filling?
You can enhance the spices by experimenting with additions such as nutmeg, ginger, or allspice. Just remember that a little goes a long way!
Is it necessary to put slits in the crust?
Yes, cutting slits in the crust allows steam to escape during baking, which prevents the crust from becoming soggy and ensures proper cooking.
Conclusion
Creating Mason jar apple pies is a fulfilling way to celebrate the flavors of fall while offering a charming and portable dessert option. Whether you enjoy them fresh from the oven or share them with loved ones, these delightful treats are sure to evoke joy.
Take your time with each layer and personalize the recipe to fit your preferences. With a bit of practice, your Mason jar apple pies will become a beloved staple in your home kitchen.
Recipe Card
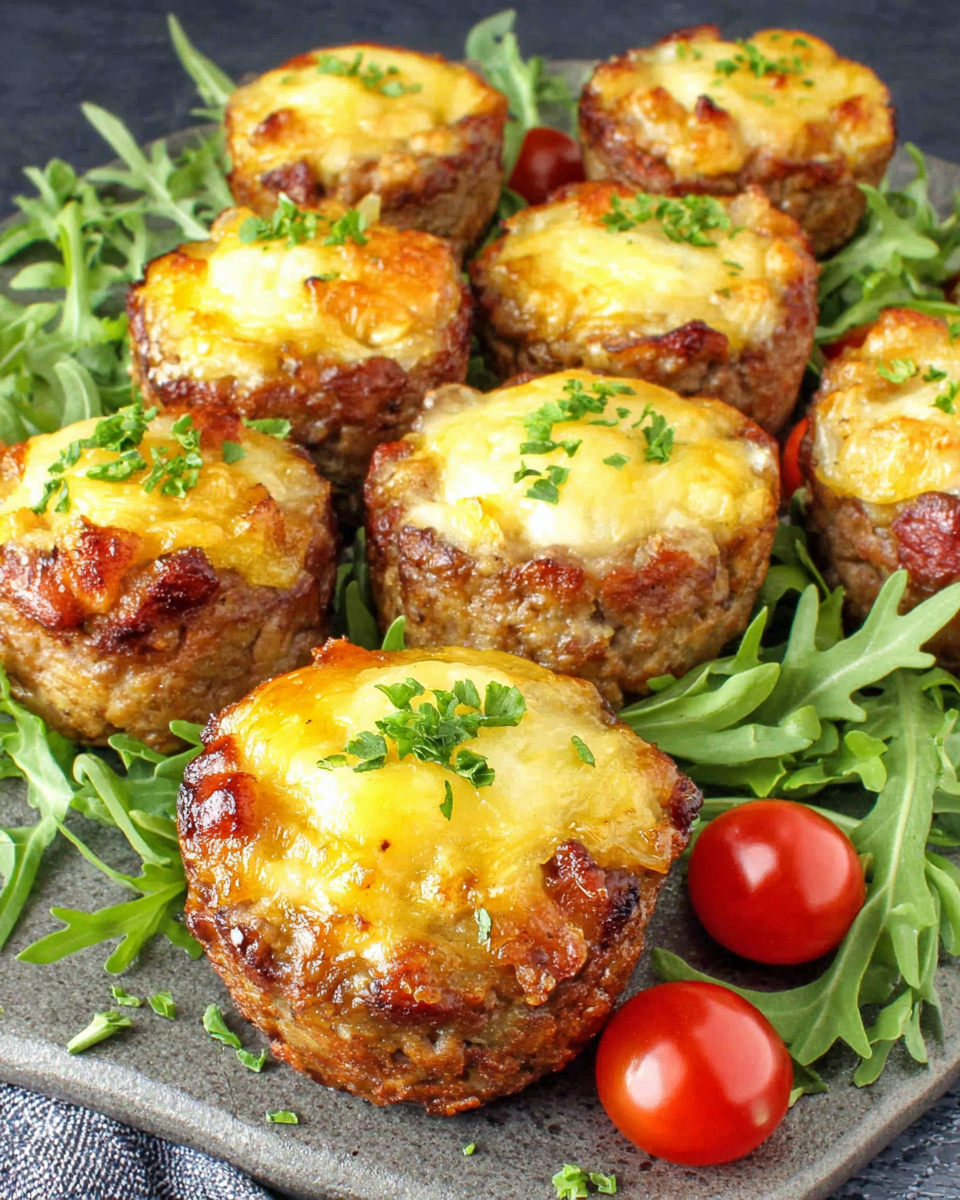
Simple and Flavorful Meatloaf Cups for Dinner
Ingredients
Method
- Preheat the oven to 375°F (190°C).
- In a large bowl, combine all the ingredients.
- Grease a muffin tin lightly with non-stick spray or oil.
- Scoop the meat mixture into each muffin cup, filling them about 3/4 full.
- Top each cup with a teaspoon of ketchup.
- Bake in the preheated oven for 20-25 minutes.
- Let the cups cool slightly before removing them from the tin.
Notes
Additional serving suggestions: pair with a crisp salad, garlic bread, or roasted seasonal vegetables for balance.
For make-ahead, prep components separately and assemble just before heating to preserve texture.
Taste and adjust with acid (lemon/vinegar) and salt right at the end to wake up flavors.


