Introduction
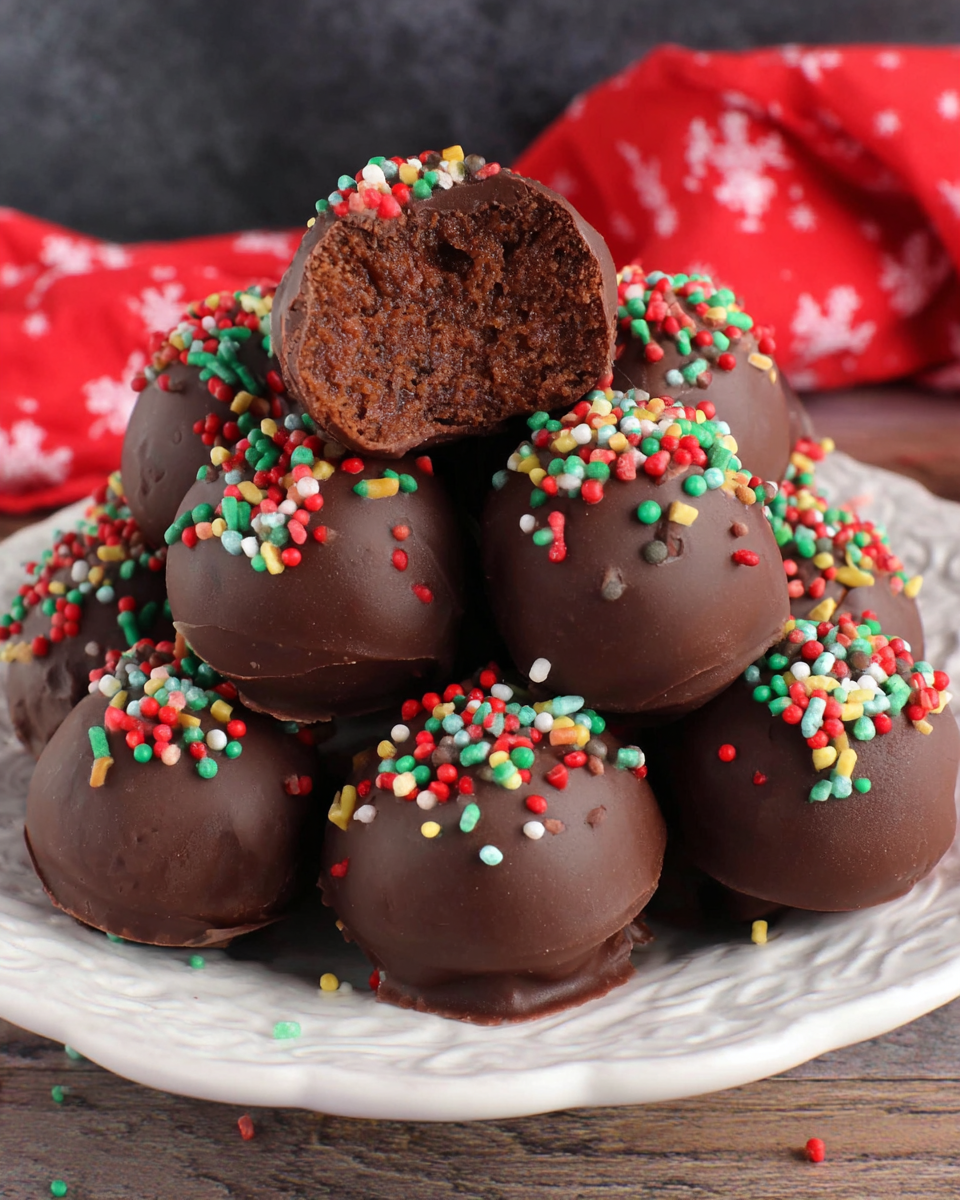
If you're craving a decadent treat that combines the richness of brownies with the indulgence of truffles, double chocolate brownie truffles are your answer. These sweet morsels deliver a satisfying chocolate experience that will leave you wanting more.
With their fudgy interior and smooth chocolate coating, these truffles take a beloved dessert and transform it into a bite-sized delight. Perfect for gatherings or a personal treat, they embody the spirit of comfort and enjoyment in every bite.
Ingredients
- 1 cup all-purpose flour
The foundation of our truffles, all-purpose flour adds structure and stability. It helps the brownie base hold together while providing a tender crumb. - 1/2 cup unsweetened cocoa powder
Cocoa powder is essential for that rich chocolate flavor. It intensifies the chocolate base, ensuring that each bite is deeply satisfying and perfect for any chocolate lover. - 1 cup granulated sugar
Sugar does more than sweeten; it helps create the right texture, giving the truffles a moist and fudgy consistency. It also balances the bitterness of the cocoa powder. - 1/2 cup brown sugar
Brown sugar adds moisture and a hint of caramel flavor to the truffles. Its higher moisture content compared to granulated sugar contributes to the fudgy texture. - 1/2 cup unsalted butter, melted
Butter provides richness and enhances the flavor of the chocolate. It also contributes to the creamy texture that makes these truffles melt in your mouth. - 2 large eggs
Eggs act as a binding agent, helping to hold the batter together. They also add moisture and contribute to the overall richness of the truffles. - 1 teaspoon vanilla extract
Vanilla extract enhances the overall flavor, adding depth to the chocolate. It complements the other ingredients and elevates the truffle experience. - 1 cup semi-sweet chocolate chips
Chocolate chips are key to achieving a perfect texture. They provide additional bursts of chocolate and contribute to the gooeyness that makes these truffles irresistible. - 1 cup chocolate melting wafers or chocolate for coating
This coating encases each truffle, offering a rich, glossy finish. Melting wafers are easy to work with and create a beautiful outer shell. - Sprinkles or cocoa powder for decoration (optional)
Sprinkles add a festive touch, while cocoa powder provides a classic appearance. Both options can enhance the overall presentation of your truffles.
Directions & Preparation
Step 1: Preheat your oven to 350°F (175°C).
Preheating the oven is crucial for even baking. This ensures that the brownie batter starts cooking at the right temperature, leading to a beautifully risen and set brownie base. Proper preheating helps achieve the perfect texture.
Step 2: Grease a small baking pan (8×8-inch) or line it with parchment paper.
Greasing the pan or lining it with parchment paper prevents the brownie from sticking, ensuring easy removal once baked. This step is key for achieving neat edges and clean squares.
Step 3: In a mixing bowl, combine the melted butter, granulated sugar, and brown sugar until smooth.
Mixing butter with sugars creates a creamy base that helps incorporate air, contributing to a light texture. Ensuring that the sugars dissolve leads to a uniform sweetness throughout the batter.
Step 4: Add the eggs and vanilla extract, mixing until fully incorporated.
Incorporating the eggs and vanilla adds moisture and richness to the batter. Be sure to mix thoroughly to ensure the ingredients are well combined, which is important for texture and flavor.
Step 5: Sift in the flour and cocoa powder, mixing gently until just combined.
Sifting the dry ingredients helps break up lumps and adds air, resulting in a light and tender brownie. Mixing gently prevents overworking the batter, ensuring the final truffles remain fudgy.
Step 6: Fold in the chocolate chips, ensuring they are evenly distributed.
Folding in chocolate chips adds decadent pockets of melted chocolate to the truffles. Even distribution ensures that each bite is packed with richness and gooey goodness.
Step 7: Pour the batter into the prepared pan, spreading it out evenly.
Spreading the batter evenly in the pan allows for uniform baking. This is essential for achieving those soft, fudgy edges that are characteristic of a great brownie.
Step 8: Bake in the preheated oven for 20-25 minutes, or until a toothpick comes out with a few moist crumbs.
Baking time is critical; removing the brownies when slightly underbaked ensures a fudgy texture. The toothpick test allows you to check for doneness without overbaking.
Step 9: Let the brownies cool completely in the pan.
Cooling the brownies in the pan helps them set and makes them easier to cut without crumbling. Allowing this time ensures you achieve clean, neat squares for truffling.
Step 10: Once cooled, cut the brownies into small squares.
Cutting the brownies into small squares prepares them to be shaped into truffles. The smaller size makes it easier to form them into uniform balls without overheating your hands.
Step 11: Roll the brownie squares into balls, about 1 inch in diameter.
This rolling technique creates the signature truffle shape. Make sure not to compact the brownies too tightly; a light hand will keep the truffles fudgy and soft.
Step 12: Chill the truffles in the refrigerator for about 1 hour, or until firm.
Chilling the truffles allows them to firm up, making them easier to coat. This cooling period is essential for achieving a smooth coating later on.
Step 13: Melt the chocolate wafers or chocolate in a microwave-safe bowl.
Melting chocolate should be done gradually to prevent burning. Stirring in between intervals helps achieve a smooth, glossy coating that will elevate your truffles.
Step 14: Dip each truffle into the melted chocolate, allowing excess to drip off.
Dipping the truffles in melted chocolate ensures an even coating. Letting the excess drip off prevents a thick layer, which can overwhelm the chocolate flavor and alter texture.
Step 15: Place the coated truffles on a cooling rack or parchment paper.
Setting the coated truffles on a rack or parchment paper ensures they don't stick when the chocolate hardens. This step also helps maintain a neat appearance.
Step 16: Sprinkle with decorative toppings if desired, and let them set at room temperature.
Decorating the truffles gives them a polished look and can enhance flavor. Allowing them to set at room temperature ensures that the coating hardens without the chocolate becoming dull.
Step 17: Once set, serve and enjoy your delicious double chocolate brownie truffles!
Serving at room temperature allows the truffles to maintain their ideal texture. Enjoying them fresh offers that delightful fudgy bite, making them a perfect treat for any occasion.

The Perfect Chocolate Balance
Achieving the right balance of cocoa flavor is essential in these double chocolate brownie truffles. By using both cocoa powder and chocolate chips, the truffles deliver intense chocolate richness. The combination ensures that every bite is both decadent and memorable, appealing to true chocolate lovers.
Customization Options
Feel free to customize these truffles to suit your taste preferences. Consider adding a sprinkle of sea salt for a touch of contrast, or mix in nuts for added crunch. You can also experiment with different types of chocolate for the coating, such as white or milk chocolate, to create your ideal flavor profile.
Perfect for Any Occasion
These double chocolate brownie truffles are versatile, making them suitable for various occasions. Whether you're hosting a dinner party, celebrating a birthday, or simply treating yourself, these truffles are sure to impress. Their bite-sized form means they’re easy to share, yet indulgent enough to stand out as a special treat.
FAQs
What if my truffles are too soft and won't hold their shape?
If your truffles are too soft, try chilling them for a longer period. If they are still not firm enough, you can add a bit more crushed brownie or a touch of cocoa powder to help them hold shape.
Can I use flavored chocolate for the coating?
Absolutely! Using flavored chocolate, such as mint or caramel, can add a unique twist to your truffles. This allows you to customize the truffle experience further.
What if my brownie batter seems dry and crumbly?
If your batter is too dry, it may need more moisture. You can add a small amount of melted butter or a splash of milk to achieve a better consistency.
Can I substitute the chocolate chips with nuts?
Yes, you can substitute chocolate chips with chopped nuts if you prefer an alternative texture. Just ensure that the overall balance of dry and wet ingredients remains consistent.
What should I do if the coating chocolate thickens while melting?
If your coating chocolate thickens, try adding a small amount of vegetable oil or shortening to thin it out. This helps create a smoother consistency for easier dipping.
Can I double the recipe without affecting the texture?
You can double the recipe, but consider using a larger baking pan to ensure even baking. Additionally, keep an eye on the baking time, as it may need slight adjustments.
What if I want to add more chocolate flavor?
To enhance the chocolate flavor, you can add extra cocoa powder to the batter or use a higher ratio of chocolate chips. Adjusting these elements will elevate the chocolate intensity.
Conclusion
Double chocolate brownie truffles are an irresistible treat that brings joy to any occasion. Whether enjoyed as a personal indulgence or shared with friends and family, their rich flavor and satisfying texture are sure to please.
With simple ingredients and easy steps, these truffles can be made any time chocolate cravings strike. Embrace this delicious recipe and relish in the chocolatey goodness it brings to your sweet moments.
Recipe Card
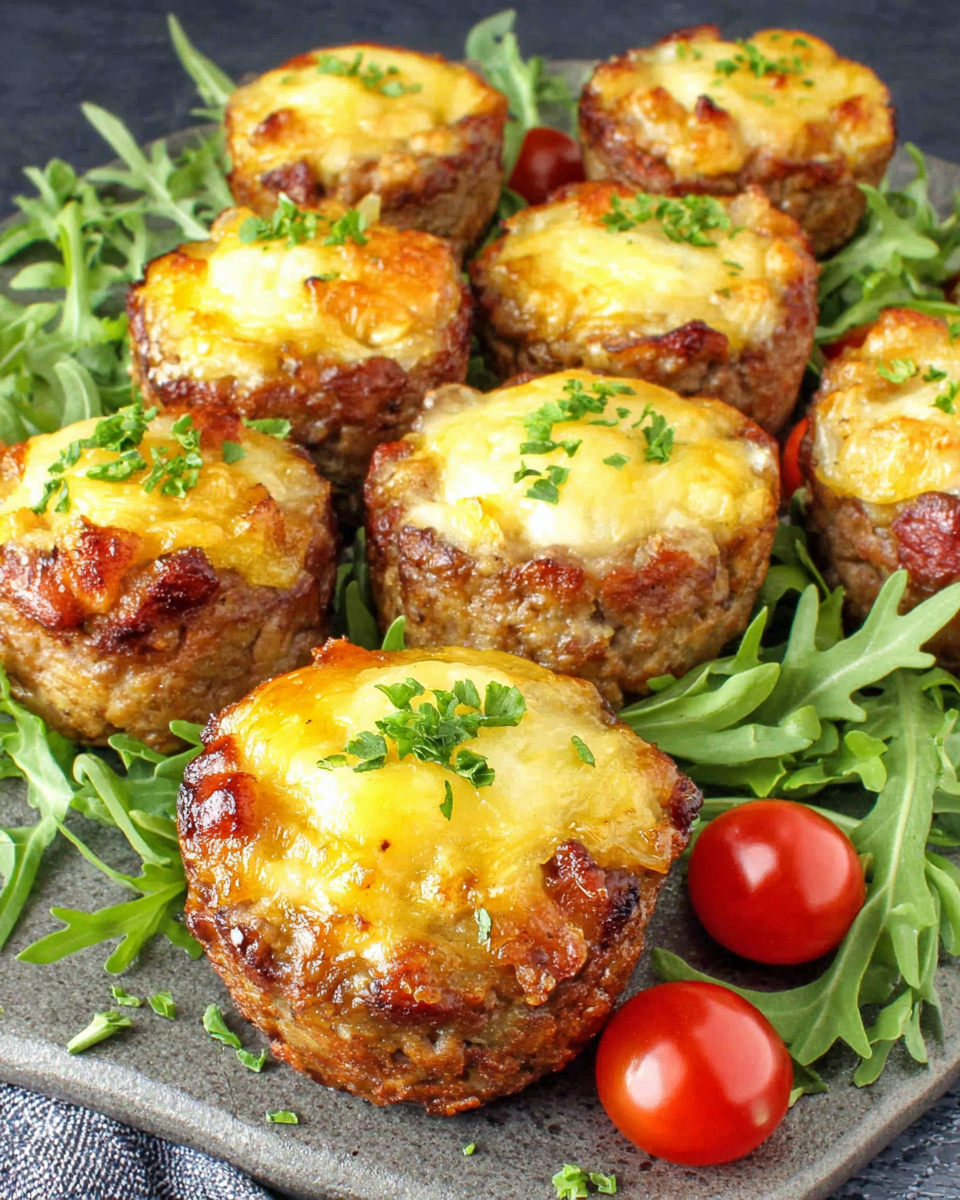
Simple and Flavorful Meatloaf Cups for Dinner
Ingredients
Method
- Preheat the oven to 375°F (190°C).
- In a large bowl, combine all the ingredients.
- Grease a muffin tin lightly with non-stick spray or oil.
- Scoop the meat mixture into each muffin cup, filling them about 3/4 full.
- Top each cup with a teaspoon of ketchup.
- Bake in the preheated oven for 20-25 minutes.
- Let the cups cool slightly before removing them from the tin.
Notes
Additional serving suggestions: pair with a crisp salad, garlic bread, or roasted seasonal vegetables for balance.
For make-ahead, prep components separately and assemble just before heating to preserve texture.
Taste and adjust with acid (lemon/vinegar) and salt right at the end to wake up flavors.


