Introduction
Chocolate mousse filling is a luxurious treat that elevates any dessert with its rich and creamy texture. This versatile concoction can be used in a variety of sweet applications, from cakes to pastries, making it a staple in any home cook's repertoire.
Crafted from just a few select ingredients, chocolate mousse filling strikes a perfect balance between sweetness and depth of flavor. The act of folding air into the mixture not only creates a light mouthfeel but also enhances the overall chocolate experience, pleasing even the most discerning chocolate enthusiasts.
Ingredients
- 8 oz semi-sweet chocolate
This is the star ingredient, providing the rich chocolate flavor and smooth texture essential for a delectable mousse. The quality of chocolate used will directly affect the final product, so choose a chocolate that you enjoy eating on its own. - 4 large eggs, separated
Eggs are crucial for both the emulsification and aeration processes. The yolks add richness while the whipped whites introduce air, resulting in a light and airy texture in the mousse. - 1/2 cup granulated sugar
Sugar not only sweetens the filling but also helps stabilize the structure. It dissolves during mixing, ensuring that the filling maintains its smooth consistency, and enhances the overall flavor profile. - 1 cup heavy cream
Heavy cream adds substantial body and creaminess to the mousse. Its whipped state contributes to the airy texture, resulting in a dessert that feels indulgently rich without being overly heavy. - 1 teaspoon vanilla extract
Vanilla enhances the overall flavor of the chocolate, adding warmth and complexity. It is a subtle touch that rounds out the flavors and makes the mousse more aromatic. - Pinch of salt
Salt plays a critical role in balancing sweetness and bringing out the deep flavors of chocolate. Even a small amount can elevate the overall taste, ensuring the mousse has a well-rounded and sophisticated profile.
Directions & Preparation
Step 1: Melt the chocolate.
Begin by finely chopping the semi-sweet chocolate and placing it in a heatproof bowl. Melt it gently over a double boiler or in the microwave, taking care to avoid overheating, which can cause the chocolate to seize. Once melted, allow the chocolate to cool slightly while you prepare the other ingredients. This step is crucial as it ensures smooth incorporation of chocolate into the mousse.
Step 2: Whisk egg yolks and sugar.
In a separate bowl, whisk together the egg yolks and granulated sugar until the mixture is pale and slightly thickened. This creates a smooth, creamy base that will blend seamlessly with the chocolate. The sugar not only sweetens but also helps emulsify the mixture, ensuring a better combination of the fat from the chocolate and the liquid from the eggs.
Step 3: Combine the melted chocolate with the yolk mixture.
Gently fold the slightly cooled melted chocolate into the egg yolk and sugar mixture. It’s important to do this carefully to avoid cooking the yolks and to maintain a smooth consistency. The warmth of the chocolate will help dissolve the sugar while blending the flavors harmoniously.
Step 4: Whip the egg whites.
In a clean, dry bowl, beat the egg whites until soft peaks form. This step incorporates air into the mousse and lightens the texture. It’s important that there are no traces of fat in the bowl, so ensure your mixing tools are completely clean. The whipped egg whites are what will lift the mousse and give it that airy quality.
Step 5: Fold in the whipped egg whites.
Gently fold the beaten egg whites into the chocolate mixture in three additions. Start with a small amount of egg whites to loosen the mixture, then incorporate the rest carefully. This technique is vital; it's about preserving the volume of the egg whites to ensure a light final mousse. Avoid over-mixing, as that can deflate the airiness.
Step 6: Whip the heavy cream.
In a separate bowl, whip the heavy cream along with the vanilla extract until soft peaks form. This step adds additional creaminess to the mousse. Ensure not to overwhip, as it can lead to a grainy texture or even butter. The whipped cream contributes to a rich mouthfeel while maintaining the mousse's lightness.
Step 7: Incorporate the whipped cream.
Gently fold the whipped cream into the chocolate mixture, similarly to how you incorporated the egg whites. This will create a rich, creamy texture while retaining some volume. The folding method will also ensure the mousse has a nice airy quality, providing that luxurious feel that mousse lovers crave.
Step 8: Chill the mousse.
Transfer the mousse filling to serving bowls or piping bags and refrigerate for at least two hours, allowing it to set properly. Chilling is an essential step that firms up the mousse, allowing all the flavors to meld together beautifully, ensuring each bite is rich and satisfying.

Enhancing Flavor with Quality Chocolate
The choice of chocolate can make all the difference in your mousse filling. Opting for high-quality chocolate with a cocoa percentage that suits your taste buds will elevate your entire dessert. Dark chocolate provides a more robust flavor, while milk chocolate offers a sweeter, creamier profile. Experimenting with different chocolates can inspire variations and elevate your confectionery creations.
Lightness is Key: The Art of Folding
Folding is a delicate yet crucial technique in mousse-making that affects texture. This method ensures that the air whipped into the egg whites and heavy cream remains intact, giving the mousse its signature lightness. Mastering the folding technique will allow you to create beautifully airy desserts that delight the palate, transforming simple ingredients into an elegant experience.
Serving Suggestions for Chocolate Mousse
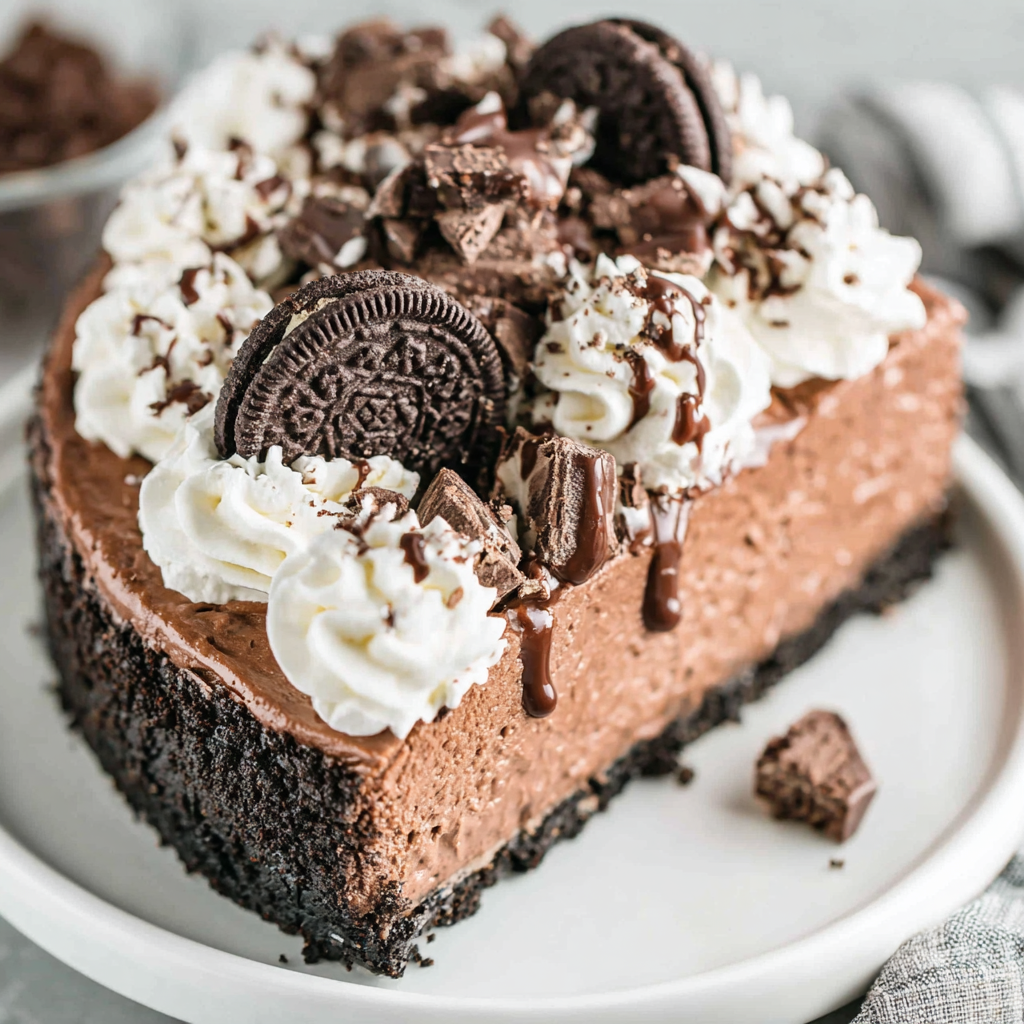
Chocolate mousse filling serves as a versatile component in many desserts. Consider using it as a layer in cakes, filling for pastries, or even a topping for cheesecakes. For added flair, garnish with fresh berries, mint leaves, or a drizzle of caramel. The possibilities are endless, and each presentation opens doors to new culinary adventures.
FAQs
What do I do if my mousse is too thick?
If your mousse turns out too thick, consider folding in a bit of whipped cream or milk to loosen it. Ensure you fold gently to maintain some volume.
Why is my mousse not setting?
If your mousse isn’t setting properly, it could be due to insufficient chilling time. Ensure that it is refrigerated for the full duration recommended, as temperature plays a crucial role in achieving the right texture.
Can I use different types of chocolate?
Yes, you can definitely experiment with different types of chocolate! Dark, milk, or even white chocolate can create unique flavor profiles, though adjustments in sweetness may be necessary.
What can I do if my mousse has a grainy texture?
A grainy texture often results from improperly melted chocolate. To remedy this, ensure that you melt the chocolate gently over low heat and avoid overheating, which causes seizing. If it happens, try straining it before combining with other ingredients.
Can I add flavors to my mousse?
Absolutely! You can infuse flavors like espresso or liqueurs by adding them either during the chocolate melting stage or folding them in with the whipped cream, creating a tailored flavor experience.
What if my mousse is too sweet?
If your mousse is too sweet, you can adjust the balance by incorporating a pinch more salt or adding a bit of unsweetened cocoa powder, which will enhance the chocolate flavor while reducing sweetness.
Conclusion
Chocolate mousse filling is a delightful treat that can elevate a simple dessert into a luxurious indulgence. With just a few ingredients, you can create a rich, airy filling that complements a variety of pastries and cakes.
By mastering the techniques outlined in this article, you can impress your guests with an elegant chocolate mousse that showcases your culinary skills. Happy baking and enjoy the delicious results of your efforts!
Recipe Card

Delightful Lemon Cream Cheese Cake Filling Recipe
Ingredients
Method
- Beat the cream cheese until smooth and creamy.
- Add the softened butter and beat until well combined.
- Gradually mix in the powdered sugar until fully incorporated.
- Stir in the lemon juice and zest, mixing until blended.
- Add vanilla extract and mix again to incorporate.
- Chill the filling for at least 30 minutes before use.
Notes
Additional serving suggestions: pair with a crisp salad, garlic bread, or roasted seasonal vegetables for balance.
For make-ahead, prep components separately and assemble just before heating to preserve texture.
Taste and adjust with acid (lemon/vinegar) and salt right at the end to wake up flavors.


