
Introduction
Dubai is a city renowned for its culinary diversity, and one of its most decadent offerings is chocolate pizza. This delightful fusion brings together the comforting elements of pizza with the rich, sweet allure of chocolate. Exploring this dish transports you to bustling Dubai, even from the comfort of your own kitchen.
Creating your own chocolate pizza allows for endless creativity and customization. Imagine the warm, melting chocolate enveloping a soft, flaky crust, topped with fresh fruits, nuts, or even a sprinkle of sea salt. Not only is it a feast for the senses, but it also provides an opportunity to impress your family and friends with a unique dessert.
Ingredients
- 1 pre-made pizza dough
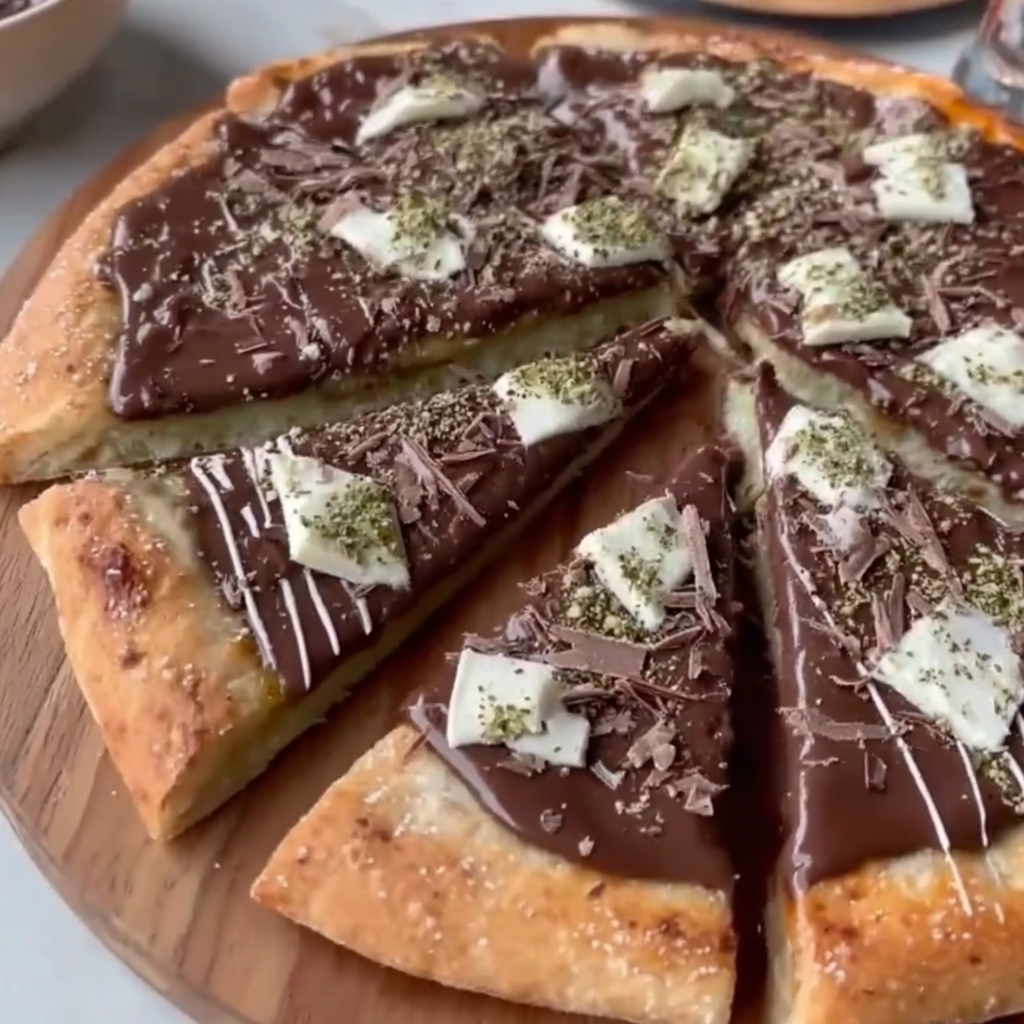
The base of the pizza, which provides the structure and texture. Its light and airy nature allows it to complement the rich chocolate without being overwhelming. - 200g dark chocolate
Dark chocolate offers a bittersweet flavor that balances the sweetness of other toppings. It melts beautifully, creating a luscious layer that defines the character of the pizza. - 100g milk chocolate
Milk chocolate adds creaminess and sweetness, enhancing the overall flavor profile. The combination of dark and milk chocolate creates a complex taste experience. - 200g fresh strawberries
Strawberries contribute a fresh, fruity brightness that contrasts with the richness of the chocolate. Their natural sweetness and slight tartness enhance every bite. - 50g chopped nuts (hazelnuts or almonds)
Nuts provide a crunchy texture that contrasts with the soft pizza base and melted chocolate. They add depth and complement the flavors of the chocolate. - 1 tablespoon sea salt
A sprinkle of sea salt elevates the sweet flavors by creating a tantalizing contrast. It helps to balance the taste and adds a gourmet touch to the dish. - Mint leaves for garnish
Mint leaves add a refreshing herbal note that brightens the dish. They serve as a beautiful garnish, enhancing both presentation and flavor.
Directions & Preparation
Step 1: Preheat your oven to 220°C (428°F).
Preheating is crucial as it ensures that the pizza dough cooks evenly and at the right temperature. An adequately hot oven will give the crust a perfect balance of crispiness on the outside while remaining soft inside.
Step 2: Roll out the pizza dough on a floured surface.
Rolling out the dough to your desired thickness influences the texture of the final product. A thinner crust will be crisper, while a thicker one will provide a soft, chewy bite. Use a bit of flour to prevent sticking.
Step 3: Place the rolled dough onto a baking tray lined with parchment paper.
Using parchment paper makes transferring the pizza in and out of the oven much easier and prevents sticking. It also helps with cleanup later on, ensuring the tray remains clean and hassle-free.
Step 4: Melt the dark and milk chocolate together.
Melting the chocolates together creates a uniform chocolate mixture that spreads effortlessly over the crust. Use a microwave in short bursts or a double boiler to avoid burning the chocolate, ensuring a smooth consistency.
Step 5: Spread the melted chocolate evenly over the pizza dough.
Spreading the chocolate evenly is key to ensuring each bite is rich and chocolaty. Use a spatula or the back of a spoon to create a smooth layer, avoiding clumps that can lead to inconsistent flavors.
Step 6: Slice fresh strawberries and scatter them on top of the melted chocolate.
Arranging the strawberries artfully not only enhances the visual appeal but also ensures that their flavor seeps into the chocolate. The balance of fresh fruit and chocolate should be well-distributed.
Step 7: Sprinkle chopped nuts over the pizza for added crunch.
Nuts should be toasted lightly beforehand to intensify their flavor, adding depth to the dish. Their crunch will contrast beautifully with the soft toppings, contributing to a delightful mouthfeel.
Step 8: Sprinkle sea salt over the top for a savory finish.
The final touch of sea salt accentuates the sweetness of the chocolate while adding a sophisticated edge. This seasoning is essential for bringing out the rich notes of the chocolate and balancing the flavor.
Step 9: Bake in the preheated oven for about 10-12 minutes.
Baking time is crucial; the goal is to melt the chocolate without burning it. Keep a close eye on the pizza, and the crust should be golden brown, while the chocolate should be melted but not hardened.
Step 10: Remove from the oven and let cool slightly before slicing.
Allowing the pizza to cool slightly enables the chocolate to set just a bit, making it easier to slice without losing too much of the toppings. Patience here ensures perfect portions and presentation.
Step 11: Garnish with fresh mint leaves and serve warm.
Garnishing with mint adds a pop of color and freshness, enhancing the overall taste and visual appeal. Serving the pizza warm means that the chocolate will still be gooey, providing an irresistible sensory experience.

The Gourmet Twist with Toppings
Exploring unique toppings can elevate the Dubai chocolate pizza experience. Consider adding exotic flavors like cardamom or pistachios for a Middle Eastern flair. Each topping contributes its own character, reflecting the vibrant culinary scene in Dubai. Remember to experiment; the joy of this recipe lies in discovering your personal favorites.
Perfect Pairings: Chocolate and Fruit
The classic pairing of chocolate and fruit is taken to new heights with this pizza. Fresh, ripe berries or even tropical fruits like mango can introduce bursts of flavor that contrast beautifully with the chocolate. Fruit not only lightens up the richness but also adds a colorful dimension to your pizza, making it visually appealing.
Serving Suggestions for a Festive Touch
Transform your chocolate pizza into a showstopper by serving it at gatherings. Pair it with a scoop of vanilla ice cream or a drizzle of caramel sauce for added indulgence. Consider creating a dessert platter with various flavor options to excite your guests' palates and celebrate the delightful fusion of sweet and savory.
FAQs
What type of chocolate is best for this recipe?
A combination of dark and milk chocolate is ideal for balanced flavor. Dark chocolate gives richness, while milk chocolate adds creaminess.
Can I add other fruits on top?
Absolutely! Bananas, raspberries, or even oranges can be delicious alternatives, each adding a unique flavor profile to the dish.
What can I do if my chocolate hardens before spreading?
If the chocolate hardens, gently reheat it in a microwave at low power or over a double boiler until it becomes smooth again for easy spreading.
Can I use homemade pizza dough instead of store-bought?
Yes, homemade dough can enhance the flavor and freshness of the pizza. Just ensure it's stretched to an even thickness.
What if the crust is too thick?
A thick crust can lead to a doughy texture. Roll it out thinner next time or adjust the cooking time to ensure it cooks through while preventing burning.
Is it necessary to bake the pizza immediately after assembling?
Yes, timing is essential. Baking too late can cause the ingredients to become soggy and affect the final texture.
Conclusion
Creating Dubai chocolate pizza is a gratifying culinary adventure that combines sweet and savory elements into a single dish. This recipe not only reflects the vibrant food culture of Dubai but also invites personal creativity and experimentation.
Whether serving it at a special occasion or enjoying it as a treat for yourself, this chocolate pizza is sure to impress. Embrace the process, and savor every delicious bite of your very own Dubai-inspired creation.
Recipe Card
Indulging in Dubai Chocolate Pizza Delights
Ingredients
Method
- Preheat your oven to 220°C (428°F).
- Roll out the pizza dough on a floured surface.
- Place the rolled dough onto a baking tray lined with parchment paper.
- Melt the dark and milk chocolate together.
- Spread the melted chocolate evenly over the pizza dough.
- Slice fresh strawberries and scatter them on top of the melted chocolate.
- Sprinkle chopped nuts over the pizza for added crunch.
- Sprinkle sea salt over the top for a savory finish.
- Bake in the preheated oven for about 10-12 minutes.
- Remove from the oven and let cool slightly before slicing.
- Garnish with fresh mint leaves and serve warm.
Notes
Additional serving suggestions: pair with a crisp salad, garlic bread, or roasted seasonal vegetables for balance.
For make-ahead, prep components separately and assemble just before heating to preserve texture.
Taste and adjust with acid (lemon/vinegar) and salt right at the end to wake up flavors.


