
Introduction
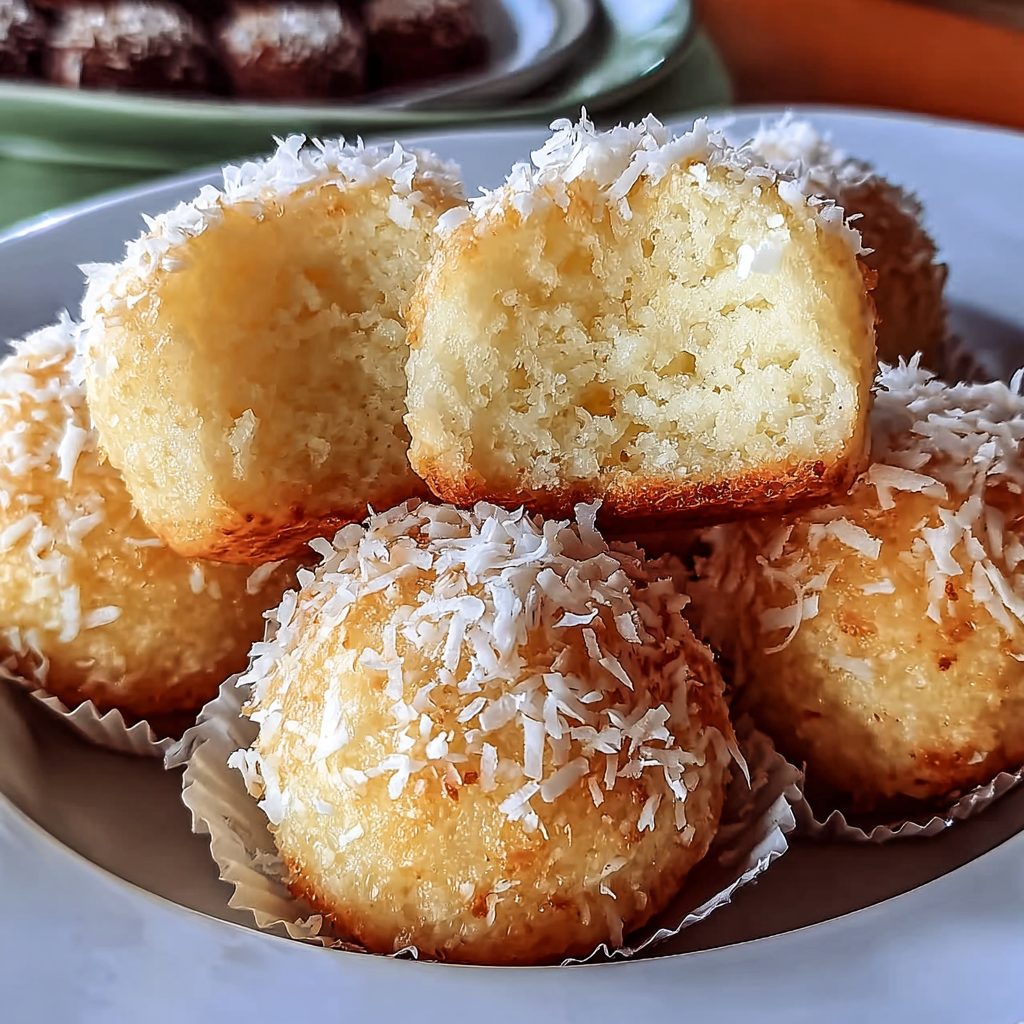
Portuguese coconut cakes, known as 'Bolos de Coco', are a delightful treat that brings the taste of sunny coastal bakeries right into your kitchen. Their enchanting blend of rich coconut flavor and fluffy texture makes them irresistible, perfect for any occasion or just a cozy evening at home.
The heavenly scent of freshly baked cakes calls for moments of joy, gathering family and friends around the table to relish each bite. With simple ingredients rooted in tradition, these cakes capture the heart of Portuguese cuisine, making the baking process as rewarding as the taste.
Ingredients
- 2 cups unsweetened shredded coconut
Shredded coconut provides the distinctive flavor and texture of the cake. It adds moisture and richness, making the cake delightfully soft and chewy. - 1 cup granulated sugar
Sugar sweetens the dessert while also aiding in browning during baking, contributing to a pleasant golden crust. - 4 large eggs
Eggs serve as the binding agent in the recipe, helping to hold the mixture together while adding moisture and a slight richness. - 1/2 cup all-purpose flour
Flour adds structure to the cake while allowing it to rise slightly. It ensures the cake isn’t too dense, balancing the moisture from the coconut. - 1/2 cup coconut milk
Coconut milk enhances the overall coconut flavor, giving the cake a rich and creamy texture that amplifies the tropical essence. - 1 teaspoon vanilla extract
Vanilla extract introduces a subtle depth of flavor, complementing the coconut without overpowering it. - 1/4 teaspoon salt
Salt is a crucial component that enhances the flavors, providing contrast to the sweetness and balancing the overall taste. - 1 teaspoon baking powder
Baking powder acts as a leavening agent, helping the cake rise and achieve the perfect fluffy texture.
Directions & Preparation
Step 1: Preheat the oven to 350°F (175°C).
Preheating the oven ensures that your cakes start baking immediately at the right temperature. This step is critical for even cooking, as it helps the cakes rise properly.
Step 2: Grease and flour a 9-inch round cake pan.
Greasing and flouring the pan creates a non-stick surface, allowing the cakes to release easily once baked. This prevents any frustrating moments of having the cake stick to the pan.
Step 3: In a large mixing bowl, combine shredded coconut, sugar, and flour.
Mixing dry ingredients first helps distribute them evenly, which ensures consistent flavor and texture throughout the cake. This method also makes the mixing process smoother in later steps.
Step 4: Add coconut milk, eggs, vanilla, and salt into the dry mixture.
Incorporating wet ingredients into dry ingredients provides a cohesive mixture that binds everything together. The eggs and coconut milk add richness while enhancing the cake's moisture.
Step 5: Stir until just combined, being careful not to overmix.
Overmixing can lead to a dense cake as it develops gluten in the flour. Aim for a smooth batter with a few small lumps remaining to ensure the texture remains light and fluffy.
Step 6: Fold in baking powder gently until it's fully incorporated.
Folding in the baking powder at the end allows for gentle mixing, preserving the air incorporated into the batter without deflating it, ensuring a light rise during baking.
Step 7: Pour the batter into the prepared cake pan.
Pouring the batter into the pan ensures an even surface, which helps the cake rise uniformly. Spreading it into an even layer will create a beautifully shaped cake.
Step 8: Bake for 25-30 minutes or until the top is golden and a toothpick inserted comes out clean.
Baking until the cake is golden ensures a rich flavor and a pleasing color. The toothpick test is a reliable way to check for doneness, indicating the cake is cooked through.
Step 9: Let the cake cool in the pan for 10 minutes, then transfer it to a wire rack.
Cooling the cake slightly in the pan allows it to set, making it easier to remove. Transferring to a wire rack helps prevent sogginess by allowing air to circulate around the cake.
Step 10: Serve as is or dust with powdered sugar for extra sweetness.
Serving the cake unadorned accentuates the pure flavor of coconut, while powdered sugar adds a charming touch. This flexibility allows you to personalize each serving.

Embracing the Coconut Experience
Coconut is not just a flavor; it's an experience that transports you to a tropical paradise. The use of fresh, unsweetened shredded coconut enhances the texture and volume of the cake, making each bite luscious and inviting. It creates a dessert that's not only delicious but also visually appealing, with shreds of coconut peeking through.
Baking with Tradition
Bolos de Coco celebrates Portuguese baking traditions, where coconut is a staple ingredient in many desserts. This recipe draws upon that heritage, infusing your kitchen with the fragrant aroma of fresh coconut while connecting you to the cultural significance of these rich flavors. It's a modern twist on a beloved classic that bridges generations.
Perfect for Any Occasion
These coconut cakes are versatile and can be enjoyed at any time of the year. Whether it's a festive gathering, a birthday celebration, or a casual weekend snack, their inviting aroma and delightful taste will entice any crowd. Dress them up with fruit or serve them plain for an elegant touch.
FAQs
What should I do if my coconut cake is too dense?
If your cake turns out too dense, it may be due to overmixing the batter or using too much flour. Make sure to stir gently and measure accurately.
Can I use sweetened coconut for this recipe?
While you can use sweetened coconut, it will alter the sweetness of the cake. If using sweetened coconut, consider reducing the added sugar to avoid an overly sweet cake.
How can I enhance the flavor of the coconut cakes?
For a flavor boost, consider adding a touch of almond extract or a sprinkle of lime zest to the batter. Both will complement the coconut beautifully.
What if my cake gets too brown before fully baking?
If your cake is browning too quickly, cover the top lightly with aluminum foil to prevent further browning while it continues to bake on the inside.
Can I make this recipe into cupcakes instead?
Yes, you can convert this recipe into cupcakes by pouring the batter into cupcake liners. Adjust the baking time to about 18-20 minutes.
What does folding in the baking powder do?
Folding in the baking powder helps distribute it without deflating the batter, ensuring a good rise and fluffy texture in the final cake.
How do I prevent my cake from sticking to the pan?
Properly greasing and flouring the pan is crucial. You can also use parchment paper for extra assurance.
Conclusion
Creating these Heavenly Portuguese Coconut Cakes in your own kitchen is a rewarding experience that not only satisfies your sweet tooth but also connects you to the rich flavors of Portugal. With every bite, you’ll enjoy the harmony of textures and the bright taste of coconut.
So, gather your ingredients, invite some friends over, and enjoy the simple pleasure of baking and sharing something special. These cakes are sure to be a hit, leaving a lasting impression that will have everyone asking for seconds.
Recipe Card
Indulging in Portuguese Coconut Cakes at Home
Ingredients
Method
- Preheat the oven to 350°F (175°C).
- Grease and flour a 9-inch round cake pan.
- In a large mixing bowl, combine shredded coconut, sugar, and flour.
- Add coconut milk, eggs, vanilla, and salt into the dry mixture.
- Stir until just combined, being careful not to overmix.
- Fold in baking powder gently until it's fully incorporated.
- Pour the batter into the prepared cake pan.
- Bake for 25-30 minutes or until the top is golden and a toothpick inserted comes out clean.
- Let the cake cool in the pan for 10 minutes, then transfer it to a wire rack.
- Serve as is or dust with powdered sugar for extra sweetness.
Notes
Additional serving suggestions: pair with a crisp salad, garlic bread, or roasted seasonal vegetables for balance.
For make-ahead, prep components separately and assemble just before heating to preserve texture.
Taste and adjust with acid (lemon/vinegar) and salt right at the end to wake up flavors.


